Chapter 8 of 10
Put the right file in the right device
A .dsk file in Finder can hold a dozen CoCo programs. Picking that file is like sliding a floppy into a drive. You still have to tell the guest which program to open. There are three names worth checking before a save: the Mac file, the device holding it, and the filename inside the disk.
Open a file or return to one
Choose File → Open Media… or drop a file from Finder onto the emulator. Check the proposed destination before continuing. A cartridge goes in a cartridge slot, a tape in the recorder and a disk in a drive. The Media menu takes you straight to a device. The pictures and named Devices controls in System view are other ways to get there.
File → Open Recent Media remembers files you opened and their destinations. If the file moved, locate it again; a remembered name supplies no copy of its contents. Clear Recent Media clears that menu. To start a CoCo block-format binary directly, use File → Load Binary…. The loader writes the program's address ranges into guest memory and starts it without a reset. Save your current program first. Canceling the binary picker leaves the emulator paused.
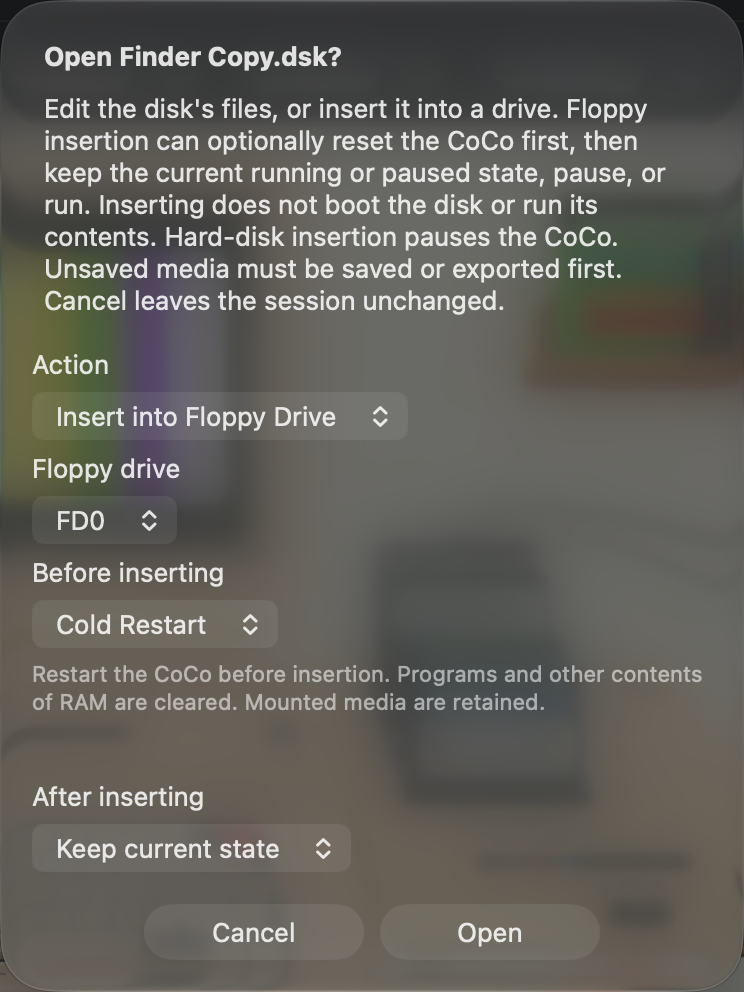
When opening a floppy image from Finder or Open Media, choose Edit Disk Image to inspect its files, or Insert into Floppy Drive to put it in FD0–FD3. Insertion offers Keep current state, Pause, or Run. Run resumes the computer after insertion succeeds; you still choose what to load or boot from the disk.
Before inserting offers No Reset (the default), Soft Reset, or Cold Restart. Soft Reset restarts the guest without clearing RAM, although its ROM reset routine may change RAM; Cold Restart clears the current program and memory. Save anything you need first. The chosen reset occurs after the disk is validated and replacement safeguards succeed, before insertion. The separate execution choice determines whether the machine runs or remains paused afterward. Opening the editor performs no reset.
Keep a floppy safe
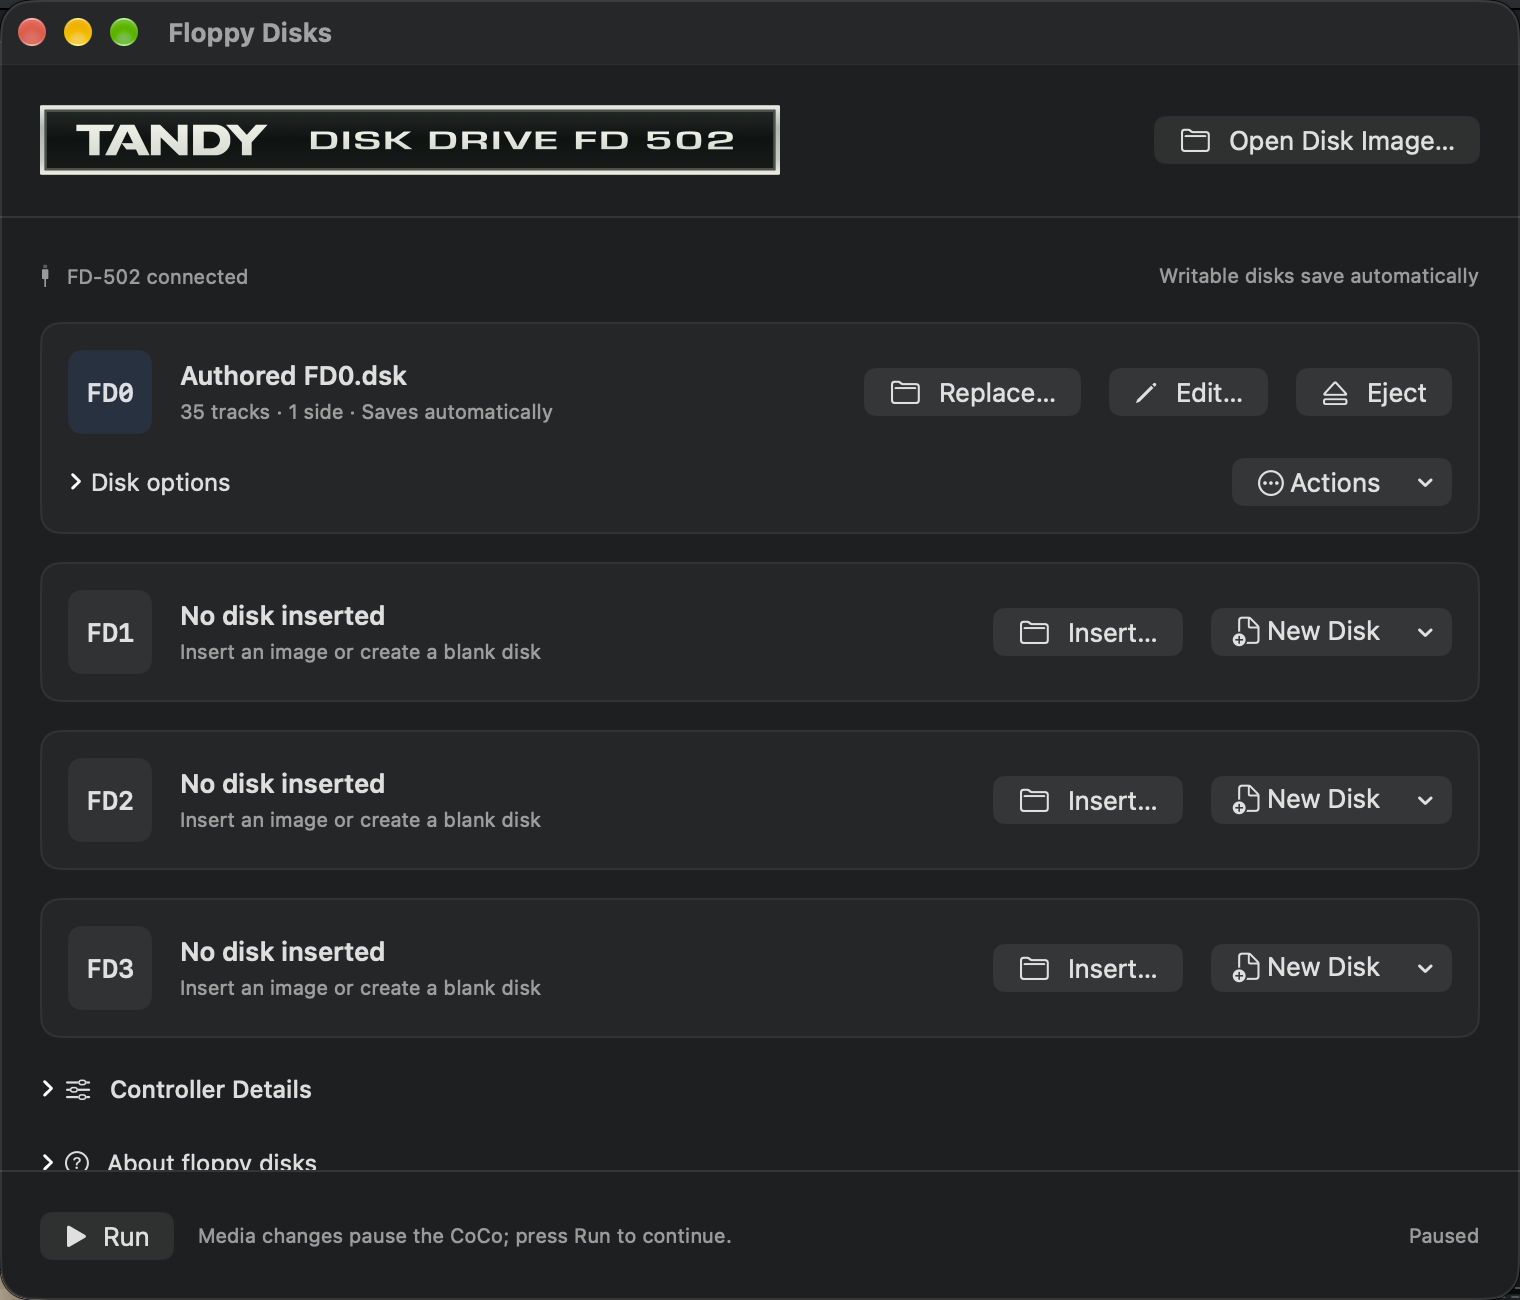
Open Media → Floppy Disks…. The FD-502 serves four drives, FD0–FD3. Read the filename and state beside the drive you intend to use. Choose Insert… for an empty drive or Replace… for an occupied one. Media and save-mode changes pause the CoCo; click Run when you're ready. An ordinary automatic save continues while the CoCo runs.
| What you want | What to do |
|---|---|
| Save ordinary work | Mount a writable image and check for Saves automatically. When a guest program writes a file, VCC Plus saves the changed image to its Mac file. |
| Examine an original safely | Open Disk options and enable Write protected. The guest can read the image. A read-only Mac file or a protection flag in the image header can lock this switch. |
| Let the game write, but decide later whether to keep the result | On a writable disk, turn on Temporary changes before the game writes. Save As… keeps a copy and retains that mode. Turning the mode off can write pending changes to the assigned file. |
| Keep a disk after a save error | Read the affected drive's message. If you disconnected its volume, reconnect it and choose Retry Save. If someone edited the file elsewhere, choose Save As… under a different name to preserve both versions. |
| Deliberately leave changes behind | Discard Changes and Eject… gives up pending in-memory edits. Any writes that already reached the Mac file are part of that file. |
An unavailable assignment and a failed write call for different actions. At startup, Retry Remembered Disks looks for the assigned files again. You can also choose a replacement or eject the outdated assignment. During a save failure the app keeps the changed disk in memory so you can rescue it. A read/write light reports real activity on the named drive. A warning in the drive row tells you when action is needed.
New Disk offers Standard DSK, DMK Track Image and VDK Disk Image. Each creates a blank, single-sided 35-track disk in memory. For a new, empty practice disk in FD0 only, use the Disk BASIC command DSKINI0 to format it, then choose Save As… to give it a Mac filename. Formatting an existing disk destroys its directory and files. The FD-502 can also open compatible JVC and OS-9 floppy images. Save As… preserves the mounted format. For a ready-made, protected example, follow Put the practice disk in FD0.
For a working-copy exercise you can do entirely offline, change one copy and reopen both.
Controller Details shows the controller ROM, selected drive, track, sector and motor status. Choose a compatible disk ROM here when supplying your own. Disabling this controller ejects all four disks and cold-restarts the CoCo. Resolve pending writes first.
Edit the files inside an image
Choose Edit… beside an occupied FD0–FD3 in Floppy Disks or HD0/HD1 in Virtual Hard Disks to open the native Disk Image Editor. The machine pauses and stays locked while you edit its current disk, including temporary changes. Open Disk Image… in Floppy Disks opens an unmounted floppy or hard-drive image without inserting it or disturbing the CoCo. If that file is already mounted in a floppy or hard drive, including through a file alias, VCC Plus uses the mounted-disk lock. An image assigned to another device or an SD card folder must be unassigned before standalone editing.
The file table shows names, sizes, types and filesystem details. The SF Symbols toolbar imports and exports files, renames or deletes entries, creates OS-9 folders, and offers Undo/Redo. Double-click a folder to enter it, or a file to export it. Drag ordinary Mac files into the table to import them. Drag selected regular files to a Finder folder to export copies. Open the intended OS-9 folder first. Total, Used and Free show actual allocation space, including allocation rounding and filesystem overhead. Disk BASIC excludes its reserved directory track from Total.
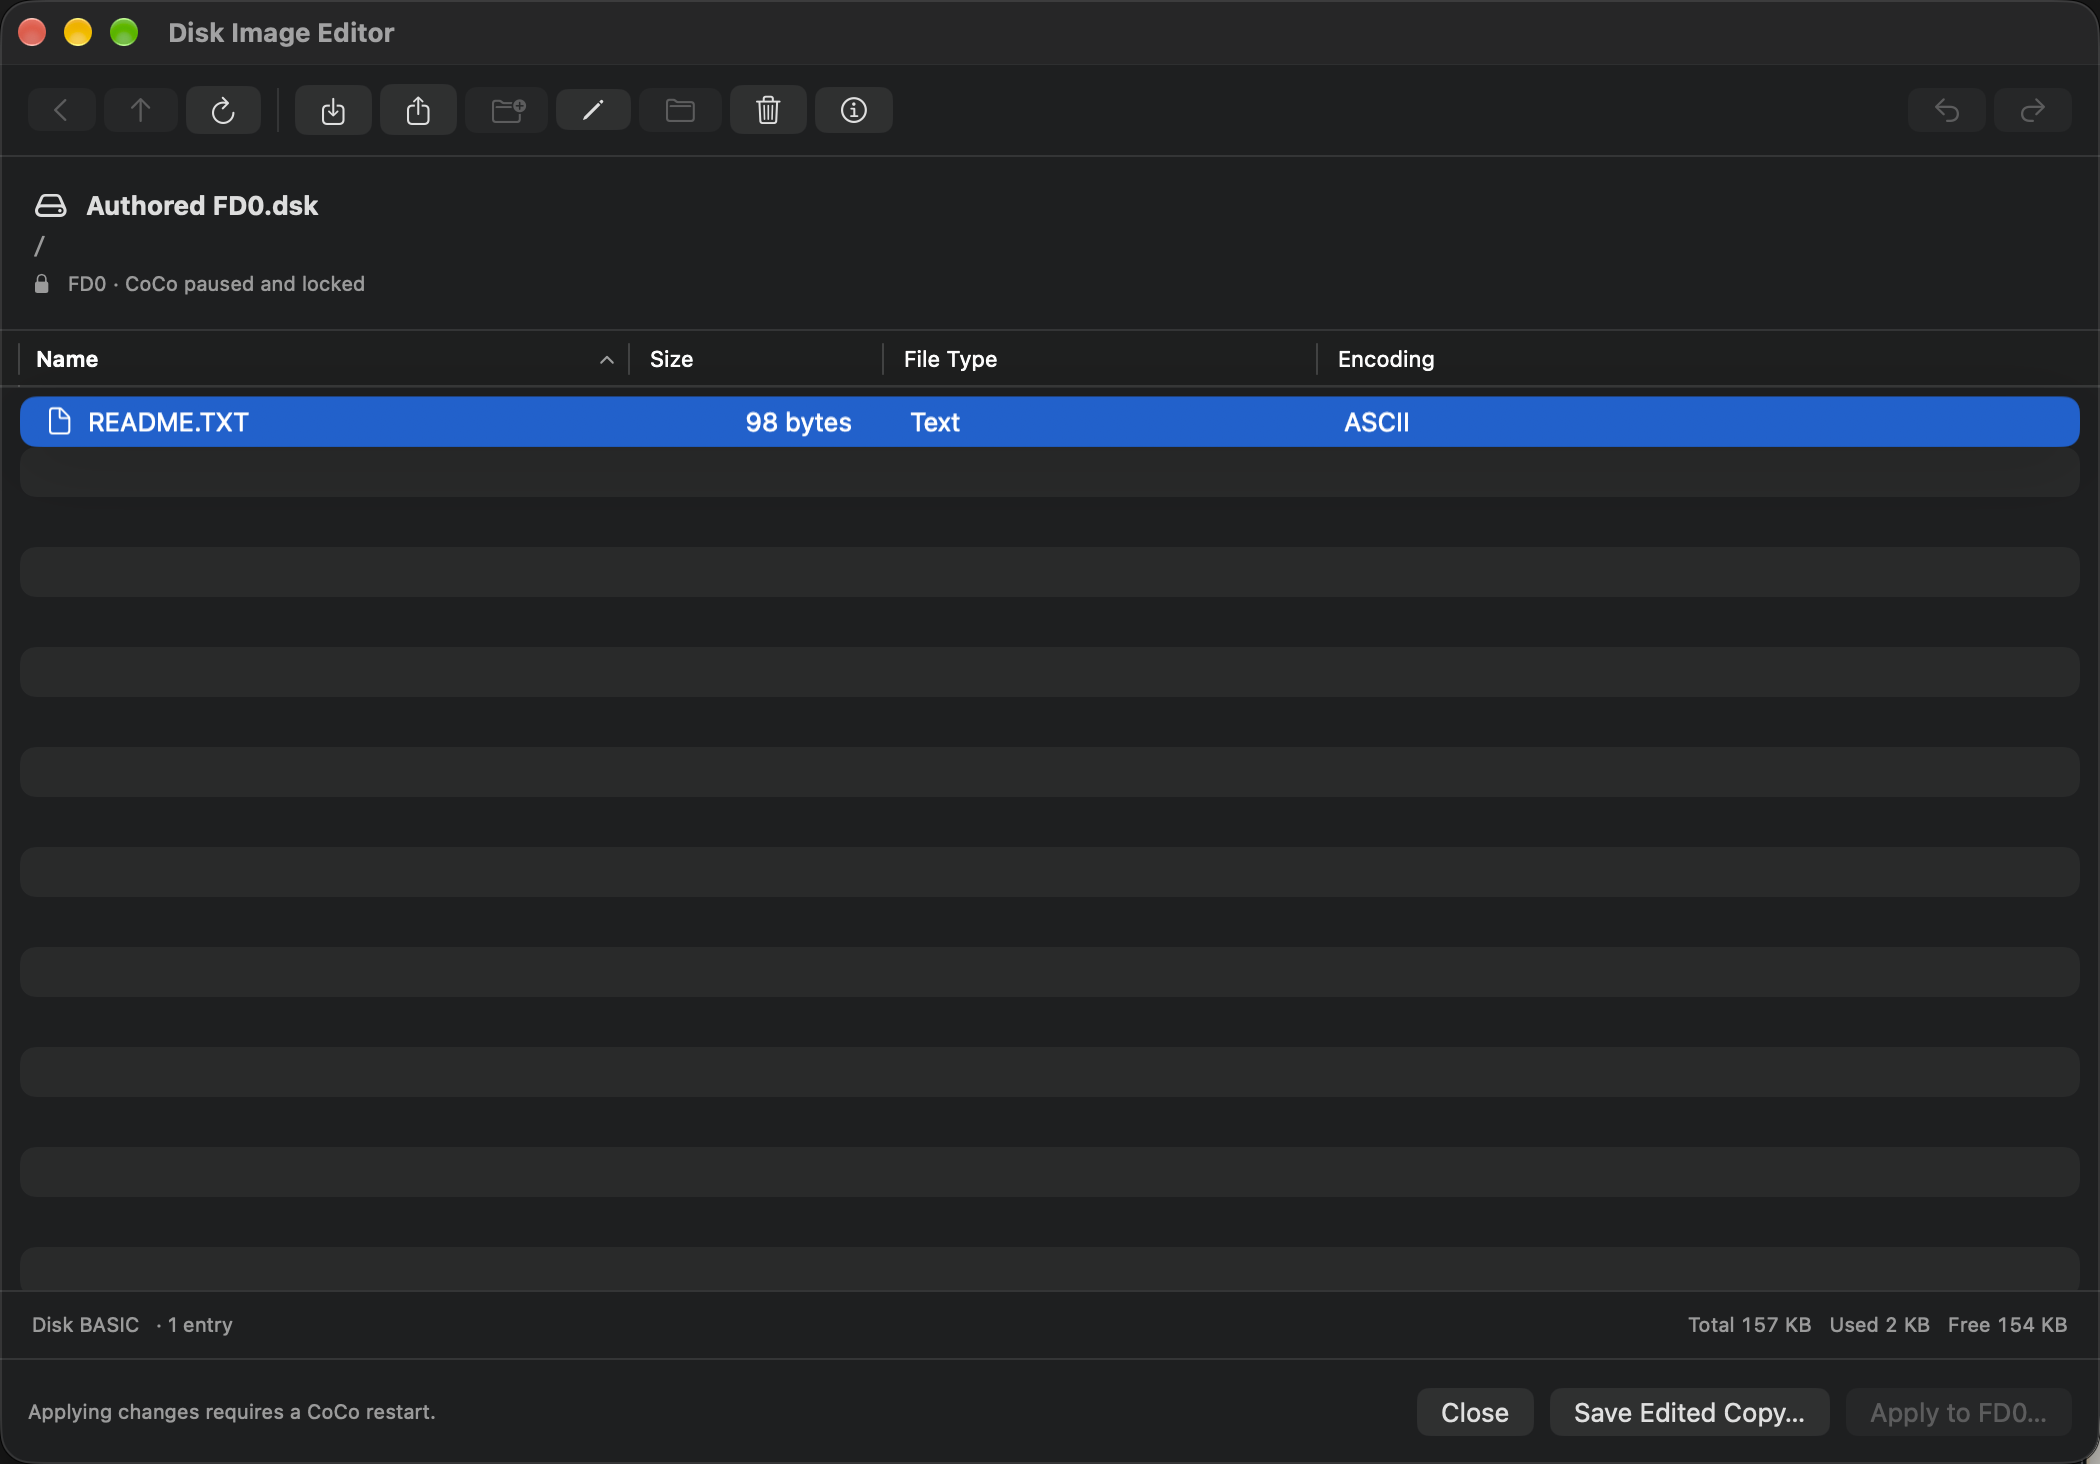
Edits stay in a private working copy. Save Edited Copy… keeps a separate image. Save Changes… updates an unmounted writable source after checking for external changes. For a mounted disk, Apply to FDn… or Apply to HDn… asks for Restart and Apply: the running guest program and memory will be cleared to prevent stale filesystem information. Save programs and recordings you need first. Cancel or Discard Changes leaves the original disk intact. Closing a mounted editor leaves the CoCo paused.
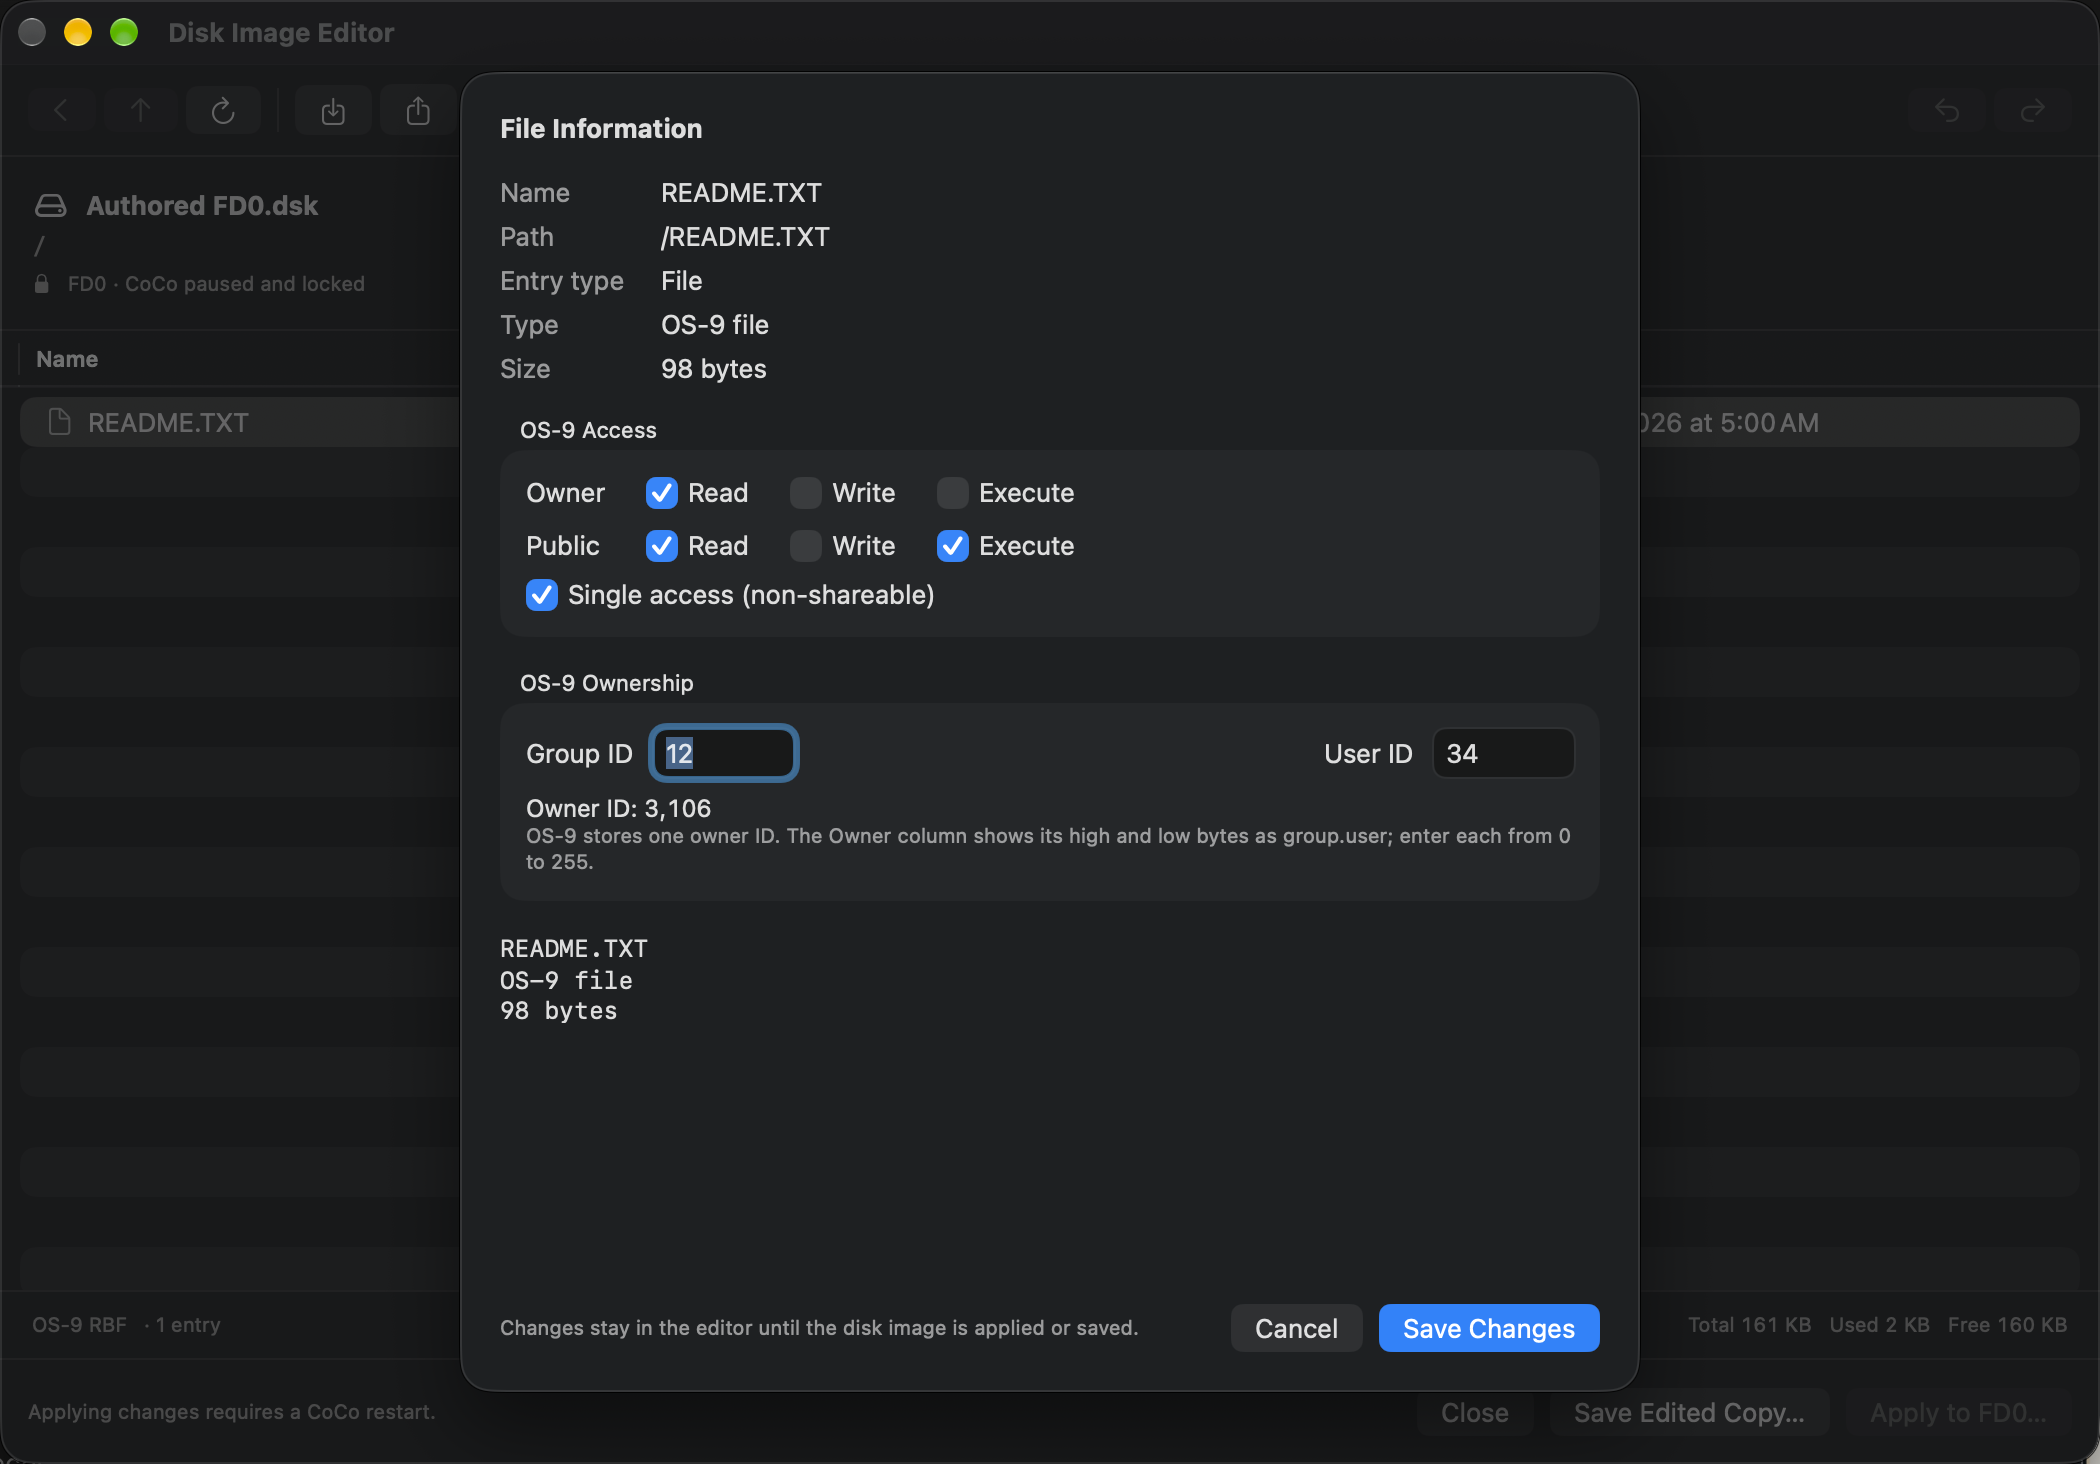
For an OS-9 file or folder, Info opens one File Information sheet for owner/public read, write and execute permissions, single access, and ownership. Group ID and User ID are each 0–255; together they represent the OS-9 owner ID shown as group.user in the table. File versus Directory stays fixed. Save Changes updates the working copy and supports Undo; Cancel leaves it alone. Applying or saving the image is still a separate action.
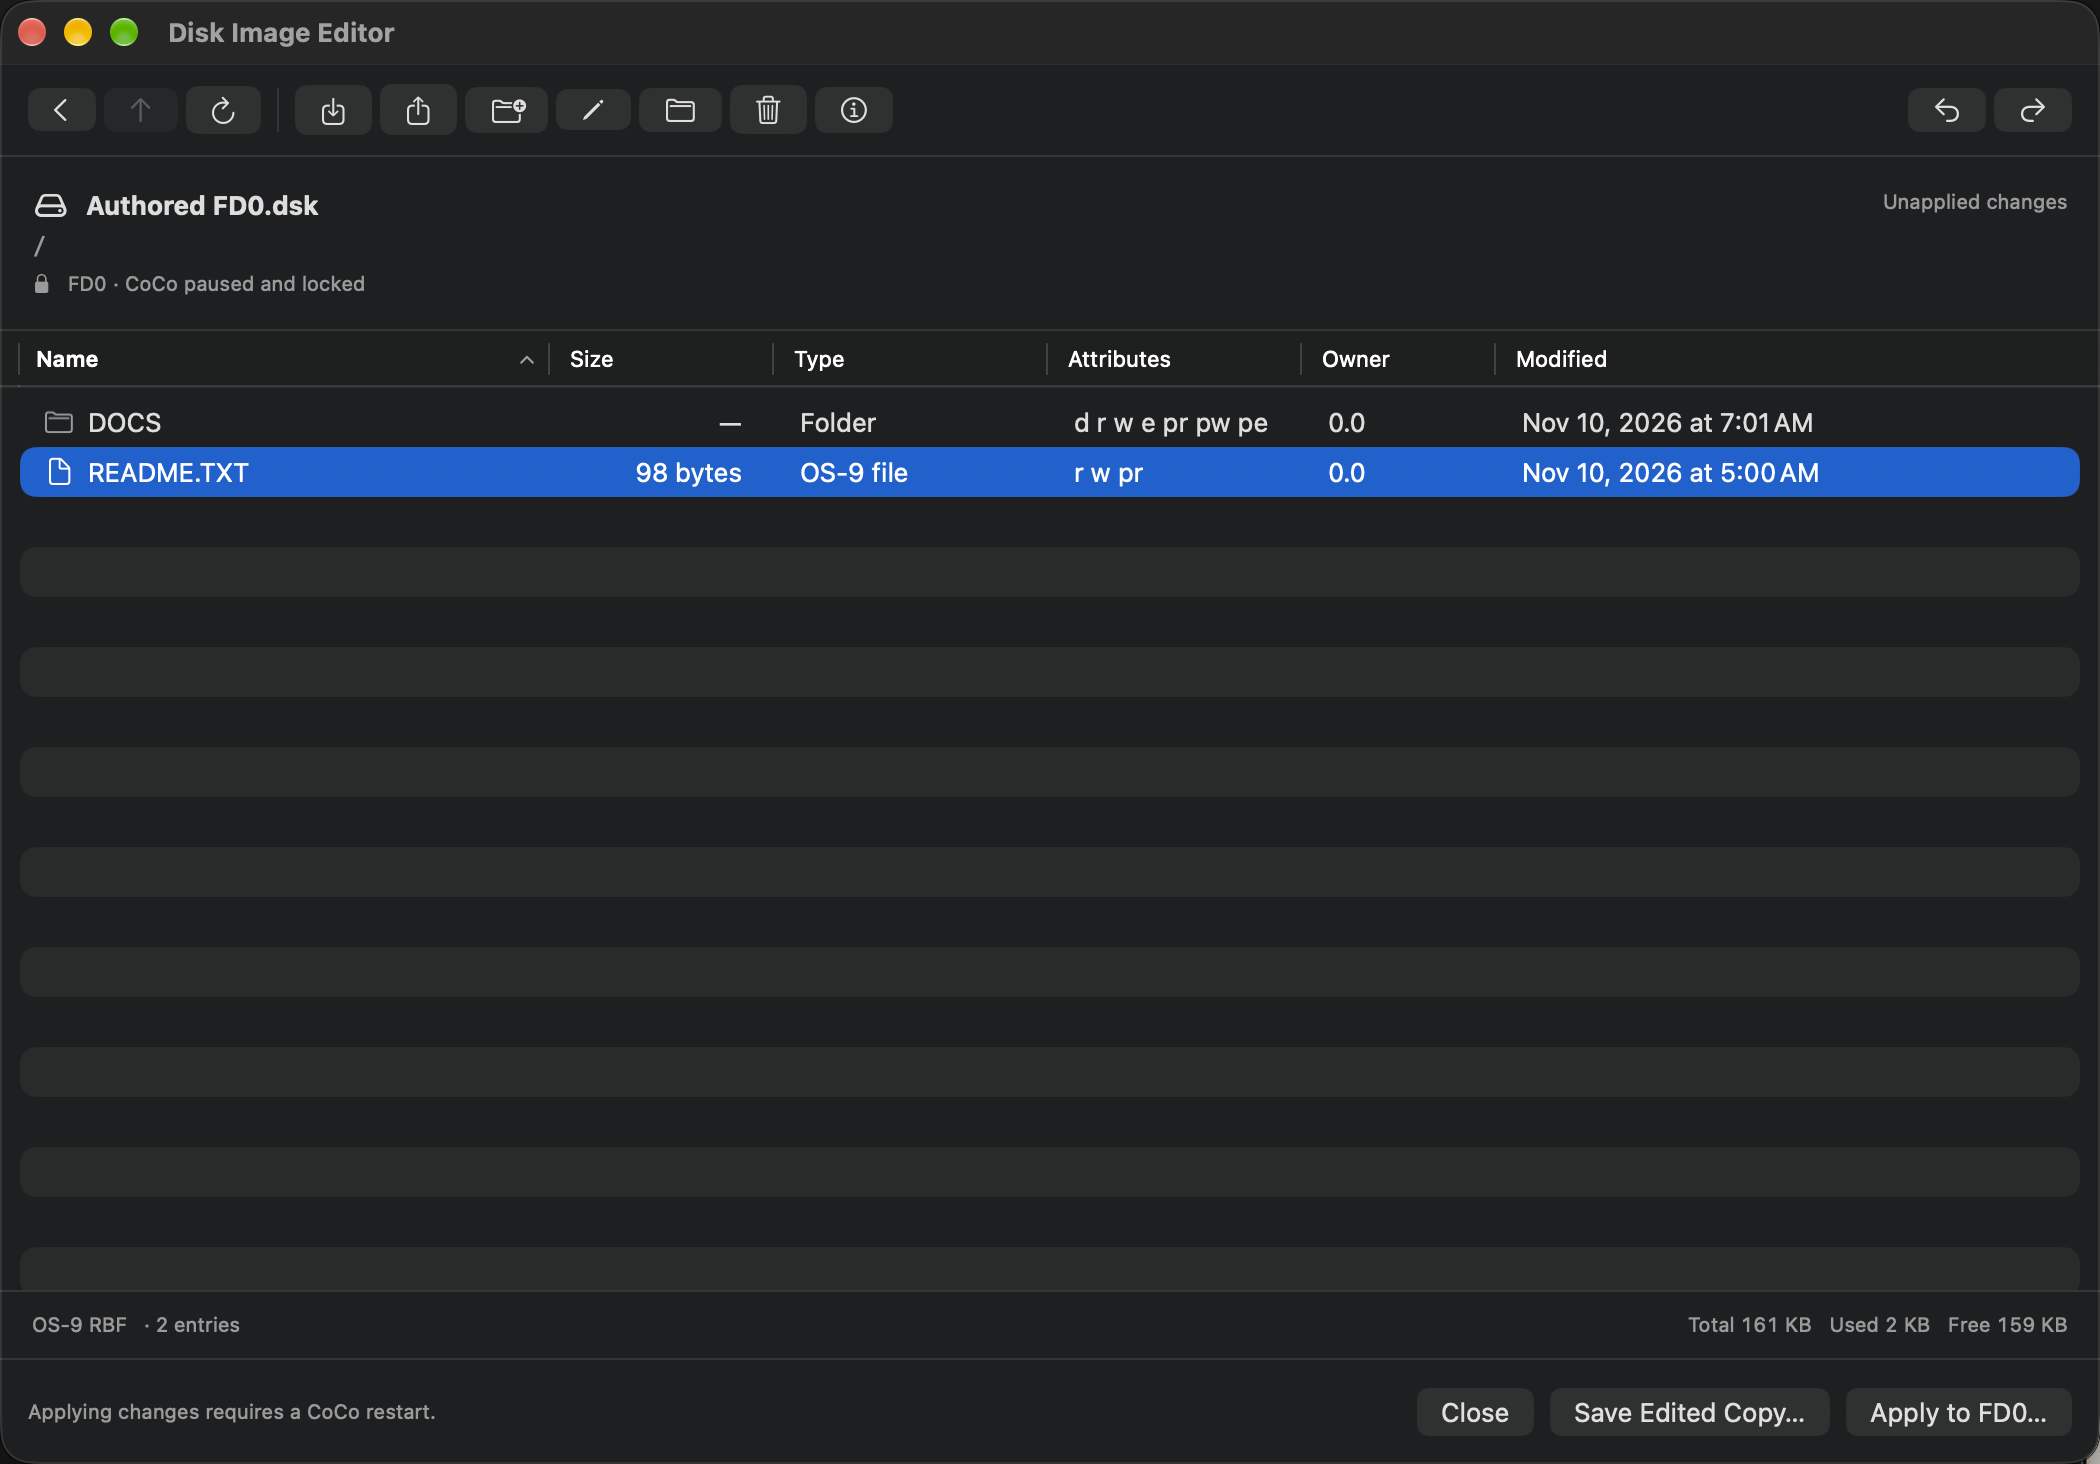
For an image with more than one recognized filesystem, the Volume picker selects OS-9 or an HDB-DOS disk number. Disk numbers start at zero and keep their original positions even when an unformatted, unsupported or boot-reserved slot is omitted from the list. A numbered disk that overlaps declared OS-9 boot data is protected rather than offered for editing. Changing the selection visits that volume's root; it neither inserts a different disk nor starts the guest. Your private edits in the other volumes remain in the working copy. Total, Used and Free describe only the selected filesystem. Save Edited Copy… saves the complete image, including every other volume and preserved region.
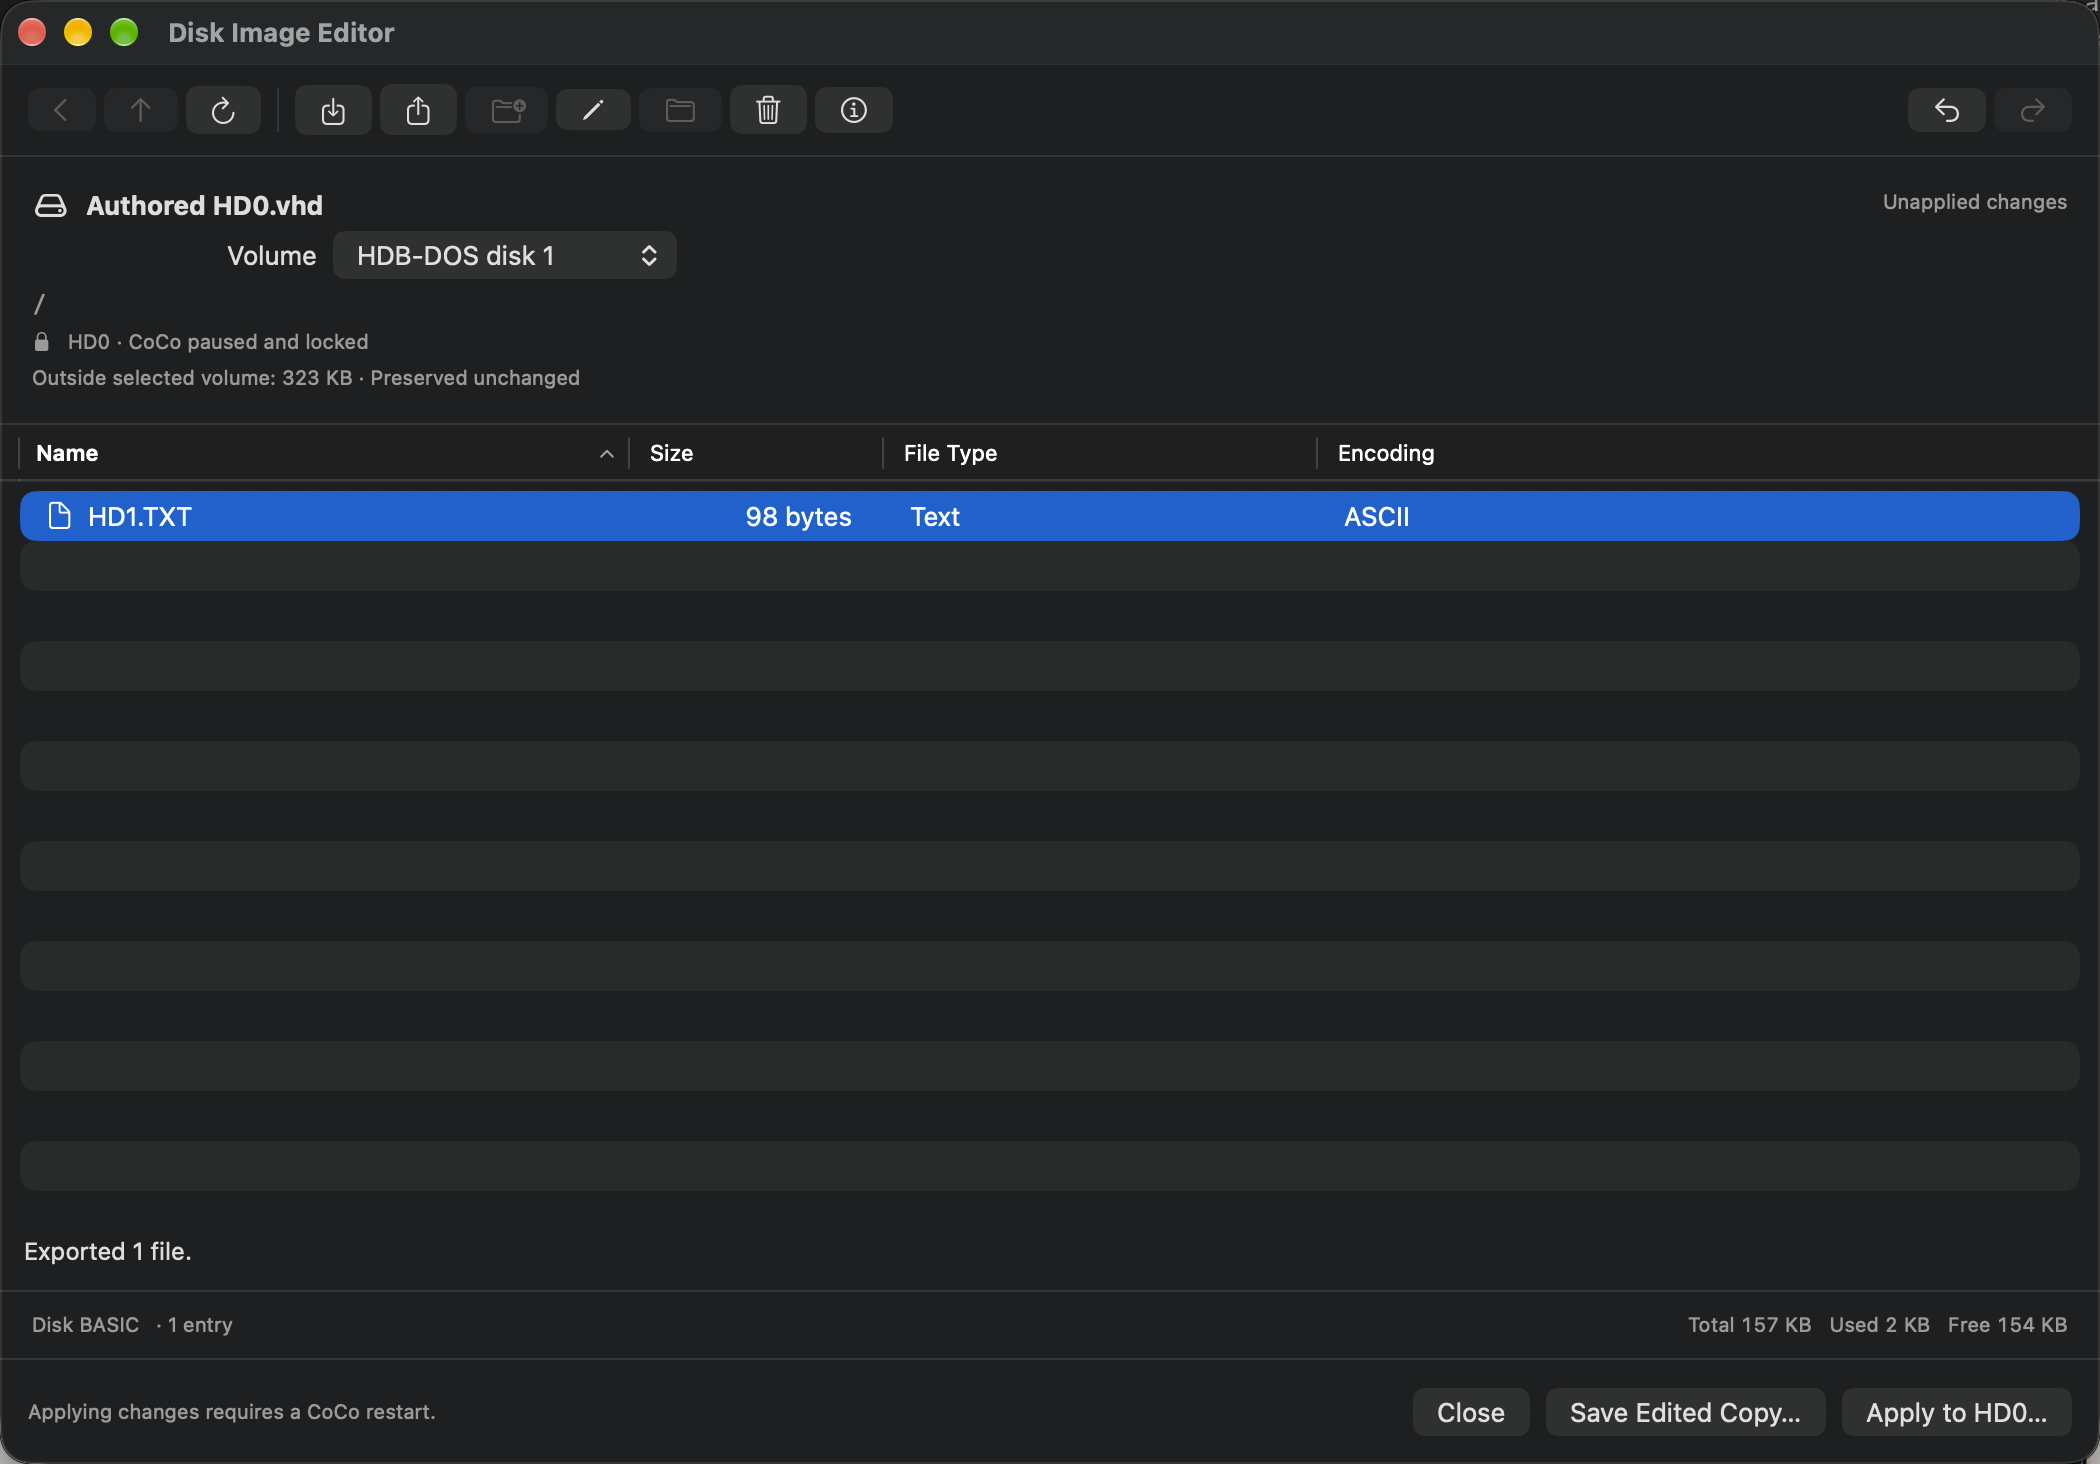
The editor supports raw images up to 512 MiB. OS-9 volumes use 256-byte sectors and allocation clusters of 1, 2, 4, 8, 16, 32, 64, 128 or 256 sectors. Numbered HDB-DOS volumes contain standard 35-track Disk BASIC filesystems; they begin at the start of the image or immediately after its declared OS-9 region. Arbitrary partition offsets and encoded containers such as DMK and VDK are not supported for editing. The editor does not format, repartition, convert or repair images. Individual imported or exported files are bounded to 16 MiB.
A larger ordinary Disk BASIC floppy may contain supplementary tracks with application data. The editor preserves those bytes unchanged and excludes them from free file space. You can still add files within the normal filesystem's available space. Disk BASIC import metadata does not convert bytes: choose ASCII or Binary / Tokenized to match the file you already have.
Move files between OS-9 folders
Select one or more files and choose Move To… in the toolbar or context menu. Browse to a destination folder within this same disk image. Select a folder and choose Open Folder, or double-click it; the displayed destination path changes as you browse. Root returns to the disk's root, and Up visits the parent. Choose Move Here when the displayed path is the destination you want. Command-Down Arrow opens the selected folder, Command-Up Arrow goes up, Return activates Move Here and Escape cancels.
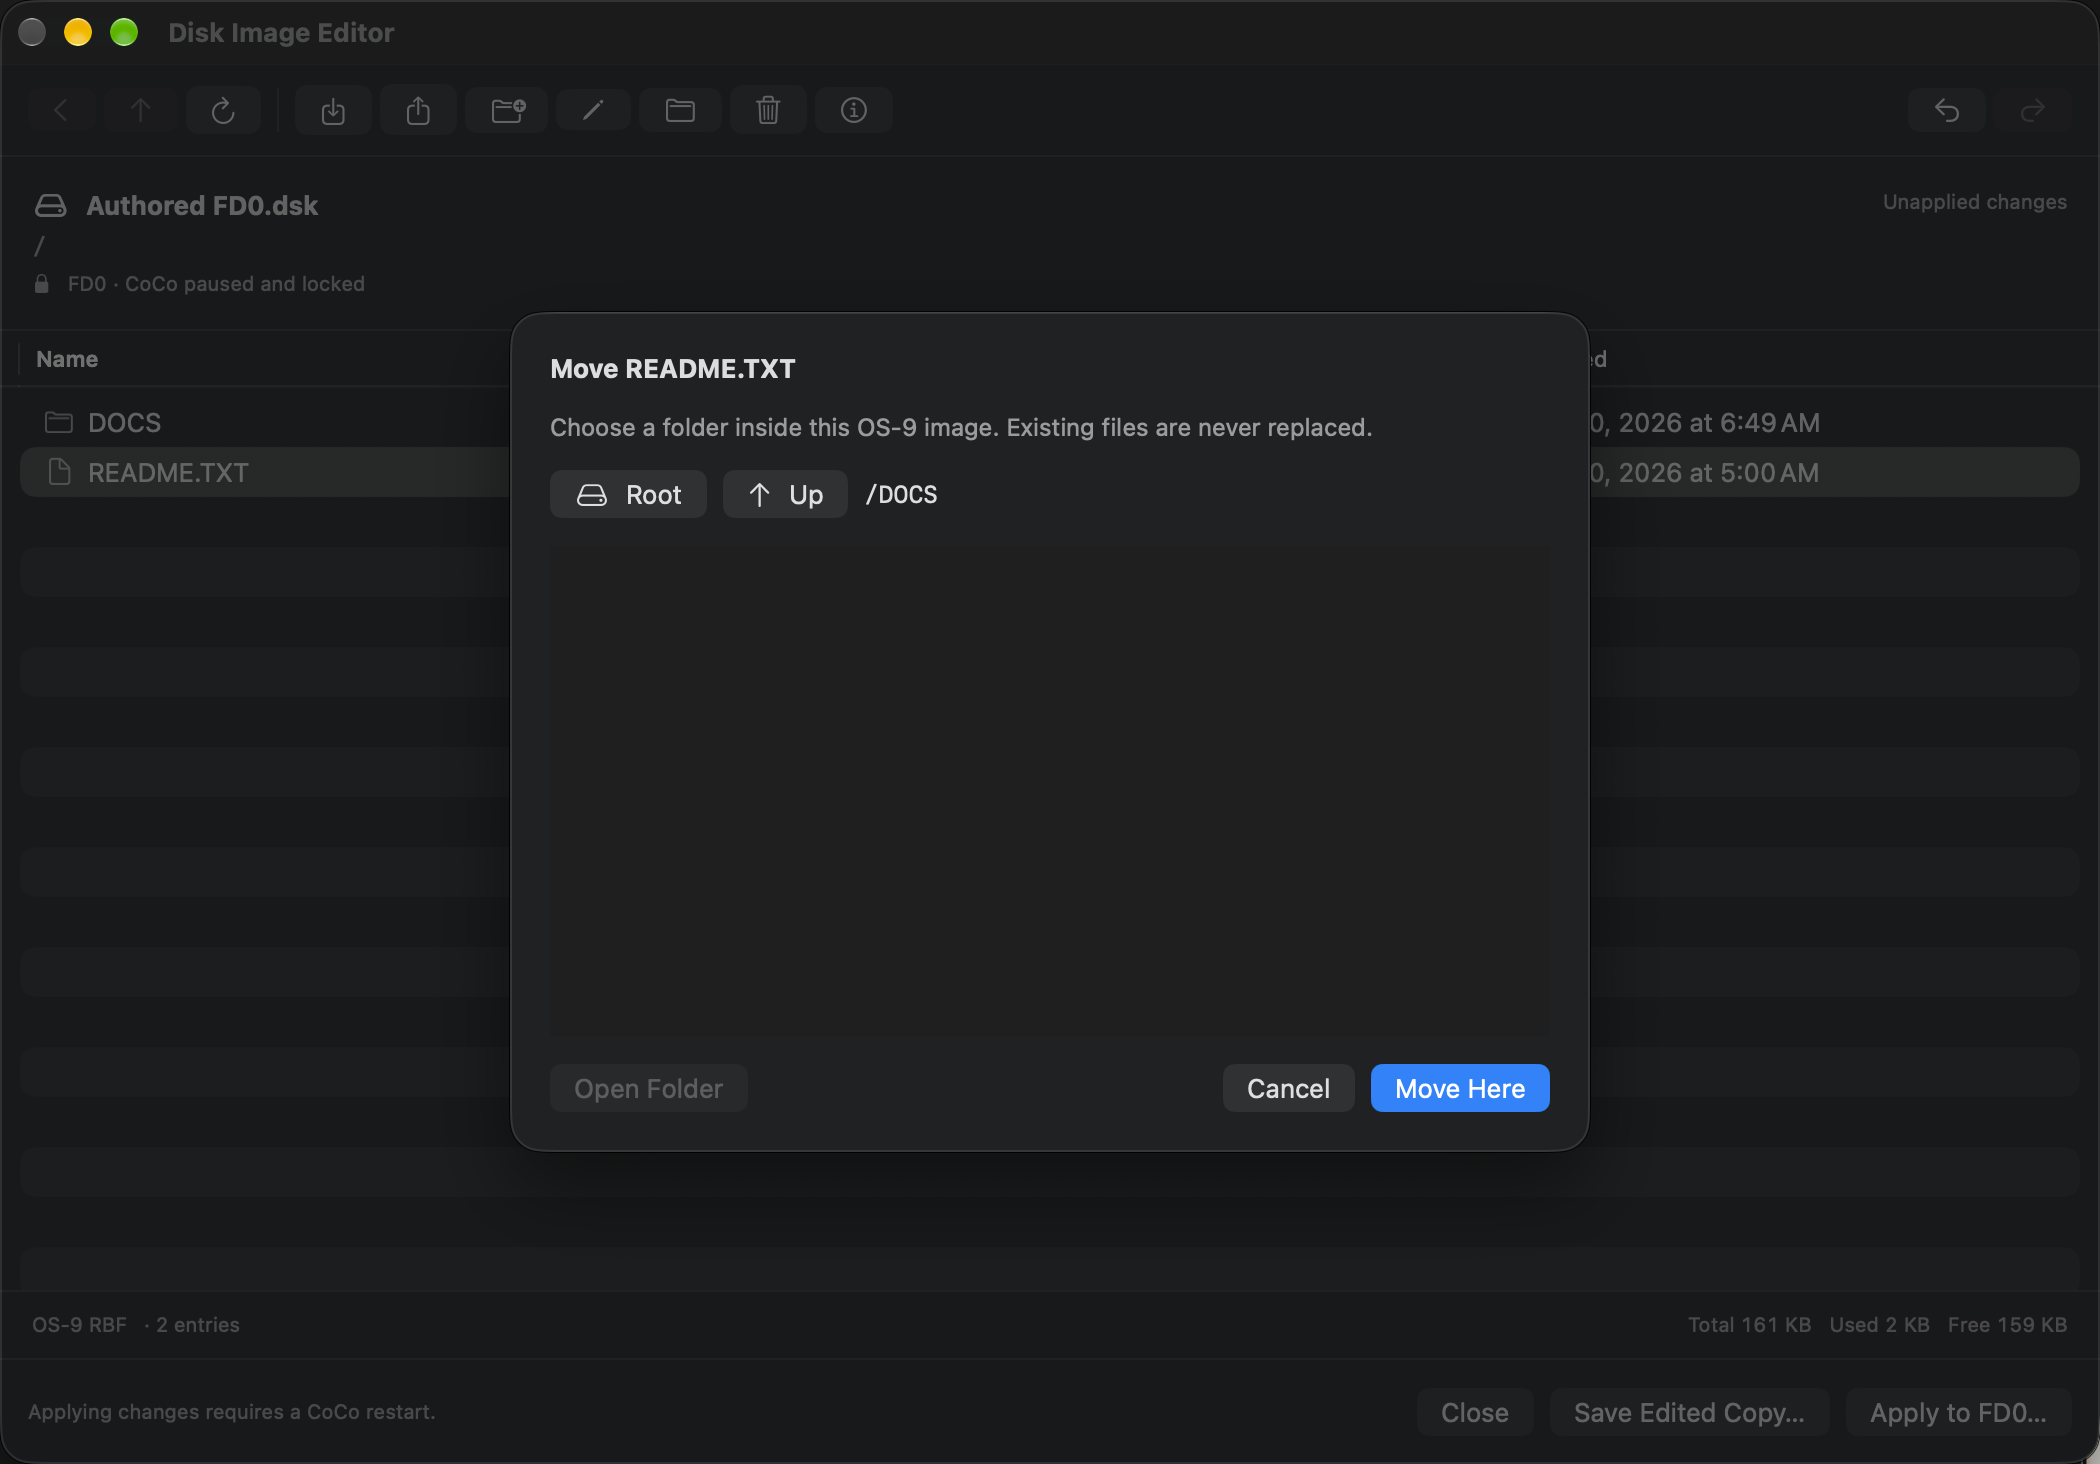
The chooser gives keyboard and VoiceOver users the same move operation as dragging selected files onto a folder in the table. To move a file back toward the root, use the chooser and visit the appropriate parent folder.
A move keeps the file's contents, permissions and ownership. It changes the working copy in one operation; Undo returns the selected files to their previous locations, and Redo repeats the move. As with other edits, the original image changes only when you save or apply it.
Choose a different folder from the current parent. A destination that already contains a matching filename is refused without overwriting either file; rename one of them before retrying. Folder destinations must belong to the same image. This operation moves regular files, not folders or Disk BASIC entries. A selected folder can be opened or inspected without being moved.
Send a floppy copy to a real CoCo
DriveWire for VCC Plus is a separate application for serving disk images to a real Color Computer. Install the matching public version of both apps. They keep separate windows and sessions; using one does not replace the other.
DriveWire opens the last-used personal profile and remembers its connection and disk references automatically. Its editable Default profile is a place to begin; Profiles… lets you create and explicitly switch named setups. For its complete connection, profile and recovery workflow, read the separate DriveWire companion guide.
- Open DriveWire for VCC Plus and connect the serial session used by your real CoCo. VCC Plus does not start or reconnect that session for you.
- In VCC Plus, open Media → Floppy Disks…. On the occupied source row, choose Actions → Send a Copy to DriveWire….
- Choose the receiving DriveWire session and its target DW0–DW3 slot. Check the displayed filename if that slot is already occupied.
- Choose Send Copy. On the first transfer, DriveWire asks Allow disk copies from VCC Plus? Choose Allow for This Connection or Decline.
- Wait for the received confirmation. Return the real CoCo to BASIC or reset it before using changed media so its software cannot reuse old disk information.
The copy includes the source drive's current in-memory bytes, including changes that have not yet reached its Mac file. Sending does not pause or restart VCC Plus, change the source's save mode, or clear an unsaved-changes indication. The two mounted disks are independent afterward. Transfers accept compatible raw, sector-aligned disk images up to 16 MiB; an encoded track image needs a suitable raw copy. Ordinary DriveWire hosting can still use larger images.
Permission lasts only for that receiving serial connection. Disconnecting it or closing its session window removes the grant. A later send still identifies its target slot and filename; refresh if the destination changed while you decided. A disk in the shared editor or in the middle of a transaction cannot be replaced.
Before replacing a DriveWire disk, the receiver keeps its current bytes as a recovery copy. In DriveWire choose File → Show Received Disks…. The received copy has its own folder; Recovery → Previous Disk.dsk inside that folder holds the displaced image. To go back, stop guest disk activity and deliberately insert that recovery image. The original Mac source remains separate.
DriveWire's Edit… opens the same Disk Image Editor interface described above, with its own served-drive safeguards. Its Software Library… uses the same library interface restricted to disk images. VCC Plus maintains the single catalog, verified downloads and installation records; DriveWire inserts a separate writable copy. Loading instructions and hardware requirements still apply to the real CoCo. Matching public versions are released together, but each application has its own build number.
Use a virtual hard disk
In Media → Virtual Hard Disks…, check whether the hard-disk controller is connected, then pick HD0 or HD1. It accepts raw VHD, OS9 and IMG sector images. A virtual hard disk controller has no boot ROM of its own. The Hard Drive BASIC and NitrOS-9 profiles supply working combinations. Look up the guest's drive names in Which drive zero?.
The hard-disk rows offer protection, temporary changes, Save As…, save retry and discard for the same reasons as the floppy rows. Edit… opens the mounted image with the same pause, lock and restart-before-applying safeguards as a floppy. Use the editor's volume selection to distinguish an OS-9 filesystem from a numbered HDB-DOS Disk BASIC volume in an image that contains both; the guest's drive names are a separate naming system. See Edit the files inside an image. Actions → New Disk… asks for a capacity in KiB. It creates an empty drive in memory. Use the guest's formatting or partitioning tools to prepare it for the particular operating system, then use Save As… to keep its Mac file. If you want a ready-to-use disk, start from the appropriate system profile.
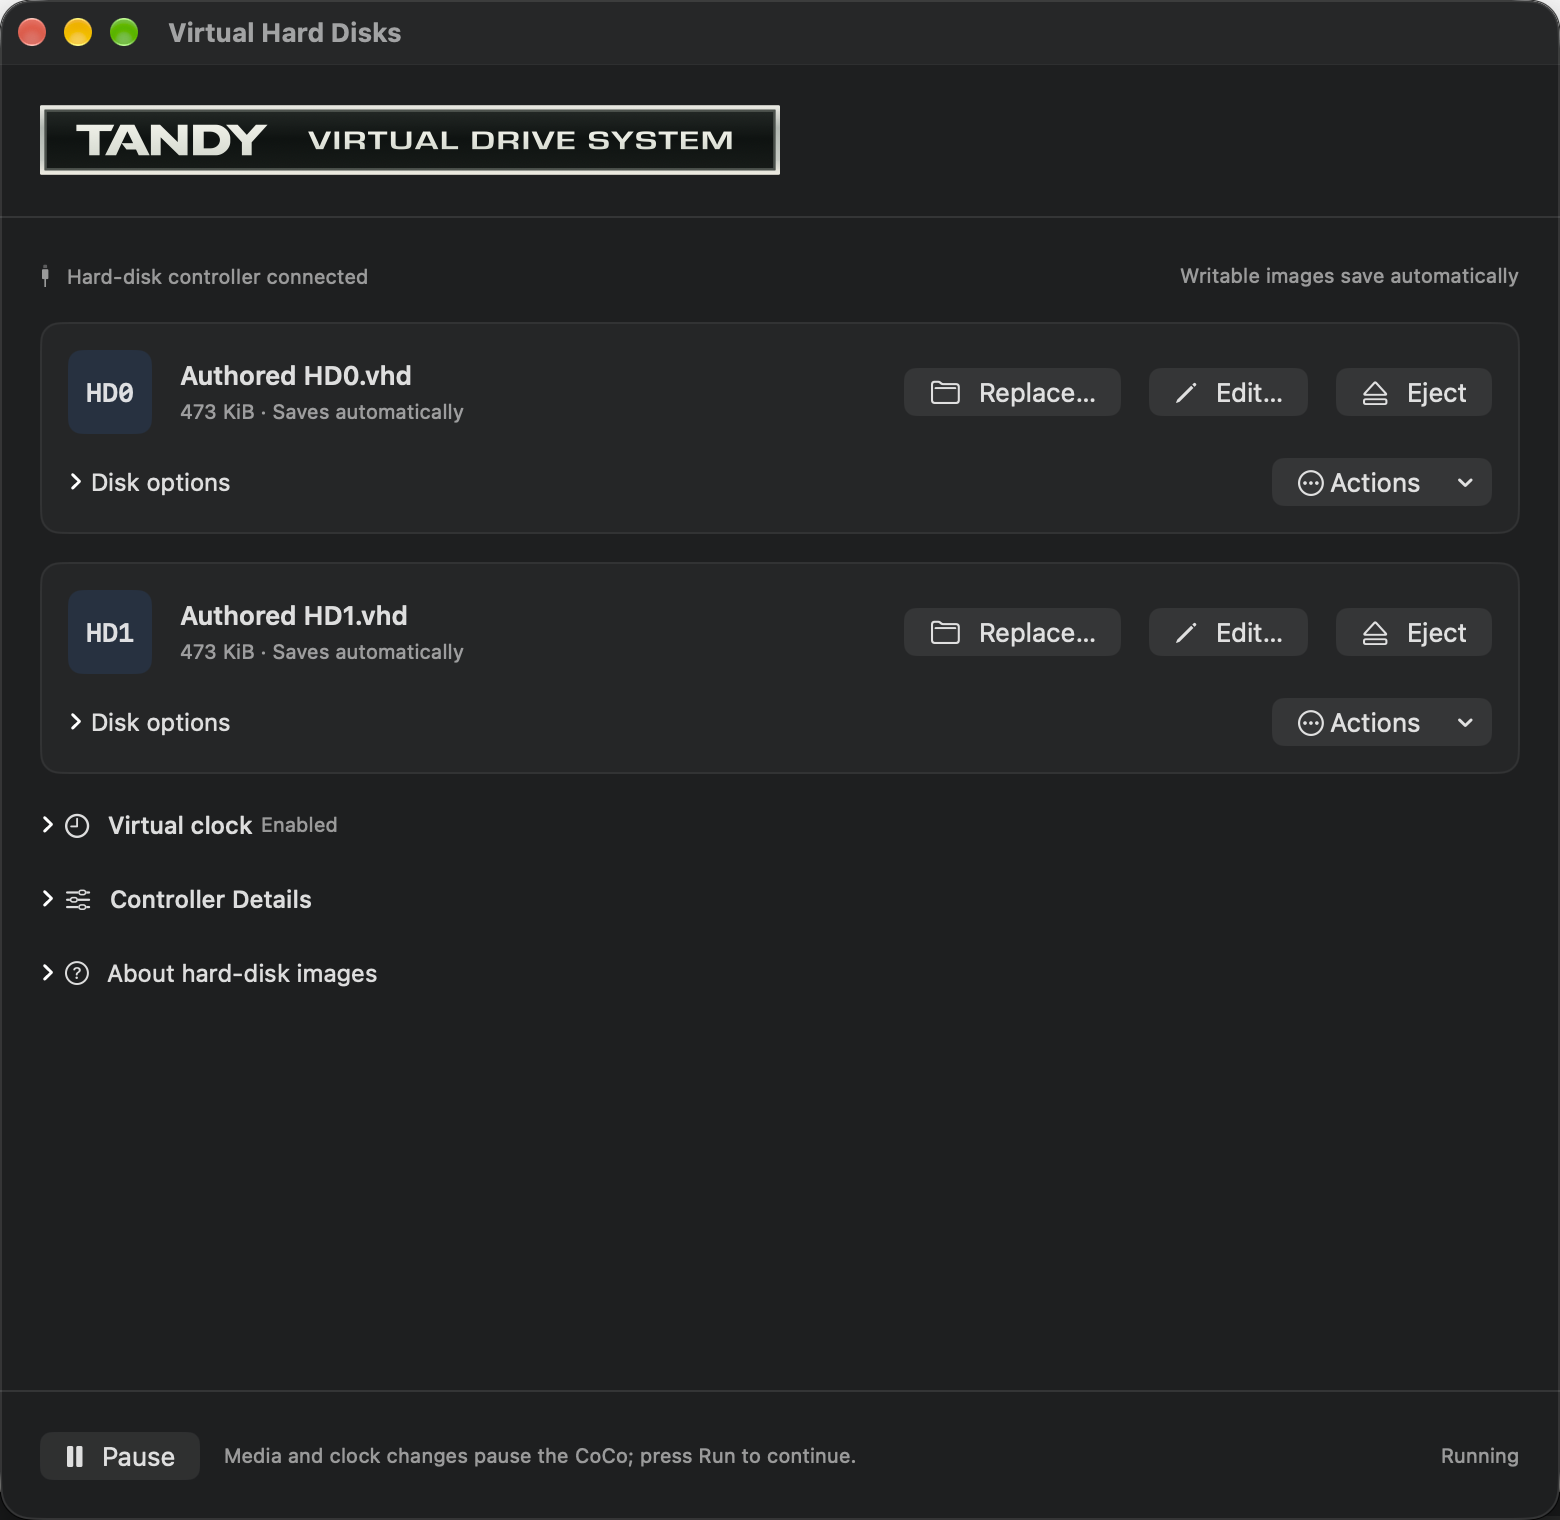
The Virtual clock starts from Mac local time. Clock enabled exposes it to supporting guest software. Allow guest to set the virtual clock lets the guest adjust the time for that emulated session. The Mac keeps its own clock. After media or clock changes, check for Paused before entering a guest command.
Follow the cartridges and card folder
A cartridge is hardware attached to the CoCo. The Multi-Pak is the box that gives it four slots. Open Cartridge → Cartridges… to choose Single cartridge or Multi-Pak, then choose a device for each slot. The app keeps the single-cartridge assignment while the Multi-Pak is in use. Floppy and virtual hard disk are separate controllers and each uses a slot; four floppy drives still need just one floppy controller. Assigning an existing controller or sound device to another slot moves it there.
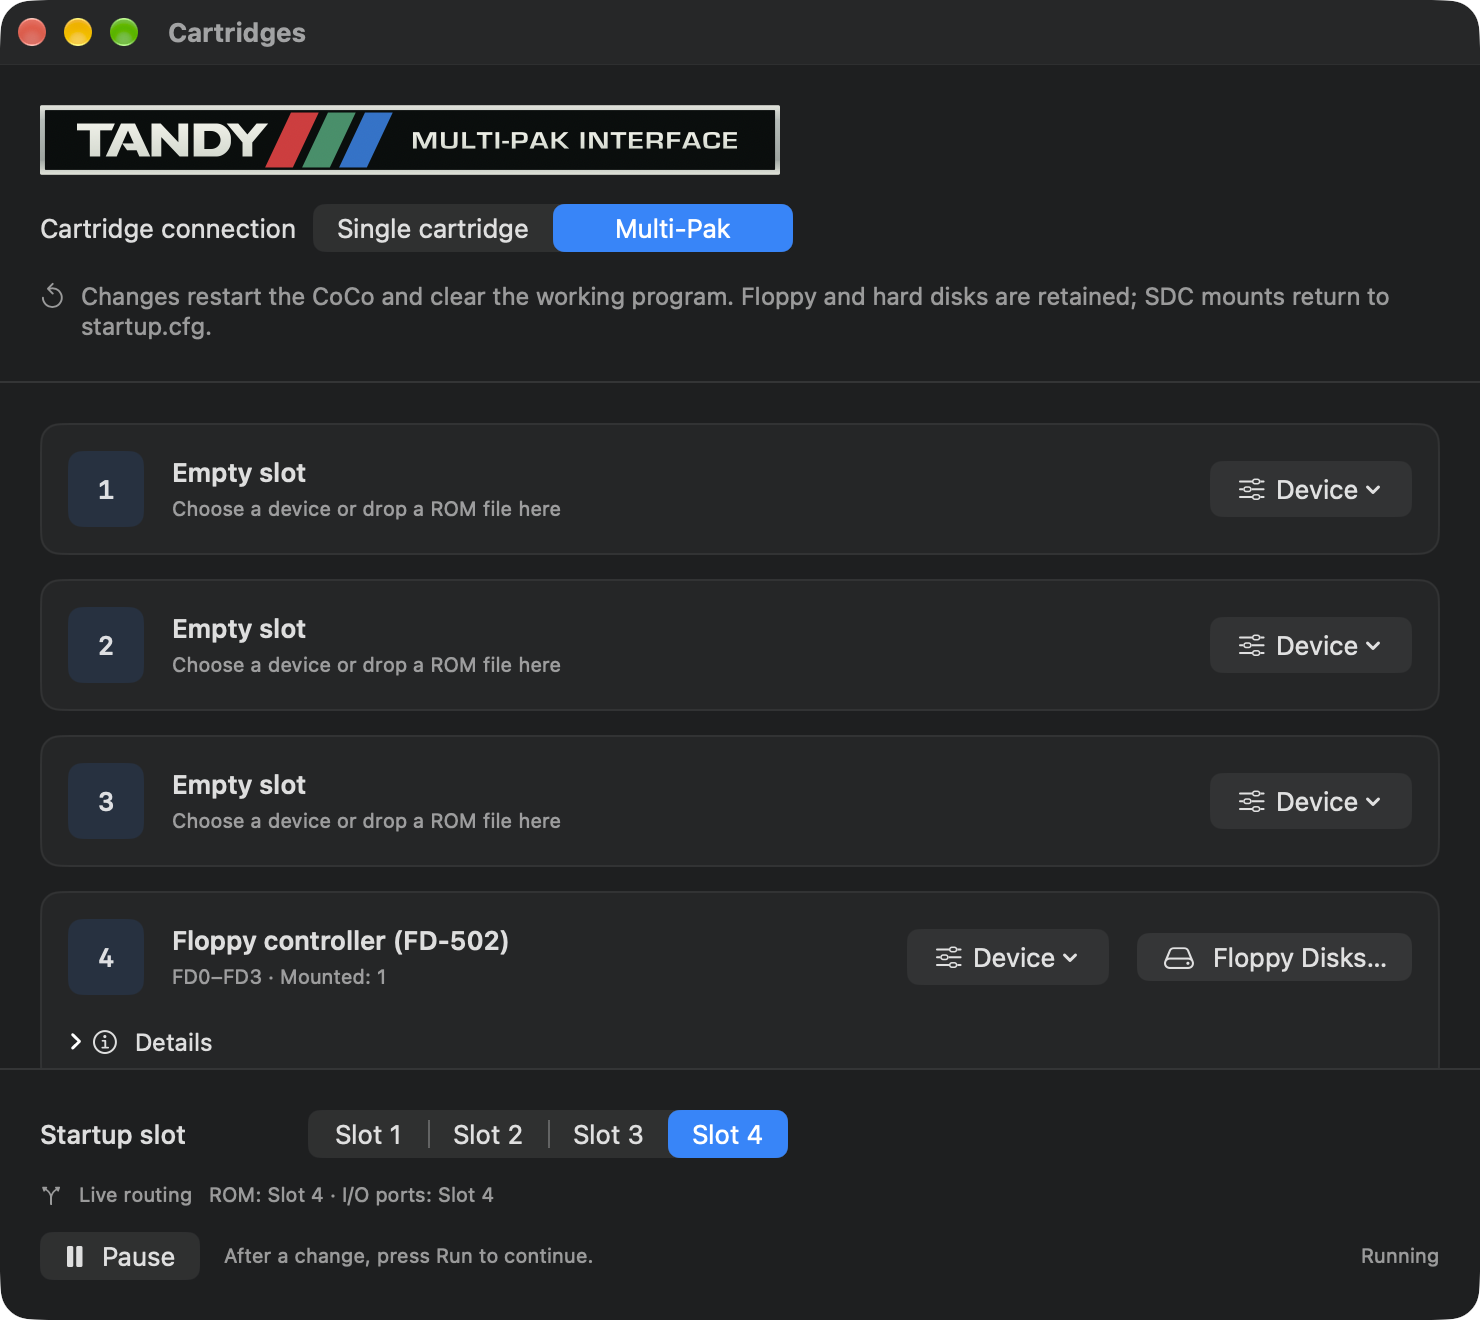
- ROM Cartridge… takes the cartridge's raw program ROM, such as a .ccc game. Choose its slot as the Startup slot to boot the cartridge. Software can subsequently select one slot to supply ROM code and a different slot for input/output. Read the live ROM and I/O ports labels when a device appears to be in the right place but a program cannot see it. Watch the Multi-Pak for a worked example.
- CoCo SDC has an SDC-DOS ROM and an SD card folder. Use Choose Folder… for the directory holding your disk images and Show SD Card Folder in Finder to see its files. Select this slot to boot SDC-DOS. Protect SD card files (read-only) blocks guest writes and file-management changes; leave it on for a collection you want to preserve. With protection off, the guest can change real files in that folder. The profile remembers folder, ROM and protection. On restart, the card's startup.cfg supplies the startup mounts. SDC0 and SDC1 are on the card, independent of FD0–FD3.
- Orchestra-90 provides stereo output to supporting software. Its optional 8 KiB ROM adds the cartridge's own music program; select that slot at startup to use it. Speech/Sound requires its two internal ROMs and a program that issues speech or sound commands. It has no boot program; leave the disk controller selected at startup when using it with a disk program. Expand the assigned slot to choose or replace its ROMs, then check the app's Sound and volume settings.
- The 512 KB RAM disk works with software written to use it. Its contents survive a reset but disappear when you remove its last assignment, load a profile or quit. Save anything valuable to persistent media first. A saved profile remembers the device. Custom layouts such as this use the conventional controls.
Changing the cartridge layout cold-restarts the CoCo and clears the working program. Floppy and hard-disk media are retained, and SDC mounts return to their startup configuration. Check the slot details for missing files before loading a different profile to fix a connection.
Play or record a tape
Choose Media → Cassette… and Insert… to select CAS or WAV. Play readies the tape; the CoCo starts its motor when the guest reads it. Use Rewind to return to the beginning. Tape position counts bytes on CAS and samples on WAV. Fast CAS speeds supported ROM loads and can be changed while stopped. For the guest loading sequence, see Cue up the cassette.
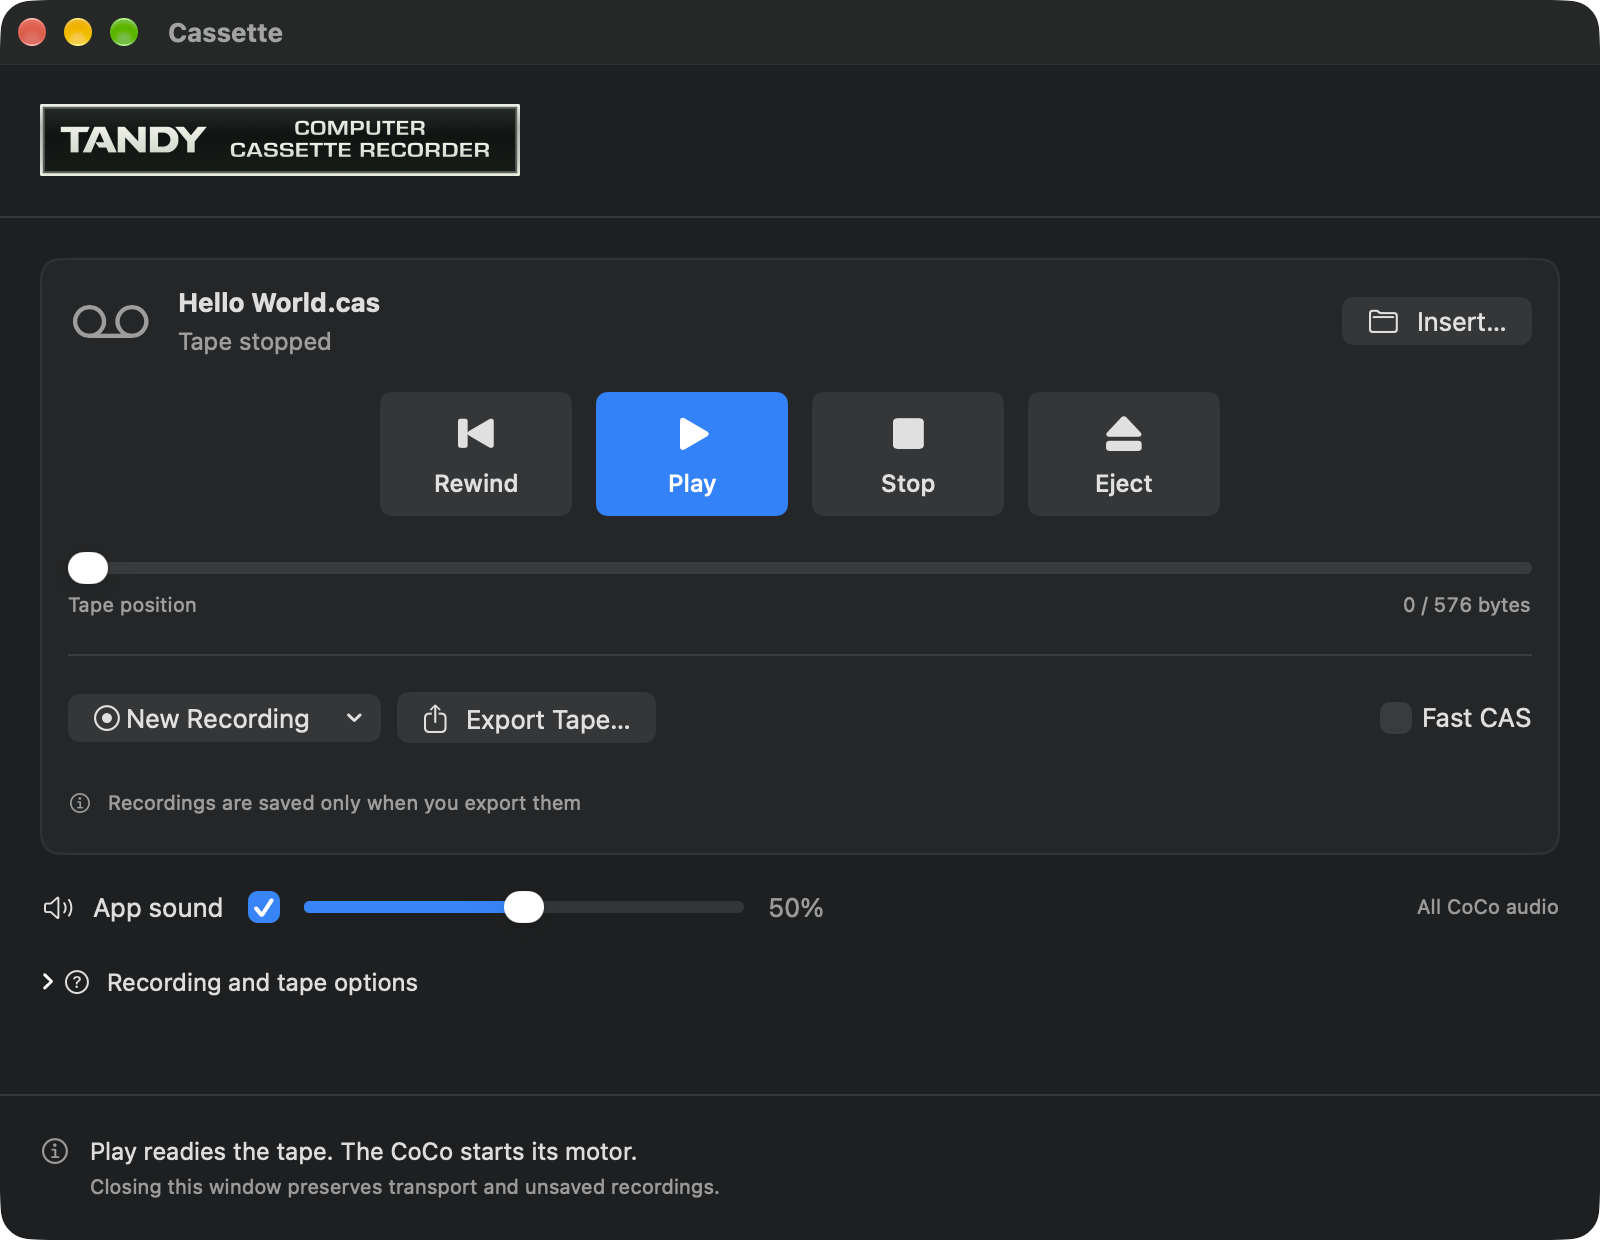
Scroll below the transport to App sound for the Sound switch and Volume slider. They affect all CoCo audio, including cartridges, rather than just the tape. A short window can keep this row below the visible area.
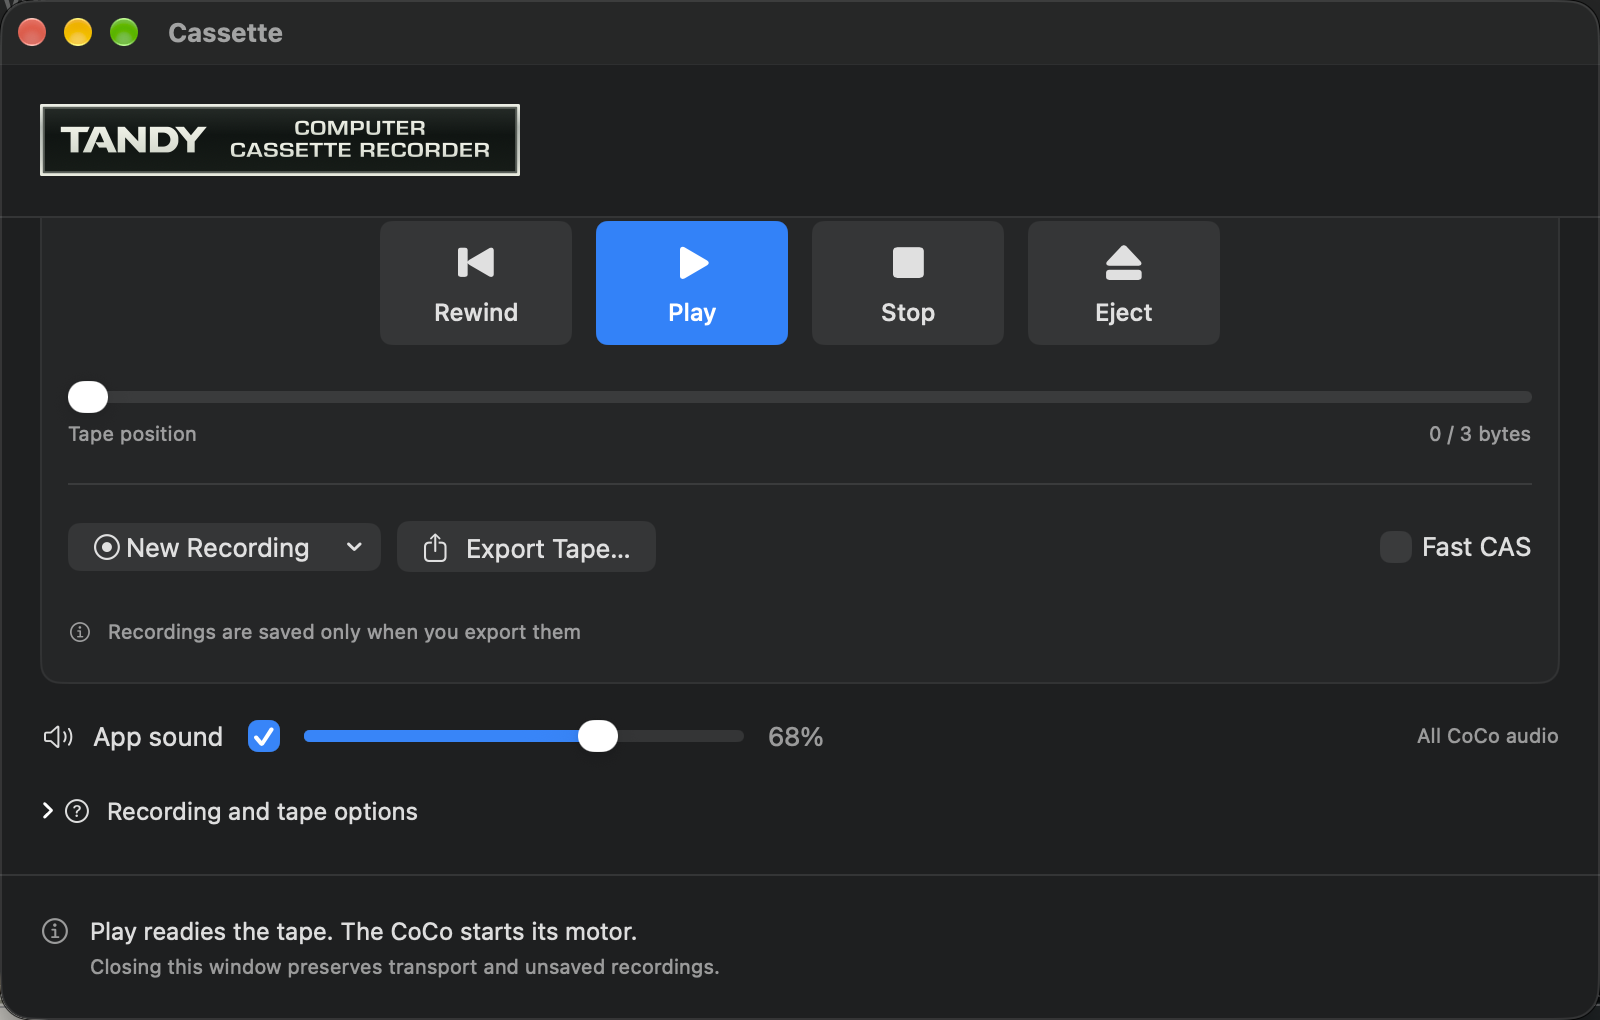
New Recording → CAS or WAV prepares a new in-memory tape in place of the inserted tape. Once the guest finishes recording, stop the transport and choose Export Tape… to give the recording a Mac file. Discard… deliberately gives up an unsaved recording. You can close the cassette window while a tape runs. Reopen it from Media or the tape status to check transport, position or a recording needing export.
Catch output from the printer
Click the illustrated printer or choose Media → Printer Output…. Start capture before asking a guest program to print. The TP-10 picture marks the CoCo's serial printer connection. The window collects the bytes the program sends there. Follow Output keeps the newest text in view; 7-bit BASIC Text ignores the high bit when displaying or saving text. Control codes appear as visible markers.
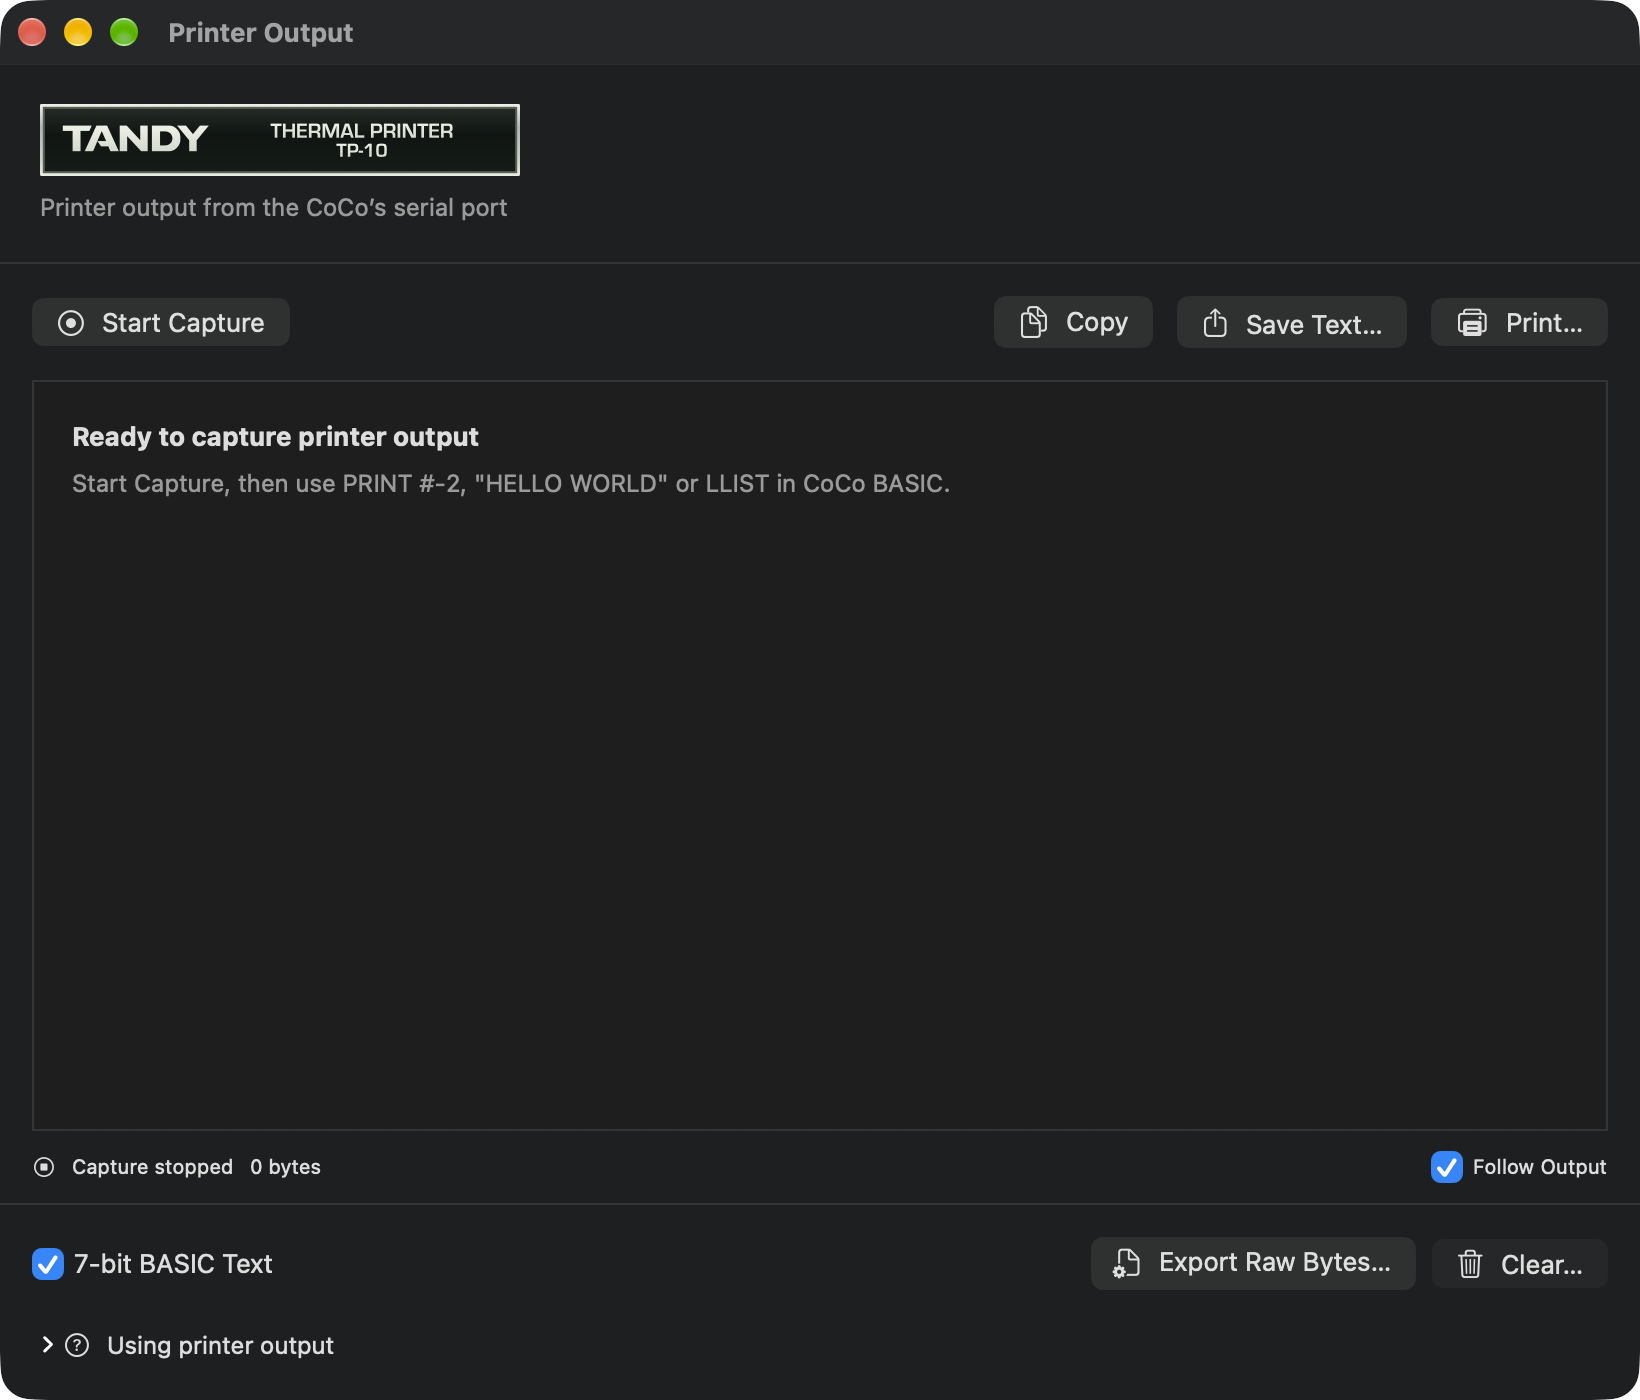
Copy, Save Text… and Print… operate on all captured text; Print opens the Mac print dialog. Export Raw Bytes… preserves the actual bytes, including control codes. Use it for data that is unsuitable as text. The preview shows the latest 64 KiB and capture holds up to 1 MiB. When the capture fills, additional bytes are dropped: stop, save and clear before starting another. Closing the window keeps capture and its output. Clear… stops capture and discards the session's collected output after confirmation. A guest program that needs printer graphics may emit control codes instead of a printed picture here.
Try a print job you can count. At a Disk BASIC prompt, open an empty Printer Output window and choose Start Capture. Give the CoCo keyboard focus. Enter the line below, then press Return.
PRINT #-2,"FLIGHT TEST"Open Printer Output again. The captured text reads FLIGHT TEST and the status shows 12 bytes. The two words and their space account for ten characters; the print stream also ends the line. Choose Clear…, read the warning, and choose Cancel. The 12 bytes are still there. Choose Stop Capture. Use Save Text… if you want a Mac copy of the result.