Chapter 3 of 10
Read and hear the CoCo
Two pilots can run the same game, in the same kind of computer, and see different colors. The game draws a pattern in memory. The video signal decides how that pattern becomes a picture. Then the Mac decides how large to draw it. Here's how to tell which choice you're making.
See what the video signal changes
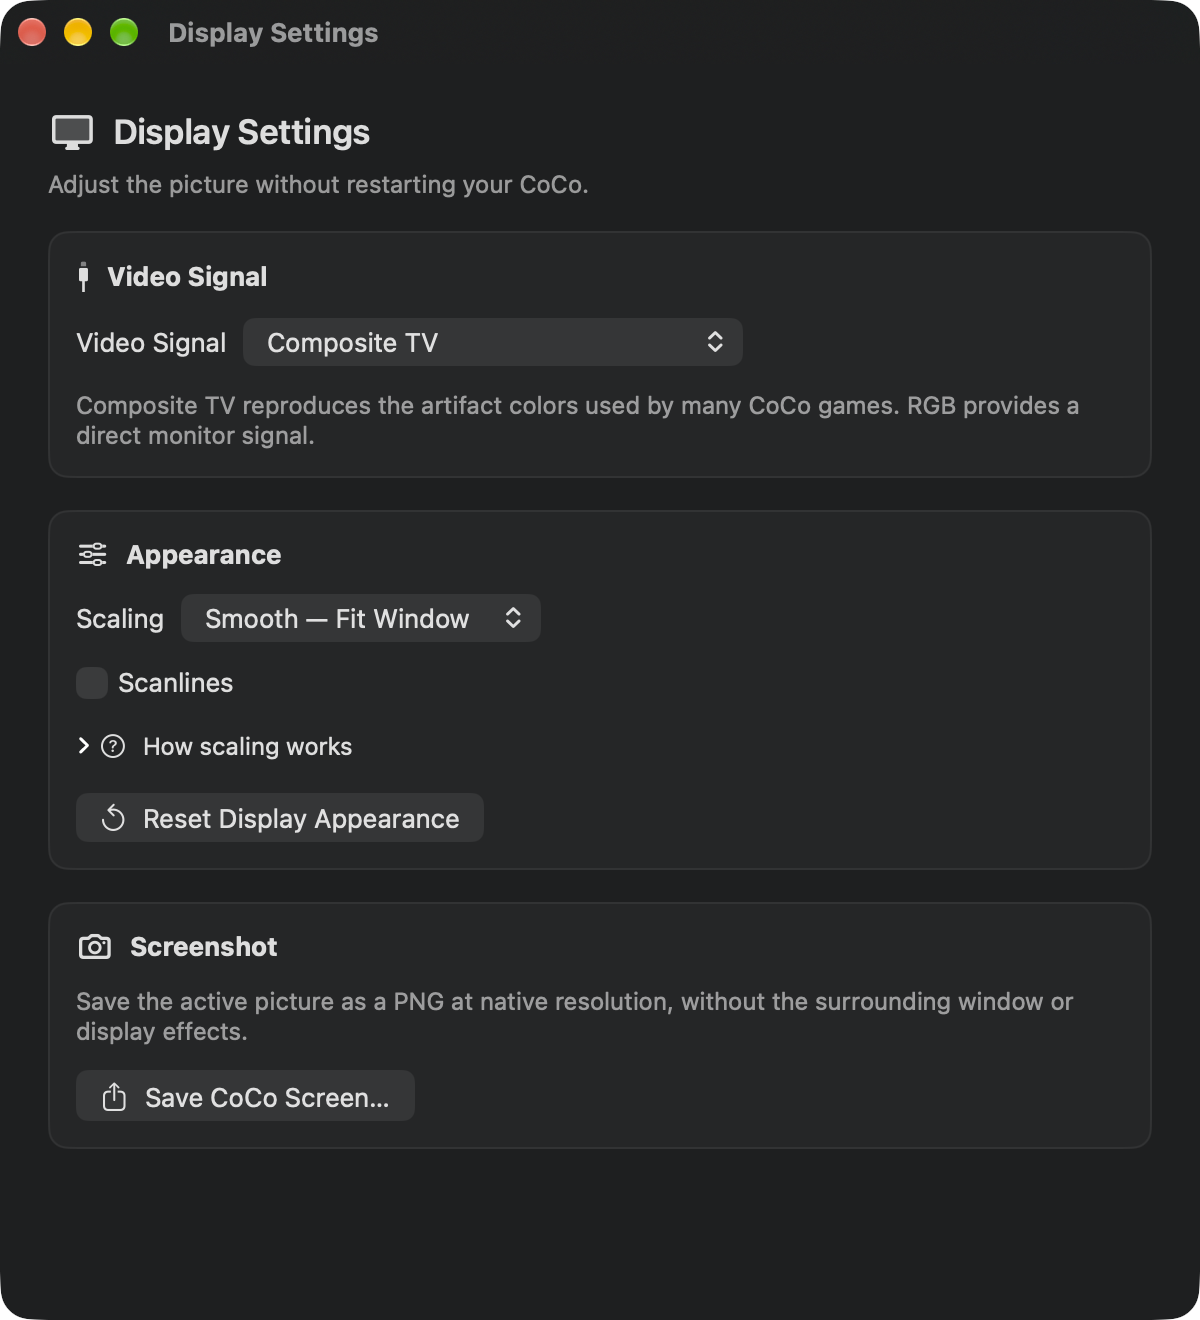
Choose a signal in Display on the Mac menu bar, in Display → Display Settings…, or under Settings → Video Signal in the main window. In System view the strip of bezel just below the monitor picture also opens the signal choices. Write down the current choice before trying another. A profile or a Software Library setup can select a signal when it starts a title.
RGB Monitor carries separate red, green and blue signals, as a CoCo 3 RGB monitor did. Composite TV recreates a TV picture in which very fine alternating bright and dark marks can appear colored. This is called artifact color. Some games drew their scenery with those patterns specifically to get colors from a TV. Composite TV — Alternate Colors reverses the artifact-color phase. Try it if you remember a familiar game's blue and orange the other way around.
Start in Disk BASIC, with your previous program saved. Follow LANDPAD.bas to open the game in a separate BASIC example window. If reading in a browser, open the downloaded listing in Develop → BASIC Development…. Choose the editor's Run and confirm replacement of the guest program if prompted. Your mission is to land under the beacon.
- Choose Display → Conventional Display, then Display → Composite TV. Choose Input → Focus CoCo Display and press Space. Wait until two pads and a cross have finished drawing. Leave the landing keys, L and R, alone.
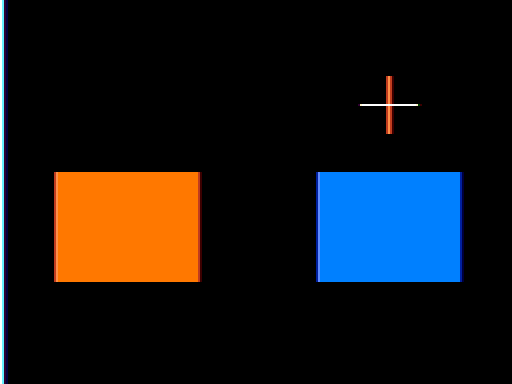
- The left pad looks orange and the right one blue. Click Pause in the emulator. Choose Display → Save CoCo Screen… and name this picture Composite.png.
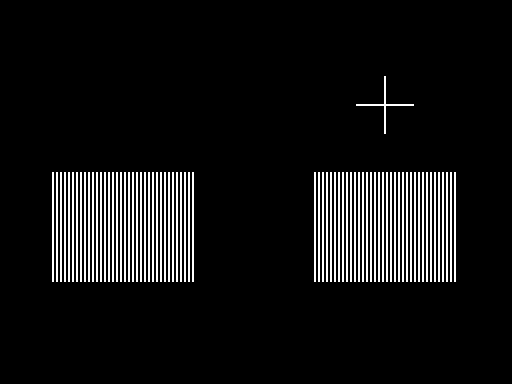
- Choose Display → RGB Monitor. A paused CoCo still shows its last completed picture. Click the emulator's Run, give the CoCo a moment to draw, then Pause. The game waits for a landing key, so you can do this without losing your place. Save this picture as RGB.png.
- Compare the pads. Both are made of bright vertical lines with one dark pixel between lines. The lines on the right begin on the opposite beat. On RGB you can see the stripes themselves. The beacon stays over the right pad in both pictures. Open the full-size images if the stripes blend at your reading size.
Give the monitor more room
Use Display → Expand Monitor in the illustrated System view to bring the live monitor forward in the same window. Return to System puts it back. Conventional Display gives the picture its own central area. All three presentations show the same machine. Drag a window corner to try a wider or taller shape. VCC Plus fits the picture while preserving its proportions; the extra space can land beside or above the picture.
Display → Display Settings… has three Scaling choices. Try them while the landing game is paused on RGB.
| Choice | Look for |
|---|---|
| Smooth — Fit Window | The picture grows to fit. Softened pixel edges can make text and diagonal lines gentler at an in-between size. |
| Sharp — Fit Window | The same fit, with crisp pixel edges. Use this to inspect a game sprite or a tiny pattern. |
| Integer Pixels | Each source pixel gets a whole-number enlargement when there is room. A larger surround can appear because the next whole step would be too big. If even the original size cannot fit, the picture scales down proportionally. |
Turn Scanlines on to add a horizontal line effect. It fades at small sizes to keep lettering readable. To compare settings precisely, hold the window size steady as you change one control at a time.
Save the CoCo picture or the Mac window
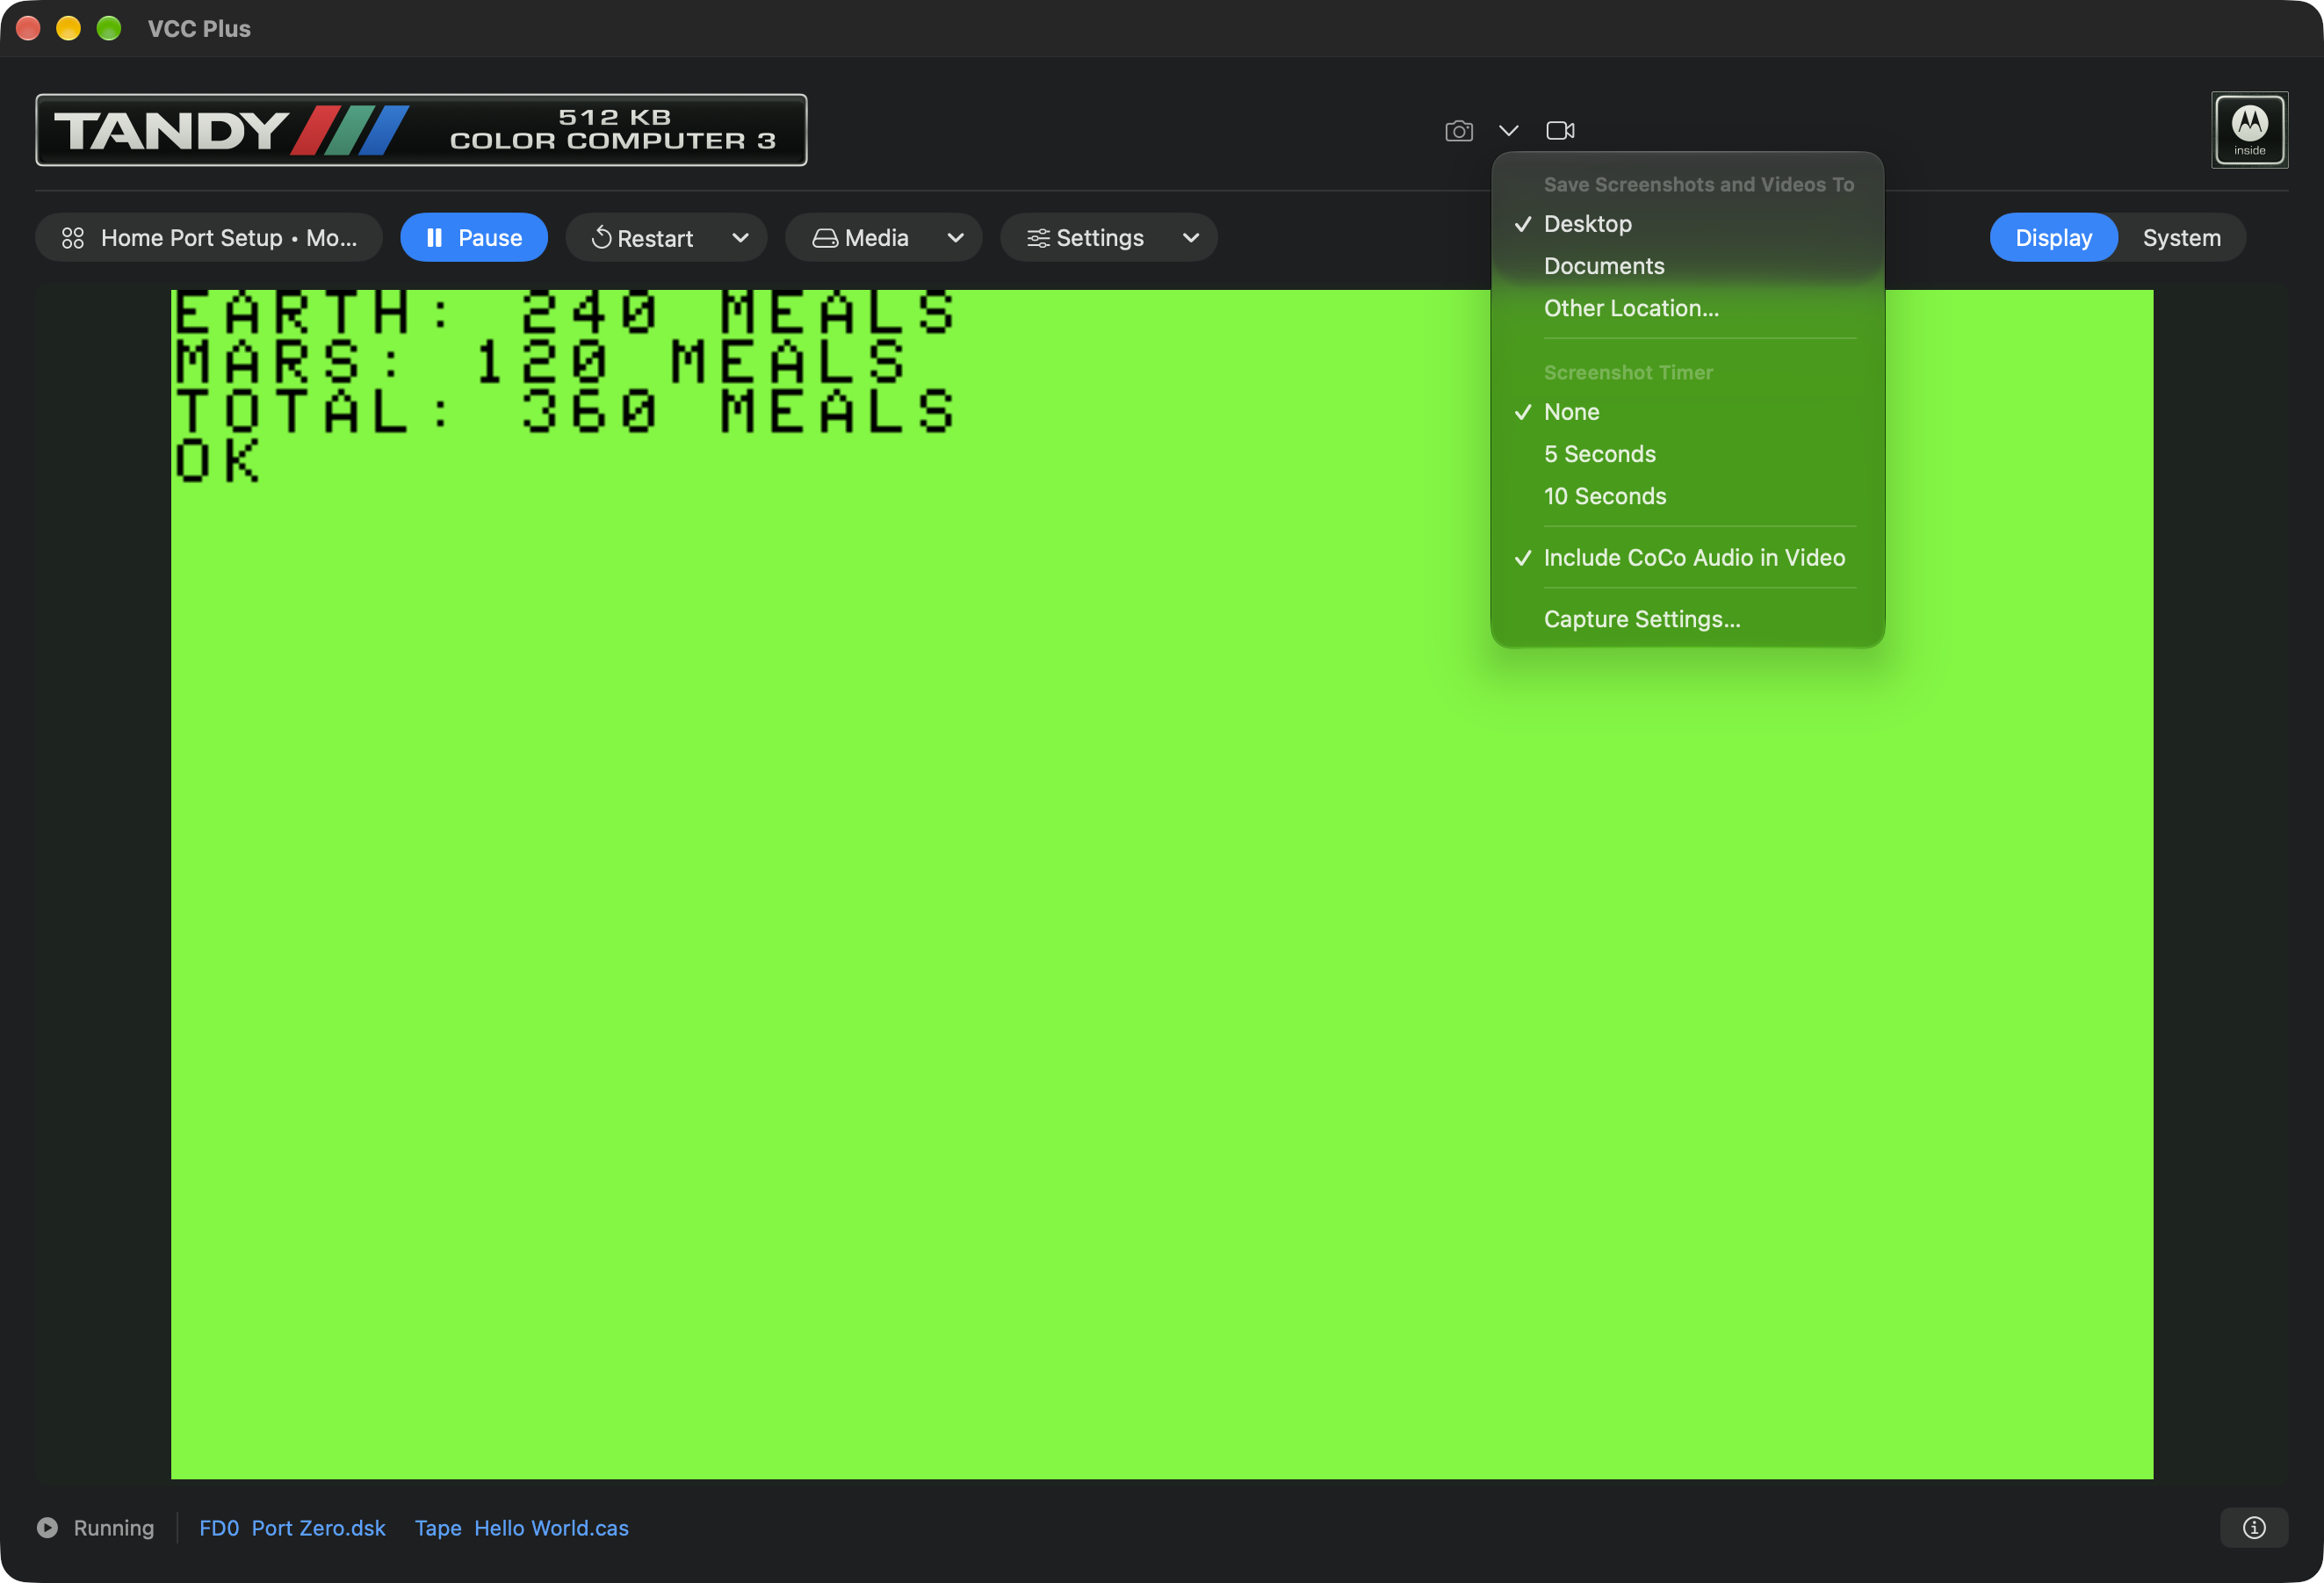
To take a picture, click the camera icon in the open header area between the machine nameplate and processor badge. Hover to see Capture CoCo Screen. The app saves a PNG directly to Desktop by default and shows a saved indicator with Show in Finder. You can keep playing rather than answering a Save dialog for every picture.
The shared disclosure beside the camera and video buttons has a Screenshot Timer: None, 5 Seconds or 10 Seconds. Choosing a timer changes the setting; it does not take a picture. Click the camera to use that timer. None captures immediately. A delayed capture shows its remaining seconds and Cancel. Keep using the CoCo until the timer finishes; the picture comes from that later moment, accompanied by a brief shutter sound. The timer is remembered for subsequent captures and launches. A guest reset or machine replacement cancels a pending timer, while switching Display/System presentation does not.
Save Screenshots and Videos To offers Desktop, Documents and Other Location…. Both kinds of capture use this one remembered folder. You can also change it in Capture Settings…. Filename collisions get a suffix rather than replacing an earlier capture. If saving fails, the captured picture remains available in Capture Settings for Save Captured Image As… or an explicit discard.
Display → Save CoCo Screen… remains the deliberate command with a native Save dialog. It freezes the picture at the moment you choose the command; the CoCo continues running while you choose its destination.
While still paused, change to Integer Pixels and choose Display → Save CoCo Screen… (Shift-Command-S). Save RGB-Integer.png. Open this and RGB.png in Preview at the same zoom. Both files in this exercise are 512 × 384 and their pixels match. Each is the active picture that came from the CoCo. Changing Mac scaling, the size of the window or the scanline effect changes how you see that picture on the Mac.
Both routes save only the actual CoCo picture. System artwork, the monitor case, toolbar, pointer and Mac desktop are excluded, even while System view is selected. A PNG retains the active picture's native raster dimensions; it does not bake in Mac window scaling or scanline effects.
To show someone a setting, a drive light, or the border around an integer-scaled picture, take a Mac window screenshot instead. Press Shift-Command-4, tap Space, then click the window you want. To share a text message for someone to read or search, try Copy CoCo Screen Text.
Finish the landing. Restore your scaling, choose Composite TV, click Run, and focus the CoCo display. Press R. The game prints BEACON FOUND! followed by OK. Pressing L instead gives DARK PAD. TRY THE OTHER ONE! and returns to BASIC. Restore your previous signal and presentation when you're done. For a closer look at the drawing trick, see Same bytes, different monitor.
Record the CoCo picture and sound
The separate video icon beside the camera starts Record CoCo Video. It records only the CoCo picture, with optional generated CoCo sound. System view, its hardware artwork, Mac windows, desktop and microphone are never part of the movie. The same controls are available through the Display menu.
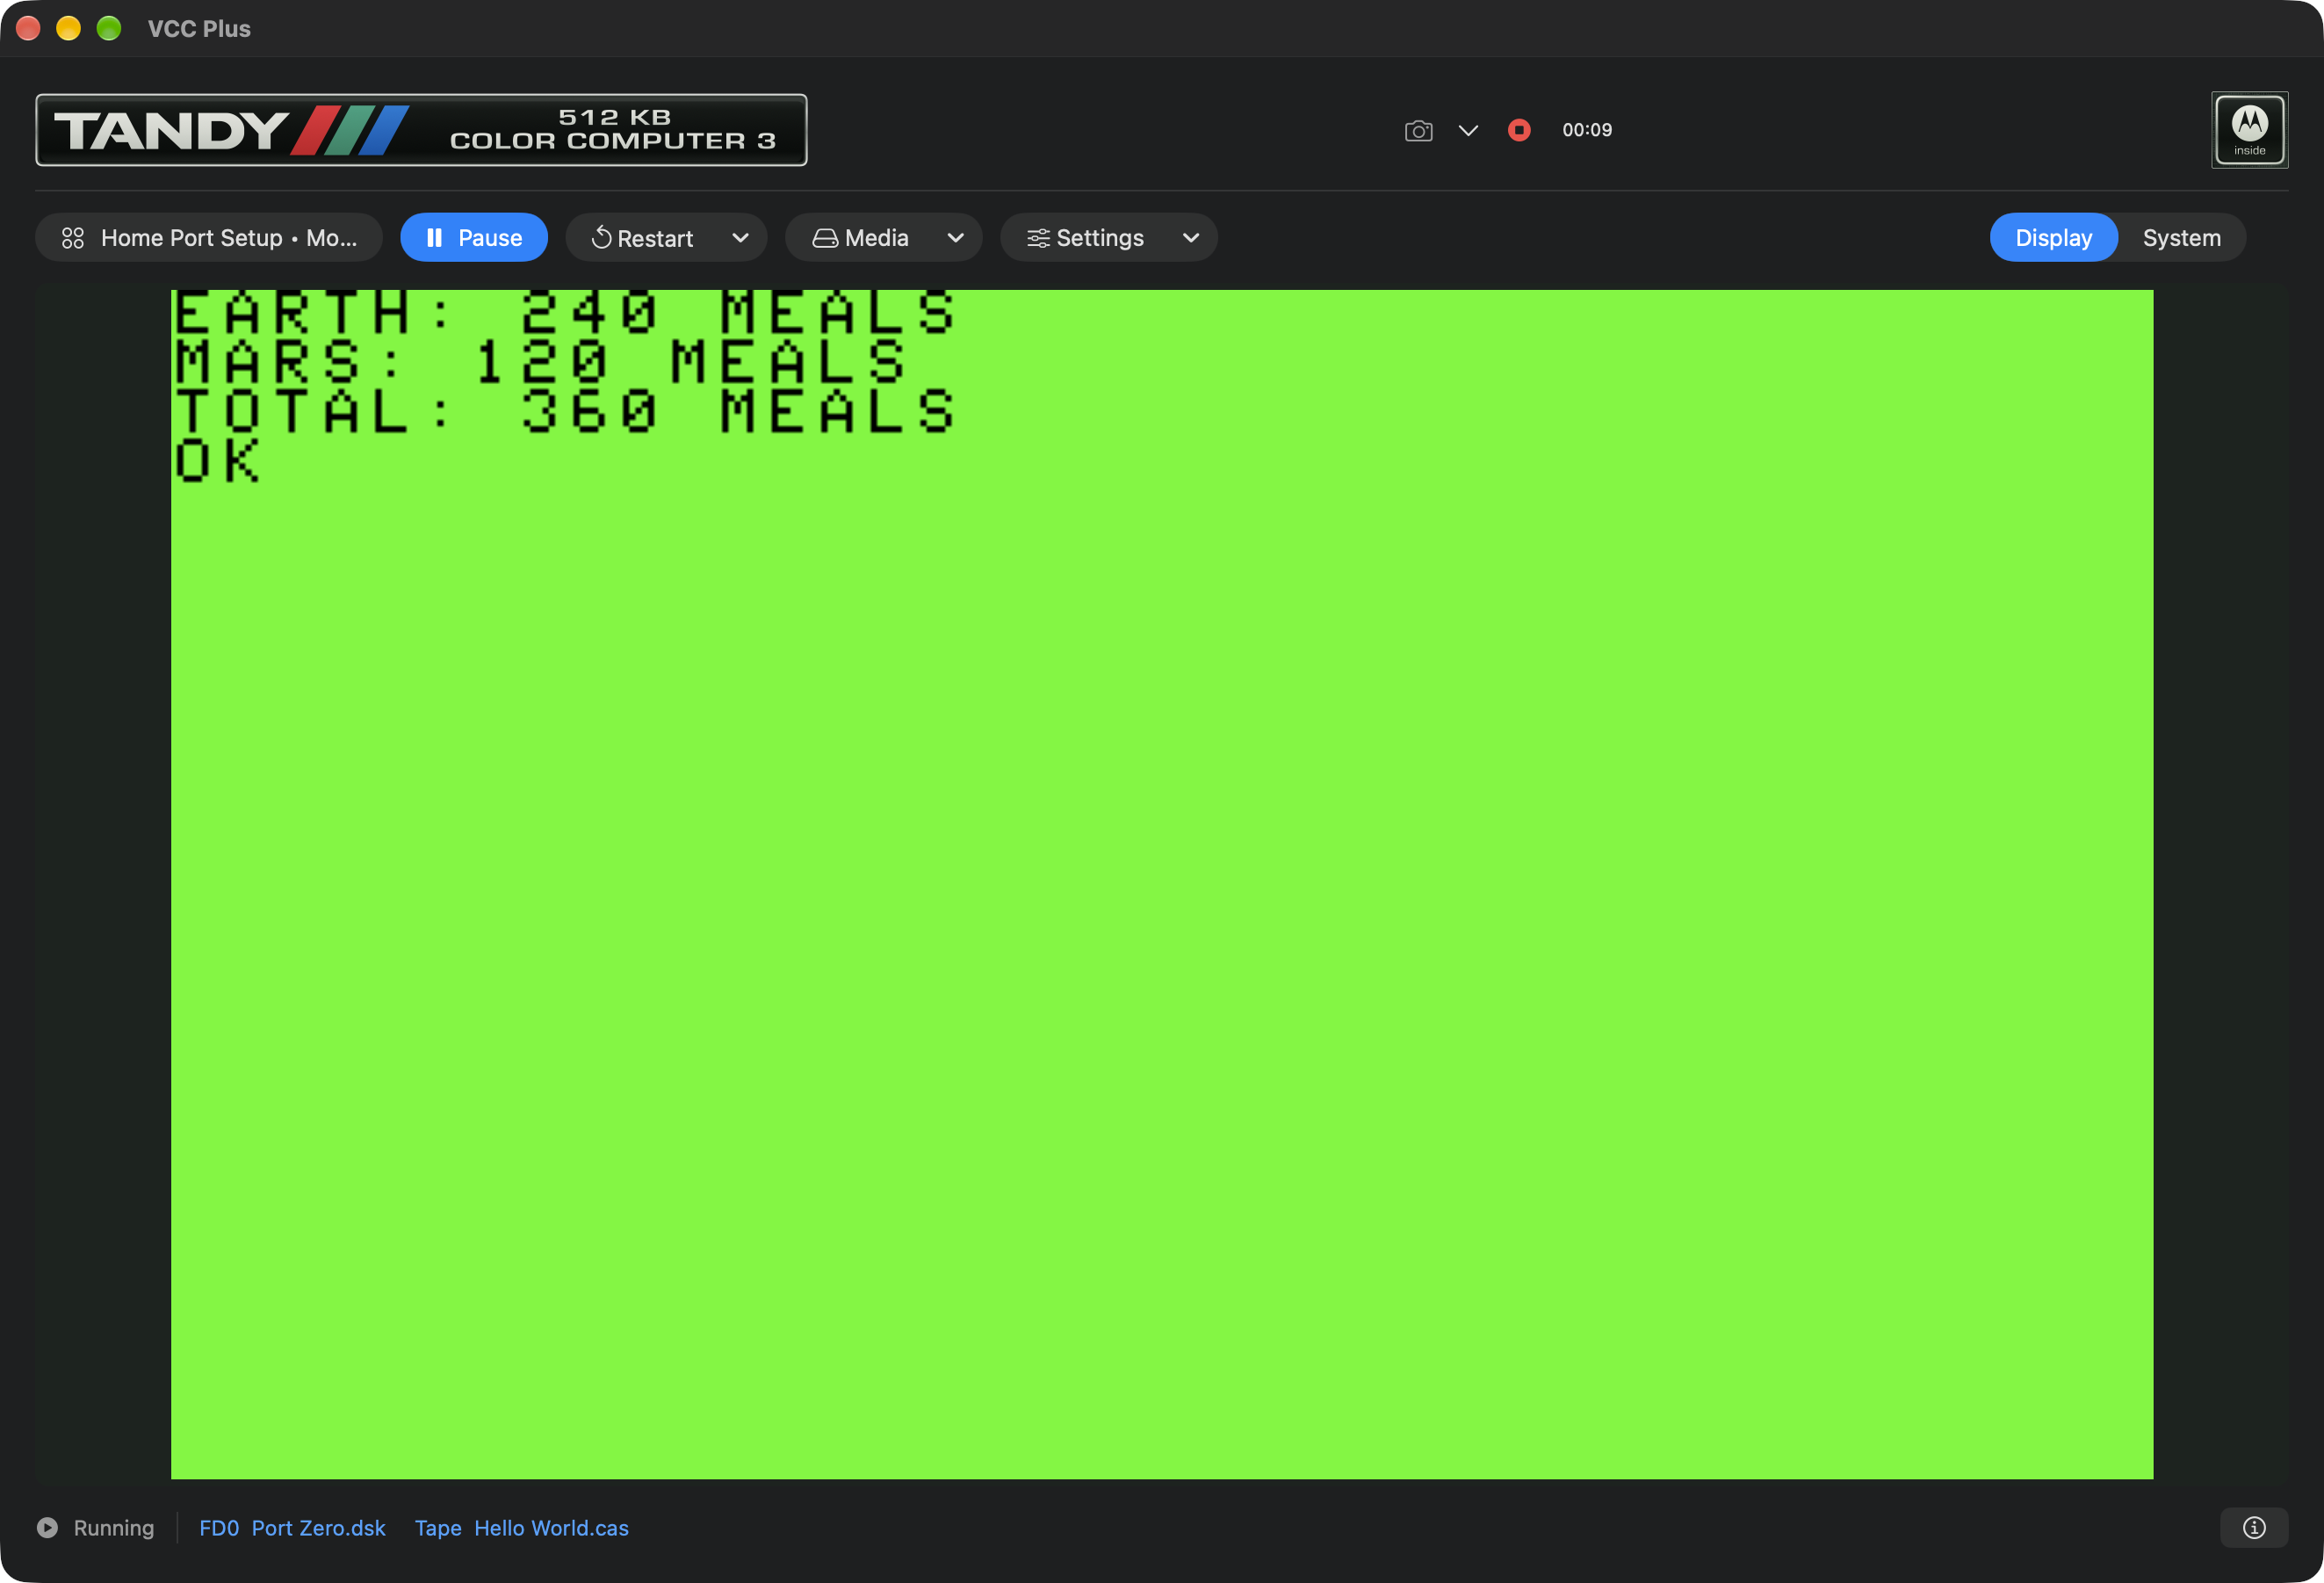
A brief tape-start cue confirms that recording has begun. During recording, the icon becomes a red stop indicator and the elapsed time stays visible. Its hover explanation changes to Stop Recording. Reduced Motion uses a steady indication rather than the repeating pulse. Click Stop when your demonstration is complete. Finishing… means the app is completing the file; wait for the saved result before opening it.
The result is an MP4 in the same remembered Save To folder as screenshots (Desktop by default). It uses H.264 video and stereo AAC sound. The fixed video canvas fits the current CoCo picture without cropping it; changing a guest video mode or resizing the Mac window does not record the surrounding UI. You can take a PNG while a movie is recording.
Include CoCo Audio in Video is on by default. Turn it off in the shared options or Capture Settings for a silent movie; the choice applies when the next recording starts. When it is on, the movie includes CoCo sound even if local playback is muted or turned down. The shutter and recording-start cues are Mac feedback only and never appear in saved movies or MCP audio/video captures. Your Mac speaker volume does not set the recorded audio level. A paused guest leaves a held picture and silence in the movie; choose Run to continue the guest. Ordinary soft/cold resets remain in the recording. Use normal emulation speed: fast-forward and recording are separate choices.
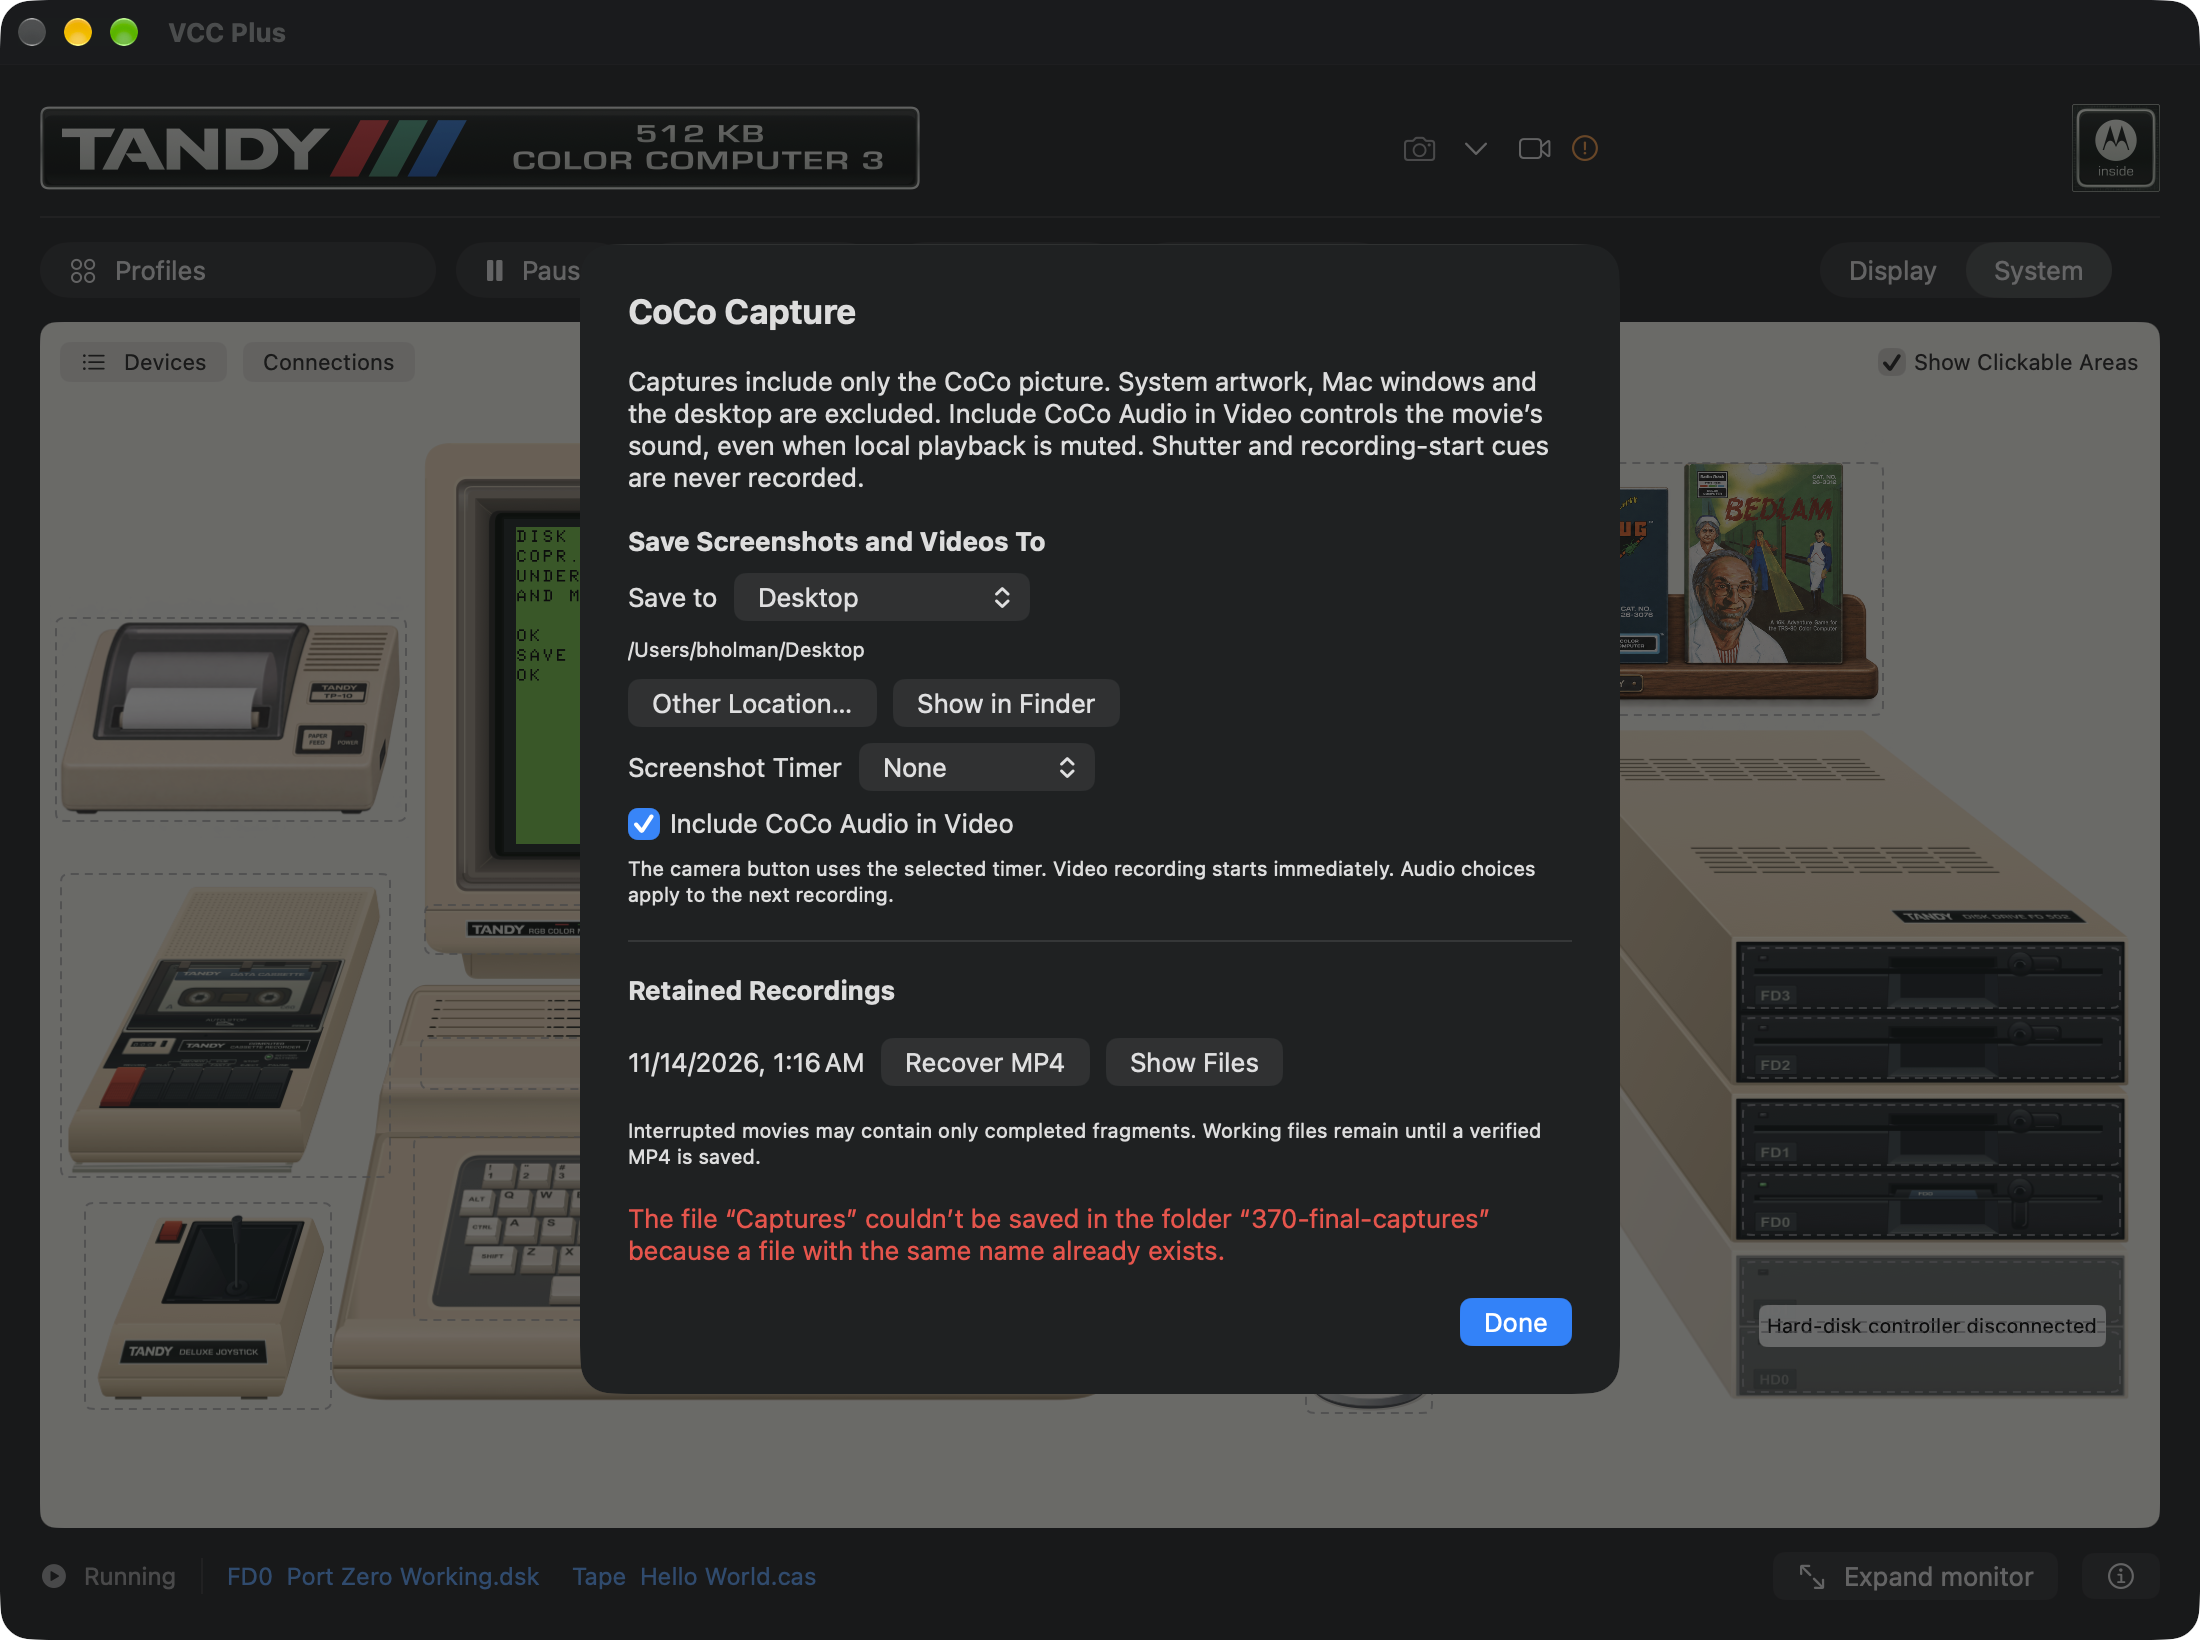
Recording keeps working files while the movie is being made and needs temporary space to complete the MP4. If a recording is interrupted or cannot be completed, open Capture Settings → Retained Recordings. Recover MP4 tries to complete the retained movie, and Show Files locates its working data. Recovery may contain only completed fragments; do not delete those files while investigating a failure. A successful MP4 completion permits the app to remove its corresponding working file. Closing the app or replacing its machine while recording requires an explicit stop/save decision. Cancelling that decision keeps the current session.
Follow a sound from CoCo to Mac
Start with the state shown below the emulator. Paused means the machine has stopped executing. Fast-forward · Sound silenced means the CoCo is running ahead of real time with playback suppressed; tape and disk operations can still progress. Use Machine → Fast-forward to return to normal speed.
Open Media → Cassette… and look for App sound. Despite its home in the cassette window, this controls all CoCo playback, including a game or sound cartridge. Turn Sound on and raise Volume. At zero the label reads Muted. A moving game can therefore be silent while the emulator keeps running. Closing the cassette window preserves the tape transport and any recording. Use the tape's Stop if you mean to stop the recorder.
For a known example with both visible and audible results, see Give the pilot an arrival sound. The landing score in that exercise plays three notes and the program advances to its log. If you prefer a visual check, follow the landing text and log, and read the Sound switch, volume percentage and run state. Those checks tell you what the program and app are doing. To check the actual speaker path, listen to a known sound and check the Mac's selected sound output and system volume.