Chapter 4 of 6
Which drive zero?
Ask Disk BASIC for a directory and the little light on FD0 flickers. Ask Hard Drive BASIC for the same directory and HD0 can answer instead. Both can show a program called HELLO. How would you tell which copy you were about to change?
Choose a setup for the software
| What you remember using | Profile to open | Where to look for files |
|---|---|---|
| An ordinary BASIC floppy or a cassette | Disk BASIC | FD0 for the first floppy, or the cassette recorder for a tape |
| A hard disk that BASIC sees as a collection of numbered disks | Hard Drive BASIC | A numbered RGB-DOS volume on HD0 |
| Disk images kept on an SD card | CoCo SDC | An image in the Mac folder serving as the SD card |
| A command shell with directories such as CMDS | NitrOS-9 L2 V3.3.0 | The OS-9 system drive and its mounted filesystems |
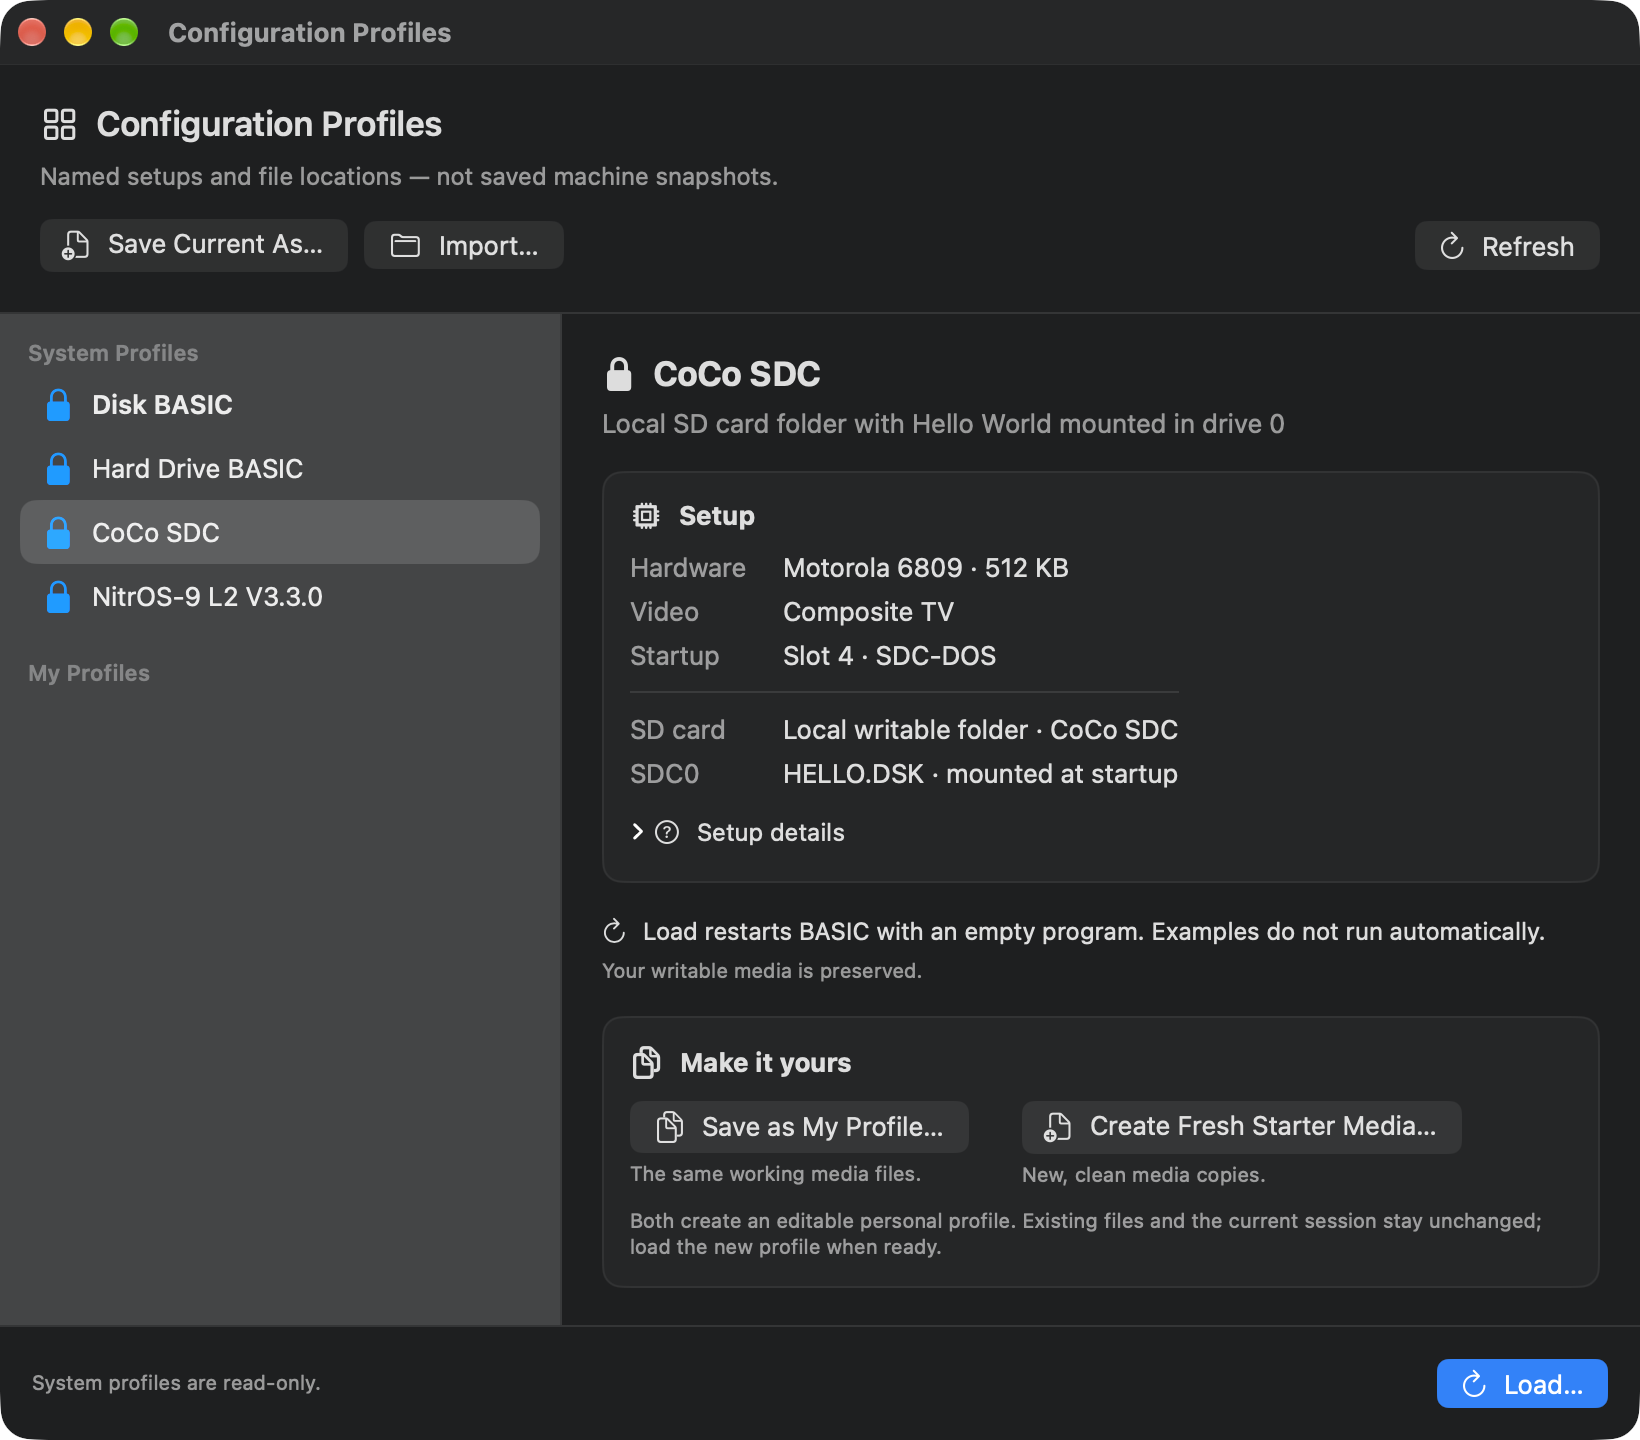
Pick the row that matches your disk, or try all four with starter media. Save any program you want from RAM before switching. In Machine → Configuration Profiles…, select the system profile, choose Load…, read the restart message, then choose Load Profile. If the machine shows Paused, click Run. A profile can bring back the same disk files, including your changes to them. Loading a profile clears the program in RAM.
Find the floppy hiding behind the hard disk
In Disk BASIC, look at the Mac filename beside FD0 and then type DIR at the CoCo. The supplied Hello World.dsk contains HELLO. If you attached the chapter 2 practice disk, its directory contains PORT. A familiar filename in the CoCo listing can be reassuring, but it's the FD0 assignment that identifies the Mac file.
Now load Hard Drive BASIC. Keep the System view visible so you can see the drive lights. Type each command separately and watch as you press Return. The read can be over by the time you finish reading the directory.
| Type | Watch for |
|---|---|
DIR 0 |
HD0 answers. You have opened BASIC volume 0 on the hard disk. |
DRIVE OFF then DIR 0 |
FD0 answers. BASIC can now see the floppy in drive 0. |
DRIVE ON then DIR 0 |
HD0 answers again. |
On fresh starter media, HELLO appears in all three listings. The experiment works because there are two copies of HELLO. If you keep your own files on those disks, your directory listings can look different. Before saving a program, check where you last pointed RGB-DOS.
Open an image on the SD card
Load CoCo SDC. Imagine a disk image lying inside an SD card's folder. Choosing that image for SDC0 is the equivalent of putting a floppy in the first drive. The starter card's configuration already chooses HELLO.DSK.
- At the BASIC prompt, enter
DIR 0. Find HELLO. - Enter
LOAD "HELLO:0", thenRUN. At the planet question, press 1. You should see Hello Nice Blue Dot World! before BASIC returns to its prompt. - To select the starter image again, enter
DRIVE 0,"/HELLO.DSK". The slash starts the filename at the top of the SD-card folder. TypeDIR 0to see the files inside the selected image.
Notice the two names in those commands. HELLO.DSK is a disk that SDC-DOS can mount. HELLO is the BASIC program that can run once that disk is mounted. When you add an image of your own, open the SD-card folder in Finder from the cartridge settings.
Visit the OS-9 side of the disk
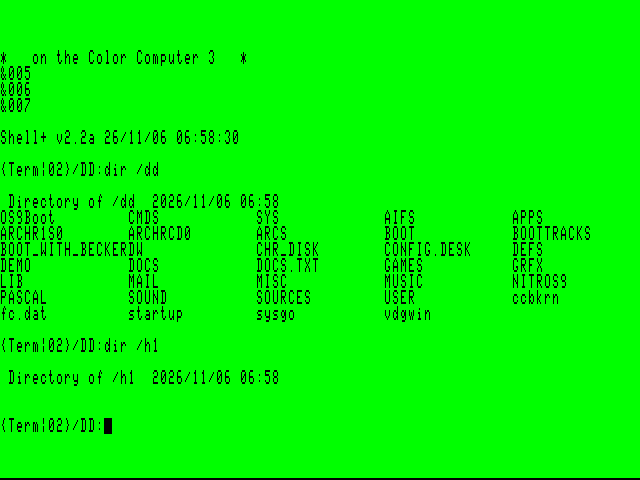
Load NitrOS-9 L2 V3.3.0 and let it boot. Wait for Shell+ and the prompt ending in /DD:. You're talking to the OS-9 shell now. Try these two commands, pressing Return after each one.
dir /dd
dir /h1
The first directory includes CMDS, DOCS and GAMES on the system disk. The second command prints Directory of /h1. On a fresh setup the heading is followed by the next prompt, with room for files you might put there later.
The disk in HD1 here is the same working disk that Hard Drive BASIC uses as HD0. Its OS-9 files occupy a separate part of that disk. HELLO belongs to the BASIC side, so an empty OS-9 directory makes sense. To stay at this prompt and try something useful, find the disk behind each name, then make a personal practice setup and leave a captain’s log. You can also leave this tour here. For another storage exercise, return to Disk BASIC through Configuration Profiles.