Below the Cape, the cargo cages are still going up and down. So are the things living in the ducts. CoCoMan needs a ride through this underground sorting yard. From the floor he can see the bottoms of the cages. From the top of a cage, the whole place looks different.
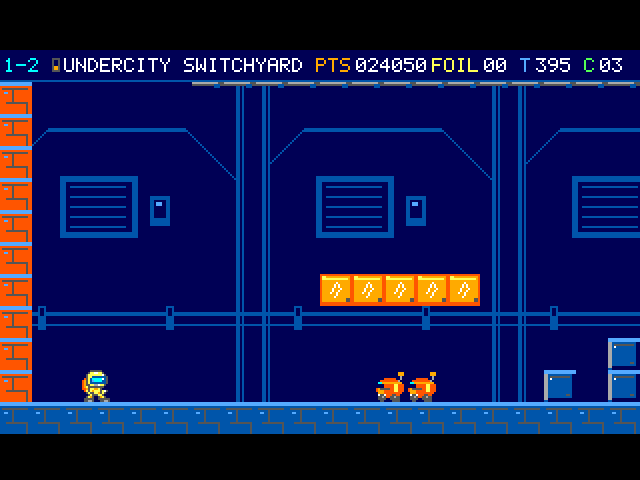
The courier has entered a dark blue freight hall. A pair of rollers travels along the floor beneath a line of amber cargo boxes.
On the flight
Watch the Switchyard gauges while the machinery runs. A Duct Tap withdraws below the rim. A moving cage carries you once your boots land on its grate.
Course map
Undercity Switchyard
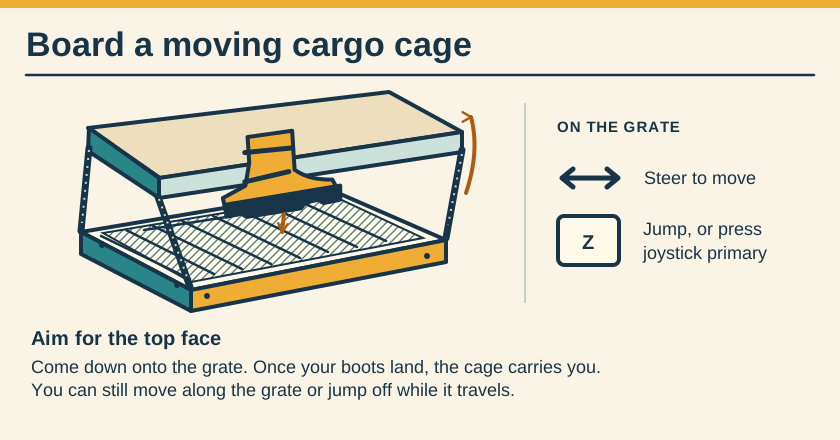
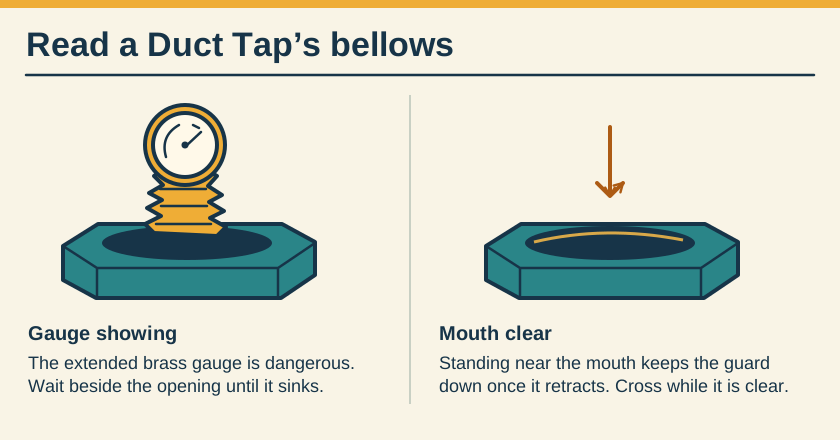
Once control returns in the tunnel, let a Duct Tap finish its stroke before crossing its mouth. Land from above on a moving freight cage. You can walk or jump again while the cage carries you.
Freight descent. Column 2, row 3. The pilot drops into the tunnel. Be ready to steer as the first patrols approach. Locate landmark 1
Freight cage. Column 139, row 7. Catch the grate from above. Steer while riding, or jump clear when the landing is in reach. Locate landmark 2
Ordinary outlet. Column 166, row 8. Walk Right into the side mouth while standing at its opening. This brings the courier into daylight for the relay. Locate landmark 3
Patrol arrival. Column 16, row 12. This marks an encounter position. Moving hazards can leave this point during play. Locate landmark 4
Patrol arrival. Column 17, row 11. This marks an encounter position. Moving hazards can leave this point during play. Locate landmark 5
Patrol arrival. Column 29, row 12. This marks an encounter position. Moving hazards can leave this point during play. Locate landmark 6
Patrol arrival · 2 machines. Column 47, row 12. This marks an encounter position. Moving hazards can leave this point during play. Locate landmark 7
Patrol arrival. Column 59, row 12. This marks an encounter position. Moving hazards can leave this point during play. Locate landmark 8
Patrol arrival. Column 62, row 12. This marks an encounter position. Moving hazards can leave this point during play. Locate landmark 9
Patrol arrival. Column 64, row 12. This marks an encounter position. Moving hazards can leave this point during play. Locate landmark 10
Patrol arrival. Column 73, row 4. This marks an encounter position. Moving hazards can leave this point during play. Locate landmark 11
Patrol arrival · 2 machines. Column 79, row 8. This marks an encounter position. Moving hazards can leave this point during play. Locate landmark 12
Patrol arrival · 3 machines. Column 102, row 12. This marks an encounter position. Moving hazards can leave this point during play. Locate landmark 13
Duct Tap. Column 109, row 9. This marks an encounter position. Moving hazards can leave this point during play. Locate landmark 14
Patrol arrival. Column 113, row 12. This marks an encounter position. Moving hazards can leave this point during play. Locate landmark 15
Patrol arrival · 2 machines. Column 138, row 8. This marks an encounter position. Moving hazards can leave this point during play. Locate landmark 16
Freight lift. Column 139, row 13. Watch the surface move before boarding. Locate landmark 17
Patrol arrival. Column 146, row 12. This marks an encounter position. Moving hazards can leave this point during play. Locate landmark 18
Freight lift. Column 154, row 1. Watch the surface move before boarding. Locate landmark 19
Freight lift. Column 154, row 9. Watch the surface move before boarding. Locate landmark 20
Duct Tap. Column 179, row 11. This marks an encounter position. Moving hazards can leave this point during play. Locate landmark 21
Undercity Switchyard · panel 1 of 5 · columns 0–39
208 columns by 15 rows. Full room at the start of a flight. Brown tile marks soil, brick or steps. A gold-topped tread is a platform. Green mouths mark ducts. Amber dots mark encounters.
Undercity Switchyard · panel 2 of 5 · columns 40–82
208 columns by 15 rows. Full room at the start of a flight. Brown tile marks soil, brick or steps. A gold-topped tread is a platform. Green mouths mark ducts. Amber dots mark encounters.
Undercity Switchyard · panel 3 of 5 · columns 82–124
208 columns by 15 rows. Full room at the start of a flight. Brown tile marks soil, brick or steps. A gold-topped tread is a platform. Green mouths mark ducts. Amber dots mark encounters.
Undercity Switchyard · panel 4 of 5 · columns 124–166
208 columns by 15 rows. Full room at the start of a flight. Brown tile marks soil, brick or steps. A gold-topped tread is a platform. Green mouths mark ducts. Amber dots mark encounters.
Undercity Switchyard · panel 5 of 5 · columns 166–207
208 columns by 15 rows. Full room at the start of a flight. Brown tile marks soil, brick or steps. A gold-topped tread is a platform. Green mouths mark ducts. Amber dots mark encounters.
21. Duct Tap
Open the scenery view
Undercity Switchyard · scenery
The native service-wall mural repeats every eight columns. Recessed hatches, lights and cable trays sit behind the pilot.
Freight descent. Column 2, row 3. The pilot drops into the tunnel. Be ready to steer as the first patrols approach. Locate landmark 1
Ordinary outlet. Column 166, row 8. Walk Right into the side mouth while standing at its opening. This brings the courier into daylight for the relay. Locate landmark 2
The native service-wall mural repeats every eight columns. Recessed hatches, lights and cable trays sit behind the pilot.
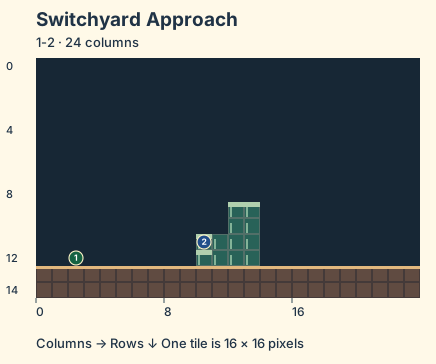
Switchyard Approach
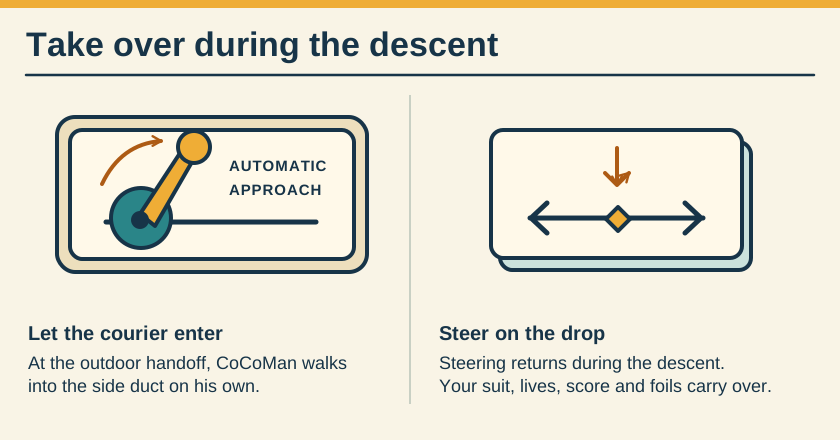
This outdoor approach is an automatic transfer into the freight system. Leave the controls alone while the courier walks into the duct. Your first chance to steer comes during the descent into the Switchyard.
Starting apron. Column 2, row 12. The courier arrives here with the suit, score, foil and lives from the earlier flight. Practice starts at this same outdoor approach. Locate landmark 1
Entry duct. Column 10, row 11. The courier walks into the open side automatically. Wait for the switch to the underground yard. Locate landmark 2
24 columns by 15 rows. Full room at the start of a flight. Brown tile marks soil, brick or steps. A gold-topped tread is a platform. Green mouths mark ducts. Amber dots mark encounters.
1. Starting apron · 2. Entry duct
Open the scenery view
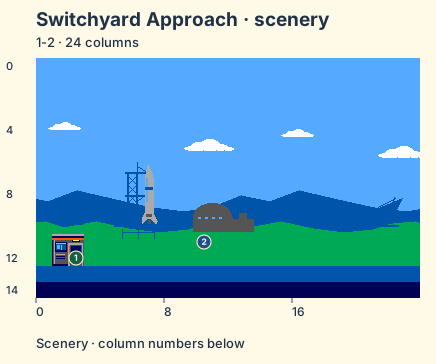
Switchyard Approach · scenery
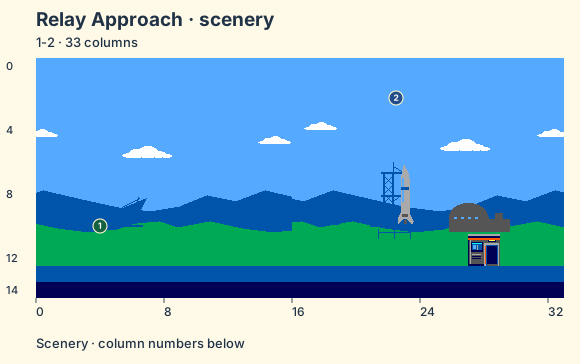
The launch grounds use a repeating native horizon of clouds, access arms and distant buildings.
Starting apron. Column 2, row 12. The courier arrives here with the suit, score, foil and lives from the earlier flight. Practice starts at this same outdoor approach. Locate landmark 1
Entry duct. Column 10, row 11. The courier walks into the open side automatically. Wait for the switch to the underground yard. Locate landmark 2
The launch grounds use a repeating native horizon of clouds, access arms and distant buildings.
1. Starting apron · 2. Entry duct
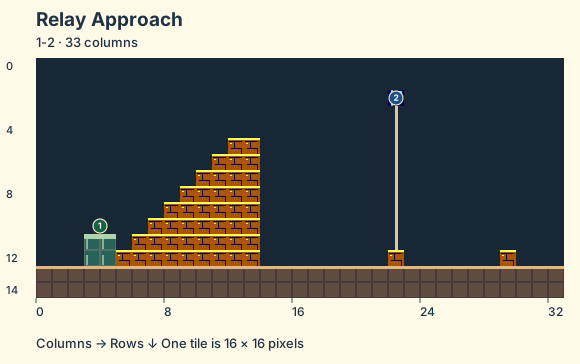
Relay Approach
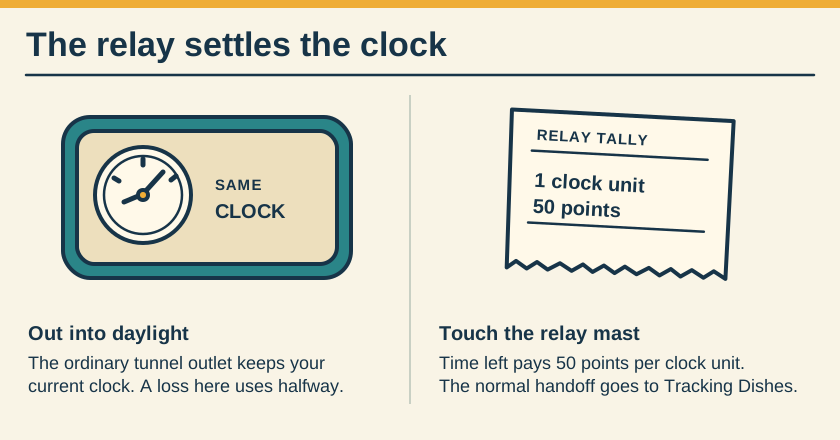
The ordinary tunnel outlet brings the courier back into daylight with the same clock. Once the pilot finishes rising, return to a normal walking or running jump.
Daylight return. Column 3.5, row 10. You rise from the Switchyard outlet here. The approach to the relay is dry. Locate landmark 1
Tracking Dishes relay. Column 22, row 2. Catch the mast and let the station finish counting. The next flight crosses the tracking array. Locate landmark 2
33 columns by 15 rows. Full room at the start of a flight. Brown tile marks soil, brick or steps. A gold-topped tread is a platform. Green mouths mark ducts. Amber dots mark encounters.
1. Daylight return · 2. Tracking Dishes relay
Open the scenery view
Relay Approach · scenery
The launch grounds use a repeating native horizon of clouds, access arms and distant buildings.
Daylight return. Column 3.5, row 10. You rise from the Switchyard outlet here. The approach to the relay is dry. Locate landmark 1
Tracking Dishes relay. Column 22, row 2. Catch the mast and let the station finish counting. The next flight crosses the tracking array. Locate landmark 2
The launch grounds use a repeating native horizon of clouds, access arms and distant buildings.
1. Daylight return · 2. Tracking Dishes relay
Board a moving cargo cage
Equipment study. A work boot descends onto the upper face of an isolated suspended steel grate. A rising motion arrow identifies the cage movement. The pilot can steer or jump once aboard.
Continuous clock. The daylight stretch continues the tunnel clock. A loss in the outdoor finish uses the tunnel checkpoint.
Relay tally. Catching the mast pays the finish award once. Time remaining converts to score before the handoff to 1-3, Tracking Dishes.
Landmarks to recognize
Duct Tap
Give the raised gauge room and watch it retract before you cross.
Freight cage
Stay balanced on its moving tread. You can steer or jump while riding.
Give me a hint
Pick a destination by reading the dispatch board. The ordinary flight and the optional freight dispatch serve different journeys.
Routes and discoveries
This link leads to an optional part of the flight. Open the section below to continue.Continue to the linked placeThis link leads to an optional part of the flight. Open the section below to continue.Continue to the linked place
One last patch of sky, then the freight line ducks under the city. CoCoMan follows it down. A parcel would fit through that entrance just fine. Today the package is wearing a helmet.
Entry
The outdoor handoff carries you into the freight system. Give the automatic descent time to finish.
Return or onward flight
Resume steering as control returns. Your equipment, score, lives and foil stay with you.
Follow this transfer
Follow the automatic entry into the freight tunnel.
This link leads to an optional part of the flight. Open the section below to continue.Continue to the linked placeThis link leads to an optional part of the flight. Open the section below to continue.Continue to the linked placeThis link leads to an optional part of the flight. Open the section below to continue.Continue to the linked placeThis link leads to an optional part of the flight. Open the section below to continue.Continue to the linked placeThis link leads to an optional part of the flight. Open the section below to continue.Continue to the linked placeThis link leads to an optional part of the flight. Open the section below to continue.Continue to the linked placeThis link leads to an optional part of the flight. Open the section below to continue.Continue to the linked placeThis link leads to an optional part of the flight. Open the section below to continue.Continue to the linked placeThis link leads to an optional part of the flight. Open the section below to continue.Continue to the linked placeThis link leads to an optional part of the flight. Open the section below to continue.Continue to the linked placeThis link leads to an optional part of the flight. Open the section below to continue.Continue to the linked placeThis link leads to an optional part of the flight. Open the section below to continue.Continue to the linked placeThis link leads to an optional part of the flight. Open the section below to continue.Continue to the linked placeThis link leads to an optional part of the flight. Open the section below to continue.Continue to the linked placeThis link leads to an optional part of the flight. Open the section below to continue.Continue to the linked placeThis link leads to an optional part of the flight. Open the section below to continue.Continue to the linked placeThis link leads to an optional part of the flight. Open the section below to continue.Continue to the linked placeThis link leads to an optional part of the flight. Open the section below to continue.Continue to the linked placeThis link leads to an optional part of the flight. Open the section below to continue.Continue to the linked placeThis link leads to an optional part of the flight. Open the section below to continue.Continue to the linked placeThis link leads to an optional part of the flight. Open the section below to continue.Continue to the linked placeThis link leads to an optional part of the flight. Open the section below to continue.Continue to the linked place
Somewhere there's a ledger that says exactly how many foils are in this room. CoCoMan prefers to count them as he goes. There are two rows within jumping distance, and one stubborn brick seems to have more tucked inside.
Entry
Take time with the optional cargo audit and collect the foils you want to bank.
Return or onward flight
Its outlet gives you the tunnel checkpoint. Collected foil stays spent on a same-life return.
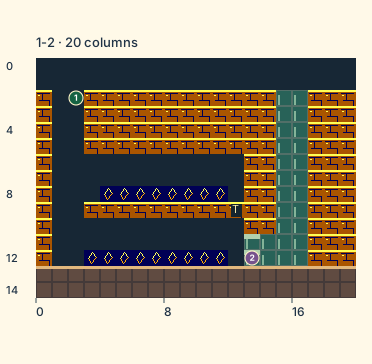
The Freight Audit has seventeen loose foils and a timed dispenser. Take as much of the cargo as you like. A same-life return remembers what has already paid.
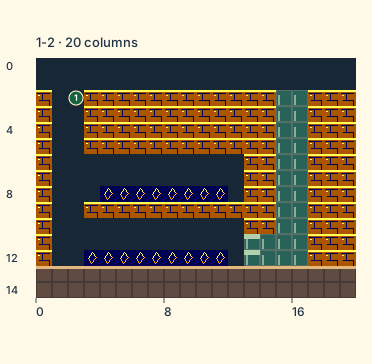
Audit arrival. Column 2, row 2. The transfer drops you into the cargo room. Let your boots meet the floor before moving off. Locate landmark 1
Freight Audit · panel 1 of 1 · columns 0–19
20 columns by 15 rows. Full room at the start of a flight. Brown tile marks soil, brick or steps. A gold-topped tread is a platform. Green mouths mark ducts. Amber dots mark encounters.
1. Audit arrival
Open the scenery view
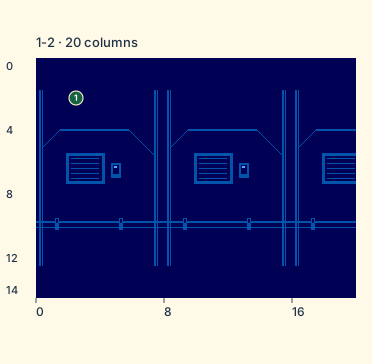
Freight Audit · scenery
The native service-wall mural repeats every eight columns. Recessed hatches, lights and cable trays sit behind the pilot.
Audit inlet. Column 103.5, row 10. Center the pilot on the guarded inlet and hold Down after the guard clears. The Freight Audit has its own cargo. Locate landmark 1
Audit return. Column 115.5, row 11. The Audit outlet returns the pilot to the tunnel with halfway earned. Your bank and remaining time carry across. Locate landmark 2
Undercity Switchyard · transfer points · panel 1 of 5 · columns 0–39
Only the selected route’s transfer positions are marked with numbered amber diamonds.
Undercity Switchyard · transfer points · panel 2 of 5 · columns 40–82
Only the selected route’s transfer positions are marked with numbered amber diamonds.
Undercity Switchyard · transfer points · panel 3 of 5 · columns 82–124
12
Only the selected route’s transfer positions are marked with numbered amber diamonds.
1. Audit inlet · 2. Audit return
Undercity Switchyard · transfer points · panel 4 of 5 · columns 124–166
Only the selected route’s transfer positions are marked with numbered amber diamonds.
Undercity Switchyard · transfer points · panel 5 of 5 · columns 166–207
Only the selected route’s transfer positions are marked with numbered amber diamonds.
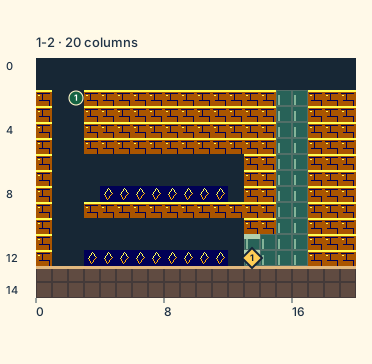
Tunnel return. Column 13, row 12. Walk Right into the side mouth from the floor. The outlet puts you back in the Switchyard and earns its halfway checkpoint. A lost life inside the Audit starts at the tunnel entrance. Locate landmark 1
Freight Audit · transfer points · panel 1 of 1 · columns 0–19
1
Only the selected route’s transfer positions are marked with numbered amber diamonds.
1. Tunnel return
Carry the Freight Audit back
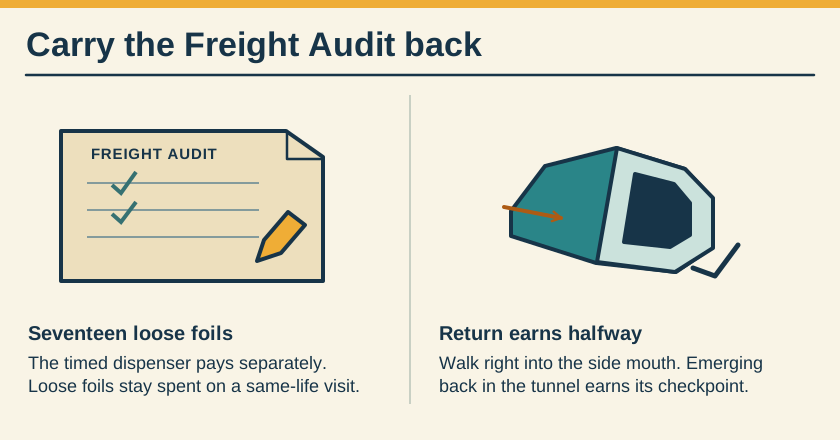
A marked cargo ledger represents spent pickups. A single side coupling represents the return from Freight Audit to the tunnel and the checkpoint the return earns.
Cargo ledger. Freight Audit has seventeen loose foils and a timed dispenser. A second visit in the same life leaves already collected loose foils spent.
Return coupling. A loss inside the Audit restarts at the tunnel entrance. Complete the side exit and rise into the tunnel to earn halfway.
This link leads to an optional part of the flight. Open the section below to continue.Continue to the linked placeThis link leads to an optional part of the flight. Open the section below to continue.Continue to the linked placeThis link leads to an optional part of the flight. Open the section below to continue.Continue to the linked placeThis link leads to an optional part of the flight. Open the section below to continue.Continue to the linked placeThis link leads to an optional part of the flight. Open the section below to continue.Continue to the linked placeThis link leads to an optional part of the flight. Open the section below to continue.Continue to the linked placeThis link leads to an optional part of the flight. Open the section below to continue.Continue to the linked placeThis link leads to an optional part of the flight. Open the section below to continue.Continue to the linked placeThis link leads to an optional part of the flight. Open the section below to continue.Continue to the linked place
Up on the roof of the freight line, CoCoMan finds the sort of choice a courier dreams about. Three departure ducts, three destinations, one pair of boots. Whichever way he goes, JUNO's going to want to hear how he got there.
Entry
Read the destination board before committing to a dispatch. This is an optional transfer to a different world.
Return or onward flight
Your chosen destination starts with its own clock. You take your existing equipment and bank along.
Undercity Switchyard · transfer points · panel 1 of 5 · columns 0–39
Only the selected route’s transfer positions are marked with numbered amber diamonds.
Undercity Switchyard · transfer points · panel 2 of 5 · columns 40–82
Only the selected route’s transfer positions are marked with numbered amber diamonds.
Undercity Switchyard · transfer points · panel 3 of 5 · columns 82–124
Only the selected route’s transfer positions are marked with numbered amber diamonds.
Undercity Switchyard · transfer points · panel 4 of 5 · columns 124–166
Only the selected route’s transfer positions are marked with numbered amber diamonds.
Undercity Switchyard · transfer points · panel 5 of 5 · columns 166–207
123
Only the selected route’s transfer positions are marked with numbered amber diamonds.
1. Dispatch to Mars · 2. Dispatch to Phobos · 3. Dispatch to the Belt
This link leads to an optional part of the flight. Open the section below to continue.Continue to the linked placeThis link leads to an optional part of the flight. Open the section below to continue.Continue to the linked place
Daylight! After all those underground cages, even a set of stairs feels like a treat. CoCoMan still has to clear the mouth of the duct and make his run at the relay mast before he can put the switchyard behind him.
Entry
Back in daylight, keep an eye on the remaining clock as you approach the mast.
Return or onward flight
Catch the mast to bank the finish and continue to Tracking Dishes.
Follow this transfer
Catch the daylight relay to begin Tracking Dishes.
This link leads to an optional part of the flight. Open the section below to continue.Continue to the linked placeThis link leads to an optional part of the flight. Open the section below to continue.Continue to the linked placeThis link leads to an optional part of the flight. Open the section below to continue.Continue to the linked placeThis link leads to an optional part of the flight. Open the section below to continue.Continue to the linked placeThis link leads to an optional part of the flight. Open the section below to continue.Continue to the linked placeThis link leads to an optional part of the flight. Open the section below to continue.Continue to the linked placeThis link leads to an optional part of the flight. Open the section below to continue.Continue to the linked placeThis link leads to an optional part of the flight. Open the section below to continue.Continue to the linked placeThis link leads to an optional part of the flight. Open the section below to continue.Continue to the linked placeThis link leads to an optional part of the flight. Open the section below to continue.Continue to the linked placeThis link leads to an optional part of the flight. Open the section below to continue.Continue to the linked placeThis link leads to an optional part of the flight. Open the section below to continue.Continue to the linked placeThis link leads to an optional part of the flight. Open the section below to continue.Continue to the linked placeThis link leads to an optional part of the flight. Open the section below to continue.Continue to the linked placeThis link leads to an optional part of the flight. Open the section below to continue.Continue to the linked placeThis link leads to an optional part of the flight. Open the section below to continue.Continue to the linked placeThis link leads to an optional part of the flight. Open the section below to continue.Continue to the linked placeThis link leads to an optional part of the flight. Open the section below to continue.Continue to the linked placeThis link leads to an optional part of the flight. Open the section below to continue.Continue to the linked placeThis link leads to an optional part of the flight. Open the section below to continue.Continue to the linked placeThis link leads to an optional part of the flight. Open the section below to continue.Continue to the linked placeThis link leads to an optional part of the flight. Open the section below to continue.Continue to the linked placeThis link leads to an optional part of the flight. Open the section below to continue.Continue to the linked placeThis link leads to an optional part of the flight. Open the section below to continue.Continue to the linked placeThis link leads to an optional part of the flight. Open the section below to continue.Continue to the linked placeThis link leads to an optional part of the flight. Open the section below to continue.Continue to the linked placeThis link leads to an optional part of the flight. Open the section below to continue.Continue to the linked placeThis link leads to an optional part of the flight. Open the section below to continue.Continue to the linked placeThis link leads to an optional part of the flight. Open the section below to continue.Continue to the linked placeThis link leads to an optional part of the flight. Open the section below to continue.Continue to the linked placeThis link leads to an optional part of the flight. Open the section below to continue.Continue to the linked placeThis link leads to an optional part of the flight. Open the section below to continue.Continue to the linked placeThis link leads to an optional part of the flight. Open the section below to continue.Continue to the linked placeThis link leads to an optional part of the flight. Open the section below to continue.Continue to the linked placeThis link leads to an optional part of the flight. Open the section below to continue.Continue to the linked placeThis link leads to an optional part of the flight. Open the section below to continue.Continue to the linked placeThis link leads to an optional part of the flight. Open the section below to continue.Continue to the linked placeThis link leads to an optional part of the flight. Open the section below to continue.Continue to the linked placeThis link leads to an optional part of the flight. Open the section below to continue.Continue to the linked placeThis link leads to an optional part of the flight. Open the section below to continue.Continue to the linked placeThis link leads to an optional part of the flight. Open the section below to continue.Continue to the linked placeThis link leads to an optional part of the flight. Open the section below to continue.Continue to the linked placeThis link leads to an optional part of the flight. Open the section below to continue.Continue to the linked placeThis link leads to an optional part of the flight. Open the section below to continue.Continue to the linked placeThis link leads to an optional part of the flight. Open the section below to continue.Continue to the linked placeThis link leads to an optional part of the flight. Open the section below to continue.Continue to the linked placeThis link leads to an optional part of the flight. Open the section below to continue.Continue to the linked placeThis link leads to an optional part of the flight. Open the section below to continue.Continue to the linked placeThis link leads to an optional part of the flight. Open the section below to continue.Continue to the linked placeThis link leads to an optional part of the flight. Open the section below to continue.Continue to the linked placeThis link leads to an optional part of the flight. Open the section below to continue.Continue to the linked place
Once control returns in the tunnel, let a Duct Tap finish its stroke before crossing its mouth. Land from above on a moving freight cage. You can walk or jump again while the cage carries you.
Freight descent. Column 2, row 3. The pilot drops into the tunnel. Be ready to steer as the first patrols approach. Locate landmark 1
Duct Tap. Column 103, row 10. The gauge rises from the pipe rim. Give its bellows room to retract before crossing the lip. Locate landmark 2
Freight cage. Column 139, row 7. Catch the grate from above. Steer while riding, or jump clear when the landing is in reach. Locate landmark 3
Audit inlet. Column 103.5, row 10. Center the pilot on the guarded inlet and hold Down after the guard clears. The Freight Audit has its own cargo. Locate landmark 4
Audit return. Column 115.5, row 11. The Audit outlet returns the pilot to the tunnel with halfway earned. Your bank and remaining time carry across. Locate landmark 5
Ordinary outlet. Column 166, row 8. Walk Right into the side mouth while standing at its opening. This brings the courier into daylight for the relay. Locate landmark 6
Launch Exchange. Column 179, row 9. At the maintenance dispatch, read the destination boards before choosing a duct. An express dispatch leaves this course for the Belt, Phobos or Mars with your existing suit and bank. Locate landmark 7
Patrol arrival. Column 16, row 12. This marks an encounter position. Moving hazards can leave this point during play. Locate landmark 8
Patrol arrival. Column 17, row 11. This marks an encounter position. Moving hazards can leave this point during play. Locate landmark 9
Patrol arrival. Column 29, row 12. This marks an encounter position. Moving hazards can leave this point during play. Locate landmark 10
Patrol arrival · 2 machines. Column 47, row 12. This marks an encounter position. Moving hazards can leave this point during play. Locate landmark 11
Patrol arrival. Column 59, row 12. This marks an encounter position. Moving hazards can leave this point during play. Locate landmark 12
Patrol arrival. Column 62, row 12. This marks an encounter position. Moving hazards can leave this point during play. Locate landmark 13
Patrol arrival. Column 64, row 12. This marks an encounter position. Moving hazards can leave this point during play. Locate landmark 14
Patrol arrival. Column 73, row 4. This marks an encounter position. Moving hazards can leave this point during play. Locate landmark 15
Patrol arrival · 2 machines. Column 79, row 8. This marks an encounter position. Moving hazards can leave this point during play. Locate landmark 16
Patrol arrival · 3 machines. Column 102, row 12. This marks an encounter position. Moving hazards can leave this point during play. Locate landmark 17
Duct Tap. Column 109, row 9. This marks an encounter position. Moving hazards can leave this point during play. Locate landmark 18
Patrol arrival. Column 113, row 12. This marks an encounter position. Moving hazards can leave this point during play. Locate landmark 19
Patrol arrival · 2 machines. Column 138, row 8. This marks an encounter position. Moving hazards can leave this point during play. Locate landmark 20
Freight lift. Column 139, row 13. Watch the surface move before boarding. Locate landmark 21
Patrol arrival. Column 146, row 12. This marks an encounter position. Moving hazards can leave this point during play. Locate landmark 22
Freight lift. Column 154, row 1. Watch the surface move before boarding. Locate landmark 23
Freight lift. Column 154, row 9. Watch the surface move before boarding. Locate landmark 24
Duct Tap. Column 179, row 11. This marks an encounter position. Moving hazards can leave this point during play. Locate landmark 25
208 columns by 15 rows. Full room with marked rewards and optional landmarks. Brown tile marks soil, brick or steps. A gold-topped tread is a platform. Green mouths mark ducts. Amber dots mark encounters.
208 columns by 15 rows. Full room with marked rewards and optional landmarks. Brown tile marks soil, brick or steps. A gold-topped tread is a platform. Green mouths mark ducts. Amber dots mark encounters.
208 columns by 15 rows. Full room with marked rewards and optional landmarks. Brown tile marks soil, brick or steps. A gold-topped tread is a platform. Green mouths mark ducts. Amber dots mark encounters.
208 columns by 15 rows. Full room with marked rewards and optional landmarks. Brown tile marks soil, brick or steps. A gold-topped tread is a platform. Green mouths mark ducts. Amber dots mark encounters.
208 columns by 15 rows. Full room with marked rewards and optional landmarks. Brown tile marks soil, brick or steps. A gold-topped tread is a platform. Green mouths mark ducts. Amber dots mark encounters.
7. Launch Exchange · 25. Duct Tap
This link leads to an optional part of the flight. Open the section below to continue.Continue to the linked placeThis link leads to an optional part of the flight. Open the section below to continue.Continue to the linked placeThis link leads to an optional part of the flight. Open the section below to continue.Continue to the linked placeThis link leads to an optional part of the flight. Open the section below to continue.Continue to the linked placeThis link leads to an optional part of the flight. Open the section below to continue.Continue to the linked place
The Freight Audit has seventeen loose foils and a timed dispenser. Take as much of the cargo as you like. A same-life return remembers what has already paid.
Audit arrival. Column 2, row 2. The transfer drops you into the cargo room. Let your boots meet the floor before moving off. Locate landmark 1
Tunnel return. Column 13, row 12. Walk Right into the side mouth from the floor. The outlet puts you back in the Switchyard and earns its halfway checkpoint. A lost life inside the Audit starts at the tunnel entrance. Locate landmark 2
20 columns by 15 rows. Full room with marked rewards and optional landmarks. Brown tile marks soil, brick or steps. A gold-topped tread is a platform. Green mouths mark ducts. Amber dots mark encounters.
 To Titan and Back