A folded tag tumbles out of the crane overhead. Easy enough to step around, CoCoMan thinks. Then it lands, sprouts spikes and starts walking. The crane follows him across the slag belt, and suddenly a roof sounds like the finest invention in the solar system.
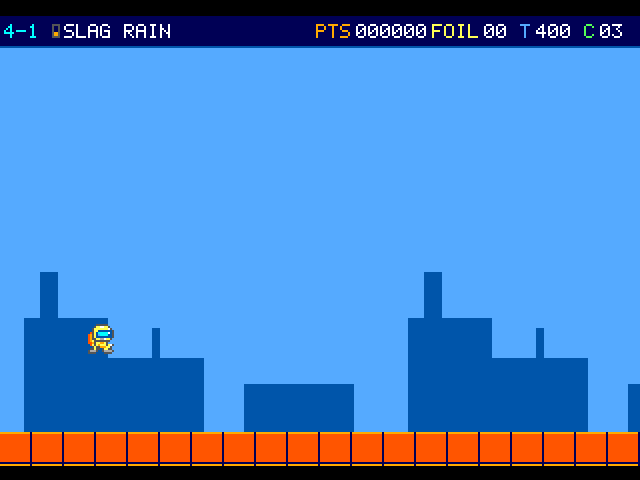
Blue refinery silhouettes rise from an orange deck. The small yellow-and-blue courier is airborne against the skyline.
On the flight
Watch the overhead Tag Tender open its hatch, then follow the folded packet all the way to the ground. It opens into a walking Burr Jack. Both the falling packet and its exposed pins can hurt from above.
Course map
Slag Rain
The Tag Tender follows overhead. A folded packet that misses you can still land ahead and unfold into a walking Burr Jack.
Slag intake. Column 2.5, row 12. A fresh shift gives you a 400 clock. Once halfway is earned, backtracking keeps it lit. Locate landmark 1
Duct Tap. Column 22, row 10. Use the fixed lip to judge the bellows as they rise and retract. Wait clear of the rim before committing to a landing. Locate landmark 2
Tag Tender arrival. Column 30, row 3. Watch the overhead hatch. A stomp works on the Tender itself. Its falling packet and the walking pins can hurt your boots. Locate landmark 3
Slag relay. Column 225, row 10. Catch the pennant to enter Belt Freight Junction. Locate landmark 4
Duct Tap. Column 21, row 10. This marks an encounter position. Moving hazards can leave this point during play. Locate landmark 5
Duct Tap. Column 116, row 9. This marks an encounter position. Moving hazards can leave this point during play. Locate landmark 6
Duct Tap. Column 132, row 9. This marks an encounter position. Moving hazards can leave this point during play. Locate landmark 7
Duct Tap. Column 163, row 11. This marks an encounter position. Moving hazards can leave this point during play. Locate landmark 8
Slag Rain · panel 1 of 5 · columns 0–45
234 columns by 15 rows. Full room at the start of a flight. Brown tile marks soil, brick or steps. A gold-topped tread is a platform. Green mouths mark ducts. Amber dots mark encounters.
1. Slag intake · 2. Duct Tap · 3. Tag Tender arrival · 5. Duct Tap
Slag Rain · panel 2 of 5 · columns 45–92
234 columns by 15 rows. Full room at the start of a flight. Brown tile marks soil, brick or steps. A gold-topped tread is a platform. Green mouths mark ducts. Amber dots mark encounters.
Slag Rain · panel 3 of 5 · columns 92–140
234 columns by 15 rows. Full room at the start of a flight. Brown tile marks soil, brick or steps. A gold-topped tread is a platform. Green mouths mark ducts. Amber dots mark encounters.
6. Duct Tap · 7. Duct Tap
Slag Rain · panel 4 of 5 · columns 140–187
234 columns by 15 rows. Full room at the start of a flight. Brown tile marks soil, brick or steps. A gold-topped tread is a platform. Green mouths mark ducts. Amber dots mark encounters.
8. Duct Tap
Slag Rain · panel 5 of 5 · columns 187–233
234 columns by 15 rows. Full room at the start of a flight. Brown tile marks soil, brick or steps. A gold-topped tread is a platform. Green mouths mark ducts. Amber dots mark encounters.
4. Slag relay
Open the scenery view
Slag Rain · scenery
The Slag Rain landscape and its underground bunker use different backdrops. This view follows the columns painted for this room.
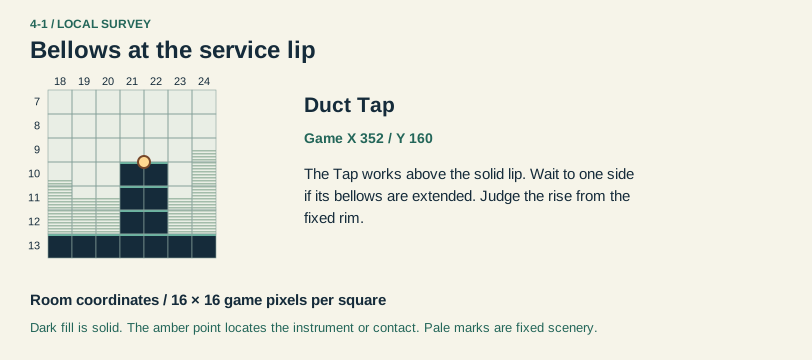
Duct Tap. The Tap works above the solid lip. Wait to one side if its bellows are extended. Judge the rise from the fixed rim. Locate landmark 1
Bellows at the service lip · local section · panel 1 of 1
1
Local section, columns 18–24, rows 7–13. One grid square corresponds to 16 by 16 game pixels. The Tap works above the solid lip. Wait to one side if its bellows are extended. Judge the rise from the fixed rim.
1. Duct Tap
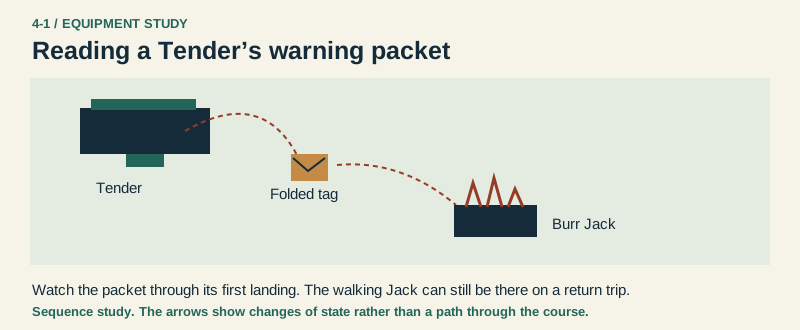
Reading a Tender’s warning packet
An overhead sled ejects a folded packet. It rises, falls, and opens three bright pins on first ground contact.
Move between clear stretches of the yard and watch both the tracking sled overhead and the Jacks already walking. A timed bank is near the mast. A spare core here depends on a qualifying arrival.
Return or onward flight
The pennant takes you to Belt Freight Junction. Once earned, your checkpoint survives a walk back through the yard.
This link leads to an optional part of the flight. Open the section below to continue.Continue to the linked placeThis link leads to an optional part of the flight. Open the section below to continue.Continue to the linked placeThis link leads to an optional part of the flight. Open the section below to continue.Continue to the linked placeThis link leads to an optional part of the flight. Open the section below to continue.Continue to the linked placeThis link leads to an optional part of the flight. Open the section below to continue.Continue to the linked placeThis link leads to an optional part of the flight. Open the section below to continue.Continue to the linked placeThis link leads to an optional part of the flight. Open the section below to continue.Continue to the linked placeThis link leads to an optional part of the flight. Open the section below to continue.Continue to the linked placeThis link leads to an optional part of the flight. Open the section below to continue.Continue to the linked placeThis link leads to an optional part of the flight. Open the section below to continue.Continue to the linked placeThis link leads to an optional part of the flight. Open the section below to continue.Continue to the linked placeThis link leads to an optional part of the flight. Open the section below to continue.Continue to the linked placeThis link leads to an optional part of the flight. Open the section below to continue.Continue to the linked placeThis link leads to an optional part of the flight. Open the section below to continue.Continue to the linked placeThis link leads to an optional part of the flight. Open the section below to continue.Continue to the linked placeThis link leads to an optional part of the flight. Open the section below to continue.Continue to the linked placeThis link leads to an optional part of the flight. Open the section below to continue.Continue to the linked placeThis link leads to an optional part of the flight. Open the section below to continue.Continue to the linked placeThis link leads to an optional part of the flight. Open the section below to continue.Continue to the linked placeThis link leads to an optional part of the flight. Open the section below to continue.Continue to the linked place
For once there's a ceiling between CoCoMan and that crane. The sand bunker even has foils stashed below the belt. He can fill his pockets before sticking his helmet back out to see what the weather is dropping now.
Entry
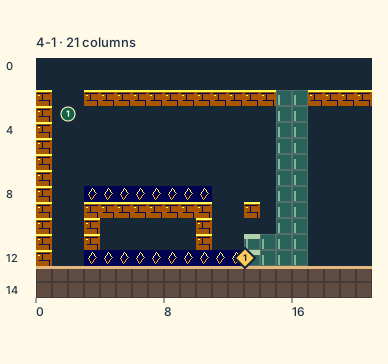
Wait until the inlet is clear, then center the pilot and hold Down. Look for eighteen foils and the suit brick. A tall pilot can crouch and crawl or duck-jump under the low ceiling.
Return or onward flight
Enter the side outlet to rise back to the yard and earn the checkpoint. Later visits on the same life remember your foils and suit brick.
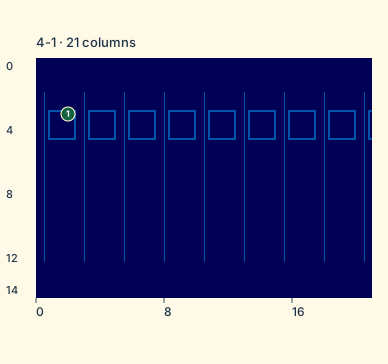
Bunker intake. Column 1.5, row 3. You drop in from above. Items you collected on a previous visit this life stay spent. Locate landmark 1
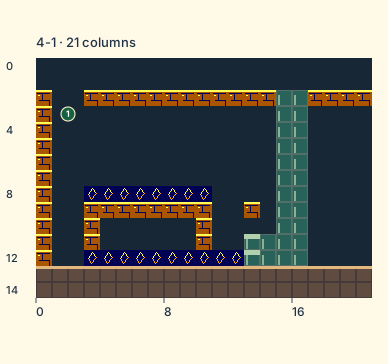
Sand Bunker · panel 1 of 1 · columns 0–20
21 columns by 15 rows. Full room at the start of a flight. Brown tile marks soil, brick or steps. A gold-topped tread is a platform. Green mouths mark ducts. Amber dots mark encounters.
1. Bunker intake
Open the scenery view
Sand Bunker · scenery
The Slag Rain landscape and its underground bunker use different backdrops. This view follows the columns painted for this room.
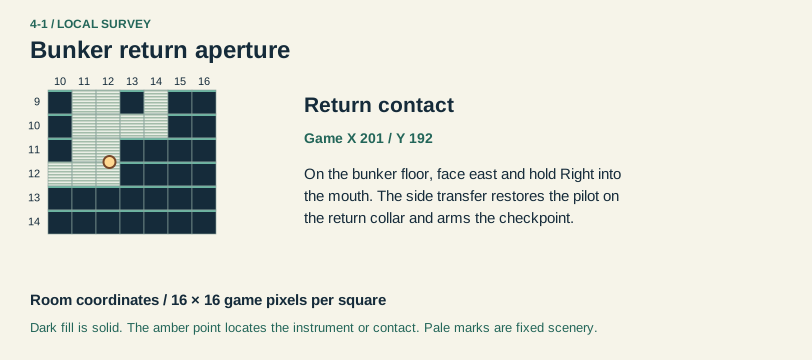
Return contact. On the bunker floor, face east and hold Right into the mouth. The side transfer restores the pilot on the return collar and arms the checkpoint. Locate landmark 1
Bunker return aperture · local section · panel 1 of 1
1
Local section, columns 10–16, rows 9–14. One grid square corresponds to 16 by 16 game pixels. On the bunker floor, face east and hold Right into the mouth. The side transfer restores the pilot on the return collar and arms the checkpoint.
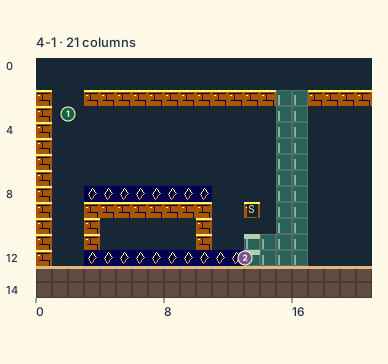
Service outlet. Column 12.5625, row 12. Stand on the bunker floor and walk Right into the mouth. The rise back to the service lip earns the surface checkpoint. Locate landmark 1
Sand Bunker · transfer points · panel 1 of 1 · columns 0–20
1
Only the selected route’s transfer positions are marked with numbered amber diamonds.
1. Service outlet
This link leads to an optional part of the flight. Open the section below to continue.Continue to the linked placeThis link leads to an optional part of the flight. Open the section below to continue.Continue to the linked placeThis link leads to an optional part of the flight. Open the section below to continue.Continue to the linked placeThis link leads to an optional part of the flight. Open the section below to continue.Continue to the linked placeThis link leads to an optional part of the flight. Open the section below to continue.Continue to the linked placeThis link leads to an optional part of the flight. Open the section below to continue.Continue to the linked placeThis link leads to an optional part of the flight. Open the section below to continue.Continue to the linked placeThis link leads to an optional part of the flight. Open the section below to continue.Continue to the linked placeThis link leads to an optional part of the flight. Open the section below to continue.Continue to the linked placeThis link leads to an optional part of the flight. Open the section below to continue.Continue to the linked placeThis link leads to an optional part of the flight. Open the section below to continue.Continue to the linked placeThis link leads to an optional part of the flight. Open the section below to continue.Continue to the linked placeThis link leads to an optional part of the flight. Open the section below to continue.Continue to the linked placeThis link leads to an optional part of the flight. Open the section below to continue.Continue to the linked placeThis link leads to an optional part of the flight. Open the section below to continue.Continue to the linked placeThis link leads to an optional part of the flight. Open the section below to continue.Continue to the linked placeThis link leads to an optional part of the flight. Open the section below to continue.Continue to the linked place
Slag intake. Column 2.5, row 12. A fresh shift gives you a 400 clock. Once halfway is earned, backtracking keeps it lit. Locate landmark 1
Duct Tap. Column 22, row 10. Use the fixed lip to judge the bellows as they rise and retract. Wait clear of the rim before committing to a landing. Locate landmark 2
Tag Tender arrival. Column 30, row 3. Watch the overhead hatch. A stomp works on the Tender itself. Its falling packet and the walking pins can hurt your boots. Locate landmark 3
Slag relay. Column 225, row 10. Catch the pennant to enter Belt Freight Junction. Locate landmark 4
Duct Tap. Column 21, row 10. This marks an encounter position. Moving hazards can leave this point during play. Locate landmark 5
Duct Tap. Column 116, row 9. This marks an encounter position. Moving hazards can leave this point during play. Locate landmark 6
Duct Tap. Column 132, row 9. This marks an encounter position. Moving hazards can leave this point during play. Locate landmark 7
Duct Tap. Column 163, row 11. This marks an encounter position. Moving hazards can leave this point during play. Locate landmark 8
234 columns by 15 rows. Full room with marked rewards and optional landmarks. Brown tile marks soil, brick or steps. A gold-topped tread is a platform. Green mouths mark ducts. Amber dots mark encounters.
1. Slag intake · 2. Duct Tap · 3. Tag Tender arrival · 5. Duct Tap
234 columns by 15 rows. Full room with marked rewards and optional landmarks. Brown tile marks soil, brick or steps. A gold-topped tread is a platform. Green mouths mark ducts. Amber dots mark encounters.
234 columns by 15 rows. Full room with marked rewards and optional landmarks. Brown tile marks soil, brick or steps. A gold-topped tread is a platform. Green mouths mark ducts. Amber dots mark encounters.
234 columns by 15 rows. Full room with marked rewards and optional landmarks. Brown tile marks soil, brick or steps. A gold-topped tread is a platform. Green mouths mark ducts. Amber dots mark encounters.
234 columns by 15 rows. Full room with marked rewards and optional landmarks. Brown tile marks soil, brick or steps. A gold-topped tread is a platform. Green mouths mark ducts. Amber dots mark encounters.
4. Slag relay
This link leads to an optional part of the flight. Open the section below to continue.Continue to the linked placeThis link leads to an optional part of the flight. Open the section below to continue.Continue to the linked placeThis link leads to an optional part of the flight. Open the section below to continue.Continue to the linked placeThis link leads to an optional part of the flight. Open the section below to continue.Continue to the linked placeThis link leads to an optional part of the flight. Open the section below to continue.Continue to the linked place
Bunker intake. Column 1.5, row 3. You drop in from above. Items you collected on a previous visit this life stay spent. Locate landmark 1
Service outlet. Column 12.5625, row 12. Stand on the bunker floor and walk Right into the mouth. The rise back to the service lip earns the surface checkpoint. Locate landmark 2
21 columns by 15 rows. Full room with marked rewards and optional landmarks. Brown tile marks soil, brick or steps. A gold-topped tread is a platform. Green mouths mark ducts. Amber dots mark encounters.
 To Titan and Back