

Back to VCC Plus Games
CoCoManTo Titan and Back
Course 6-4

Night Shift in the Inductor

The Inductor is still running, with hot links swinging from the floor and the ceiling. CoCoMan needs to reach Cal’s signal station on the other side of Echo Bell’s bridge. Judging by the forks in the air, Echo Bell would prefer to keep the bridge to itself.

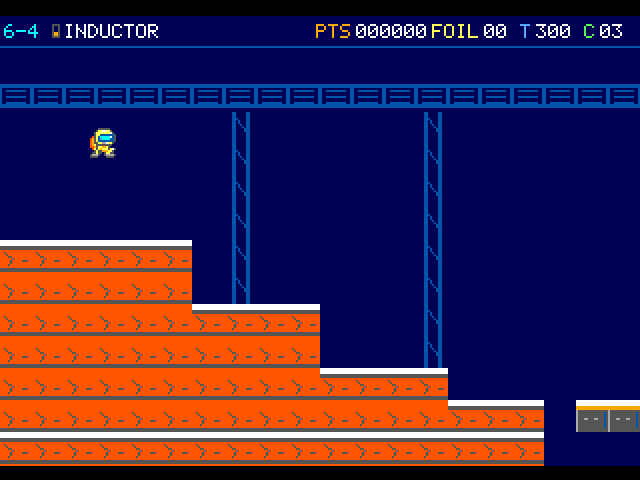
The courier drops toward the first orange stair in the Inductor. Narrow blue supports reach up to the overhead rail.

On the flight

Read the turning hot beads, then look separately at the floor vents. Near the bridge, Echo Bell raises a fork before it releases. A loose fork can still cross either the grating or the upper carrier.

Course map

Inductor and Signal Chamber

Open the full-size illustration

  1. Arrival. Column 2, row 6. The pilot first takes control in this part of the room. Locate landmark 1
  2. Short Thermal Rotor. Column 28, row 10. Encounter reference. A moving threat can leave this position during play. Locate landmark 2
  3. Vent Pulse. Column 30, row 14. Encounter reference. A moving threat can leave this position during play. Locate landmark 3
  4. Short Thermal Rotor · 2. Column 46, row 7. Encounter reference. A moving threat can leave this position during play. Locate landmark 4
  5. Short Thermal Rotor · 3. Column 55, row 7. Encounter reference. A moving threat can leave this position during play. Locate landmark 5
  6. Short Thermal Rotor · 4. Column 64, row 12. Encounter reference. A moving threat can leave this position during play. Locate landmark 6
  7. Short Thermal Rotor · 5. Column 68, row 8. Encounter reference. A moving threat can leave this position during play. Locate landmark 7
  8. Short Thermal Rotor · 6. Column 76, row 8. Encounter reference. A moving threat can leave this position during play. Locate landmark 8
  9. Short Thermal Rotor · 7. Column 80, row 12. Encounter reference. A moving threat can leave this position during play. Locate landmark 9
  10. Plasma Burst. Column 96, row 12. Encounter reference. A moving threat can leave this position during play. Locate landmark 10
  11. Plasma Warning Lamp. Column 100, row 9. Encounter reference. A moving threat can leave this position during play. Locate landmark 11
  12. Plasma Warning Lamp · 2. Column 100, row 11. Encounter reference. A moving threat can leave this position during play. Locate landmark 12
  13. Inspection Carrier. Column 104, row 7. Watch the moving tread before boarding. Its position changes during play. Locate landmark 13

    Follow the optional transfer

  14. Vent Pulse · 2. Column 110, row 14. Encounter reference. A moving threat can leave this position during play. Locate landmark 14
  15. Torque Fork. Column 114, row 8. Encounter reference. A moving threat can leave this position during play. Locate landmark 15
  16. Echo Bell Warden. Column 115, row 9. Encounter reference. A moving threat can leave this position during play. Locate landmark 16
  17. Relay Cutoff. Column 121, row 10. Approach this relay to finish the room. Locate landmark 17

    Continue to 7-1 · Arrival

Landmarks to recognize

Paired rotor banks
Find the opening between the individual beads before stepping into either sweep.
Echo Bell's fork
The raised tool is your warning. Once released it keeps flying, even if an Arc hit reaches the Warden.
Give me a hint

Stand where you can see both the carrier and the grating. Their paths meet at the same east cutoff.

Routes and discoveries

This link leads to an optional part of the flight. Open the section below to continue.Continue to the linked place

Inductor and Signal Chamber

Entry

Pass the alternating rotor banks and watch the approach emitters before the bridge. At the cutoff, pass the live Warden or land five Arc sparks first.

Return or onward flight

Walk on to Cal and his vacuum flask. Both outcomes carry a qualified reserve into the Return-Line Battery. A lost life before completion restarts at the intake.

This link leads to an optional part of the flight. Open the section below to continue.Continue to the linked placeThis link leads to an optional part of the flight. Open the section below to continue.Continue to the linked placeThis link leads to an optional part of the flight. Open the section below to continue.Continue to the linked placeThis link leads to an optional part of the flight. Open the section below to continue.Continue to the linked placeThis link leads to an optional part of the flight. Open the section below to continue.Continue to the linked place

Inspection Carrier

The little inspection platform runs a rail above the grating. CoCoMan gets a ride across the bridge, but he’ll still have to keep an eye on Echo Bell. The Warden throws high.

Entry

Land from above on the little carrier under the inspection rail. Ride its tread and watch for a high fork as you approach Echo Bell.

Return or onward flight

Step or jump from the carrier to the east cutoff. The rail itself provides no foothold.

Inductor and Signal Chamber · transfer points

Open the full-size illustration

  1. West bridge pier. Column 104, row 11. This is the transfer position on this route. Locate landmark 1

    Board the moving tread · Inspection Carrier

This link leads to an optional part of the flight. Open the section below to continue.Continue to the linked placeThis link leads to an optional part of the flight. Open the section below to continue.Continue to the linked placeThis link leads to an optional part of the flight. Open the section below to continue.Continue to the linked placeThis link leads to an optional part of the flight. Open the section below to continue.Continue to the linked placeThis link leads to an optional part of the flight. Open the section below to continue.Continue to the linked placeThis link leads to an optional part of the flight. Open the section below to continue.Continue to the linked placeThis link leads to an optional part of the flight. Open the section below to continue.Continue to the linked place

Bridge Grating

On the lower crossing, a Vent Pulse jumps through the grating. CoCoMan has trouble on two fronts here, with one eye on the next pulse and the other on Echo Bell’s throwing arm.

Entry

Stay on the lower bridge and watch for the second Vent Pulse coming up through the grating. Time your crossing between that pulse and the loose fork.

Return or onward flight

Reach the same east lever from the bridge. Take the fixed footing beyond it as the crossing releases.

Inductor and Signal Chamber · transfer points

Open the full-size illustration

  1. West bridge pier. Column 104, row 11. This is the transfer position on this route. Locate landmark 1

    Cross the lower grating · East grating

  2. East grating. Column 119, row 11. This is the transfer position on this route. Locate landmark 2

    Step onto the cutoff footing · Relay Cutoff

