

Back to VCC Plus Games
CoCoManTo Titan and Back
Course 6-3

The Counterweight Choir

The rescue shaft has a hoist, moving shuttles and pans that work in pairs. As soon as CoCoMan puts his boots on one pan, its partner starts to rise. He’s just getting the hang of that when a lamp warns that a Courier Dart is on its way.

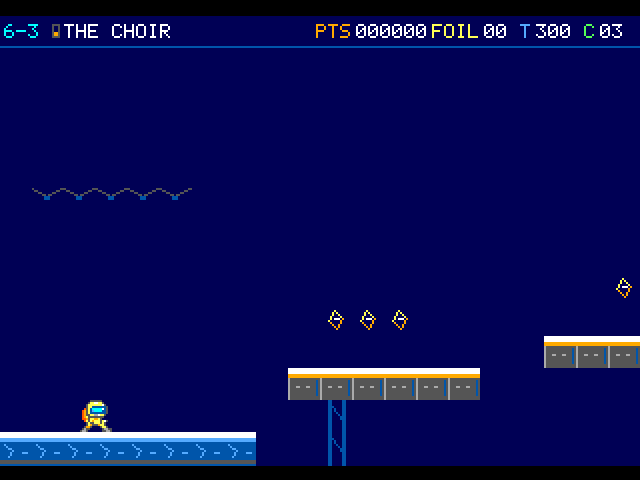
The first floating shelf is topped by a row of foils. The starting ice deck ends just before it.

On the flight

Give each moving system a moment to show how it works. A spring compresses, a shuttle continues along its track, and a linked pan changes height as you stand on its partner. Fixed berths give you room to change your timing.

Course map

Rescue shaft

Open the full-size illustration

  1. Arrival. Column 2, row 12. The pilot first takes control in this part of the room. Locate landmark 1
  2. Vertical Cargo Lift. Column 27, row 11. Watch the moving tread before boarding. Its position changes during play. Locate landmark 2
  3. Sprung Buffer. Column 32, row 7. Hold Jump for the regular rebound or press again partway through compression. Locate landmark 3

    Follow the optional transfer

  4. Horizontal Rescue Shuttle. Column 42, row 9. Watch the moving tread before boarding. Its position changes during play. Locate landmark 4
  5. Horizontal Rescue Shuttle · 2. Column 52, row 10. Watch the moving tread before boarding. Its position changes during play. Locate landmark 5
  6. Horizontal Rescue Shuttle · 3. Column 59, row 9. Watch the moving tread before boarding. Its position changes during play. Locate landmark 6
  7. Dart Lane Lamp. Column 68, row 8. The lamp commits a dart to the marked height before the shot crosses. Locate landmark 7
  8. Courier Dart. Column 69, row 8. Encounter reference. A moving threat can leave this position during play. Locate landmark 8
  9. Linked Counterweight Pan. Column 71, row 9. The paired treads exchange height under the rider’s weight. Locate landmark 9
  10. Linked Counterweight Pan · 2. Column 77, row 8. The paired treads exchange height under the rider’s weight. Locate landmark 10
  11. Linked Counterweight Pan · 3. Column 84, row 8. The paired treads exchange height under the rider’s weight. Locate landmark 11
  12. Linked Counterweight Pan · 4. Column 89, row 10. The paired treads exchange height under the rider’s weight. Locate landmark 12
  13. Checkpoint shelter. Column 95, row 9. Stand here between moving systems. A paid retry returns to X1528. Locate landmark 13
  14. Sprung Buffer · 2. Column 101, row 8. Hold Jump for the regular rebound or press again partway through compression. Locate landmark 14
  15. Linked Counterweight Pan · 5. Column 104, row 9. The paired treads exchange height under the rider’s weight. Locate landmark 15
  16. Linked Counterweight Pan · 6. Column 109, row 8. The paired treads exchange height under the rider’s weight. Locate landmark 16
  17. Dart Lane Lamp · 2. Column 111, row 9. The lamp commits a dart to the marked height before the shot crosses. Locate landmark 17
  18. Courier Dart · 2. Column 112, row 9. Encounter reference. A moving threat can leave this position during play. Locate landmark 18
  19. Collapsing Escape Pod. Column 118, row 10. Watch the moving tread before boarding. Its position changes during play. Locate landmark 19
  20. Collapsing Escape Pod · 2. Column 122, row 9. Watch the moving tread before boarding. Its position changes during play. Locate landmark 20
  21. Collapsing Escape Pod · 3. Column 127, row 10. Watch the moving tread before boarding. Its position changes during play. Locate landmark 21
  22. Collapsing Escape Pod · 4. Column 132, row 9. Watch the moving tread before boarding. Its position changes during play. Locate landmark 22

    Follow the optional transfer

  23. Relay Mast. Column 146, row 12. Approach this relay to finish the room. Locate landmark 23

    Continue to 6-4 · Arrival

Landmarks to recognize

Shuttle berths
Let the next deck come level before committing to the next jump. The same berths work when you head back.
Sheltered perch
Get both boots down on the checkpoint as you travel east. It gives you a quiet place between systems.
Give me a hint

Near the departure landing, look beneath the hanging pods before you board one. There is solid footing down there even after a pod sinks.

Routes and discoveries

This link leads to an optional part of the flight. Open the section below to continue.Continue to the linked place

Rescue shaft

Entry

Link the cargo lift, spring bench, three shuttles and paired pans, using fixed landing spots between them. Give the Dart lane time to clear when its lamp comes on.

Return or onward flight

At the east terrace, continue to the mast for the Inductor. Collect all 24 loose foils in one life to qualify the battery reserve after Cal's relay.

This link leads to an optional part of the flight. Open the section below to continue.Continue to the linked placeThis link leads to an optional part of the flight. Open the section below to continue.Continue to the linked placeThis link leads to an optional part of the flight. Open the section below to continue.Continue to the linked placeThis link leads to an optional part of the flight. Open the section below to continue.Continue to the linked placeThis link leads to an optional part of the flight. Open the section below to continue.Continue to the linked placeThis link leads to an optional part of the flight. Open the section below to continue.Continue to the linked placeThis link leads to an optional part of the flight. Open the section below to continue.Continue to the linked place

Upper Survey Shelf

A spring near the lift bench offers a ride well above the working decks. CoCoMan has the whole jump to spot the survey shelf, where extra foils are waiting for a clean landing.

Entry

Land on the first spring and press Jump afresh while it is compressed for extra height. Ordinary held jumps from the approach can also reach the shelf and its four foils.

Return or onward flight

Rejoin the shuttle crossing by the lift bench or use the lower perch to approach the first ride.

Rescue shaft · transfer points

Open the full-size illustration

  1. Upper survey shelf. Column 37, row 6. This is the transfer position on this route. Locate landmark 1

    Rejoin the shuttle crossing · Horizontal Rescue Shuttle

  2. Lower perch. Column 37, row 10. This is the transfer position on this route. Locate landmark 2

    Return by the lower perch · Sprung Buffer

This link leads to an optional part of the flight. Open the section below to continue.Continue to the linked placeThis link leads to an optional part of the flight. Open the section below to continue.Continue to the linked placeThis link leads to an optional part of the flight. Open the section below to continue.Continue to the linked placeThis link leads to an optional part of the flight. Open the section below to continue.Continue to the linked placeThis link leads to an optional part of the flight. Open the section below to continue.Continue to the linked placeThis link leads to an optional part of the flight. Open the section below to continue.Continue to the linked placeThis link leads to an optional part of the flight. Open the section below to continue.Continue to the linked place

Escape Pods

The escape pod looks sturdy until CoCoMan steps onto it and the rope begins to fray. There’s still time to reach the next pod, provided he’s ready for the same thing to happen there.

Entry

Step out from the departure landing and cross the four pods promptly. The rope frays once the pilot puts weight on a pod, then the pod descends.

Return or onward flight

Continue to the east terrace. If you lose a pod, use the fixed recovery shelves below. The settled pods stay down for the rest of this life.

Rescue shaft · transfer points

Open the full-size illustration

  1. Departure landing. Column 113, row 10. This is the transfer position on this route. Locate landmark 1

    Board the first pod · Collapsing Escape Pod

  2. East terrace. Column 138, row 12. This is the transfer position on this route. Locate landmark 2
This link leads to an optional part of the flight. Open the section below to continue.Continue to the linked placeThis link leads to an optional part of the flight. Open the section below to continue.Continue to the linked placeThis link leads to an optional part of the flight. Open the section below to continue.Continue to the linked placeThis link leads to an optional part of the flight. Open the section below to continue.Continue to the linked placeThis link leads to an optional part of the flight. Open the section below to continue.Continue to the linked placeThis link leads to an optional part of the flight. Open the section below to continue.Continue to the linked placeThis link leads to an optional part of the flight. Open the section below to continue.Continue to the linked placeThis link leads to an optional part of the flight. Open the section below to continue.Continue to the linked placeThis link leads to an optional part of the flight. Open the section below to continue.Continue to the linked placeThis link leads to an optional part of the flight. Open the section below to continue.Continue to the linked placeThis link leads to an optional part of the flight. Open the section below to continue.Continue to the linked placeThis link leads to an optional part of the flight. Open the section below to continue.Continue to the linked placeThis link leads to an optional part of the flight. Open the section below to continue.Continue to the linked place

Recovery Ledges

Once the pods sink, the ledges below them still cross the shaft. CoCoMan can take the lower steps and leave the moving decks behind, as long as his boots find solid ice at each gap.

Entry

Take the permanent steps beneath the pods and aim for each patch of solid ice. They form a complete crossing even after all four pods have gone down.

Return or onward flight

The ledges lead east to the same terrace. They also work westbound if you want to return to the departure landing.

Rescue shaft · transfer points

Open the full-size illustration

  1. Departure landing. Column 113, row 10. This is the transfer position on this route. Locate landmark 1

    Descend to permanent footing · First recovery shelf

  2. First recovery shelf. Column 117, row 13. This is the transfer position on this route. Locate landmark 2
  3. Last recovery shelf. Column 132, row 12. This is the transfer position on this route. Locate landmark 3

    Reach the terrace below the pods · East terrace

  4. East terrace. Column 138, row 12. This is the transfer position on this route. Locate landmark 4
  5. Western recovery shelf. Column 117, row 13. This is the transfer position on this route. Locate landmark 5

    Return to the departure landing · Departure landing


