

Back to VCC Plus Games
CoCoManTo Titan and Back
Course 6-1

Snowmaker on the Night Shift

The Snowmaker Tender follows CoCoMan along the ridge and drops folded tags in his path. A tag looks almost harmless, right up until it lands and unfolds into a Burr Jack. The next break in the ice is plenty to think about before he adds a Burr Jack to it.

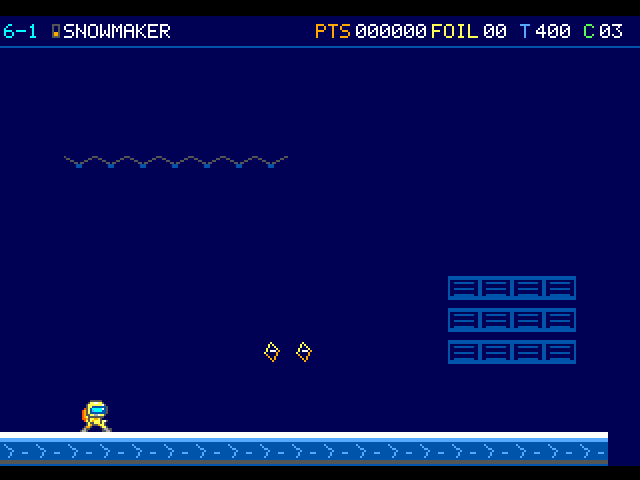
Two amber foils hang over an uninterrupted stretch of ice. A dark grille marks the wall farther along the ridge.

On the flight

A hatch opens on the weather sled before each packet drops. Its first solid landing opens it into a Burr Jack, so a roof over your helmet changes where the danger will be.

Course map

Night ridge

Open the full-size illustration

  1. Arrival. Column 2, row 12. The pilot first takes control in this part of the room. Locate landmark 1
  2. Snowmaker Tender. Column 32, row 3. Encounter reference. A moving threat can leave this position during play. Locate landmark 2
  3. Folded Tag. Column 36, row 5. The tag unfolds on the first solid surface it lands on, including a shed roof. Locate landmark 3
  4. Snow-shed roof. Column 37, row 8. The roof catches falling tags. You can also travel underneath. Locate landmark 4

    Follow the optional transfer

  5. Burr Jack. Column 40, row 8. Encounter reference. A moving threat can leave this position during play. Locate landmark 5
  6. Shelter. Column 72, row 12. Ground contact programs the restart between the two sorties. Locate landmark 6
  7. Duct Tap. Column 78, row 10. Wait clear of the rim until the bellows retract. Locate landmark 7
  8. Snowmaker Tender · 2. Column 94, row 3. Encounter reference. A moving threat can leave this position during play. Locate landmark 8
  9. Folded Tag · 2. Column 96, row 5. The tag unfolds on the first solid surface it lands on, including a shed roof. Locate landmark 9
  10. Burr Jack · 2. Column 97, row 12. Encounter reference. A moving threat can leave this position during play. Locate landmark 10
  11. Relay Mast. Column 133, row 12. Approach this relay to finish the room. Locate landmark 11

    Continue to 6-2 · Arrival

Landmarks to recognize

Snow-shed roof
The roof catches falling tags while the pilot walks underneath. A Jack already on the roof can still walk off its edge.
Checkpoint shelter
Stand on the sheltered ground to earn a quiet restart between the two chases.
Give me a hint

The returning Tender is a second sortie. There is a way to meet it at height, though the ridge stays open below.

Routes and discoveries

This link leads to an optional part of the flight. Open the section below to continue.Continue to the linked place

Night ridge

Entry

Cross the first cut using the small landing, choose your route at the shed, then get both feet down at the checkpoint shelter. Wait clear of the service-duct guard before crossing its rim.

Return or onward flight

Stay on the ridge beyond the second chase to reach the mast for the Brineworks. A complete Shepherd Moons sweep carried through Wick makes a spare available beneath the beams.

This link leads to an optional part of the flight. Open the section below to continue.Continue to the linked placeThis link leads to an optional part of the flight. Open the section below to continue.Continue to the linked placeThis link leads to an optional part of the flight. Open the section below to continue.Continue to the linked placeThis link leads to an optional part of the flight. Open the section below to continue.Continue to the linked placeThis link leads to an optional part of the flight. Open the section below to continue.Continue to the linked placeThis link leads to an optional part of the flight. Open the section below to continue.Continue to the linked placeThis link leads to an optional part of the flight. Open the section below to continue.Continue to the linked placeThis link leads to an optional part of the flight. Open the section below to continue.Continue to the linked placeThis link leads to an optional part of the flight. Open the section below to continue.Continue to the linked placeThis link leads to an optional part of the flight. Open the section below to continue.Continue to the linked placeThis link leads to an optional part of the flight. Open the section below to continue.Continue to the linked place

Snow Shed

Under the snow shed, the roof catches whatever the Tender drops. There’s a timed foil dispenser up on the roof too, for a courier willing to give up a perfectly good place to hide.

Entry

Walk under the roof in any suit for cover. To take the upper way, use the west step and look for the roof dispenser. Watch for the Jacks that hatch on that same roof.

Return or onward flight

Descend from either side. The east drop rejoins the ridge ahead, and the west step lets you try the covered walk instead.

Night ridge · transfer points

Open the full-size illustration

  1. West shed step. Column 29, row 11. This is the transfer position on this route. Locate landmark 1

    Climb onto the shed · Snow-shed roof

  2. East ridge floor. Column 43, row 13. This is the transfer position on this route. Locate landmark 2
  3. West ridge floor. Column 29, row 13. This is the transfer position on this route. Locate landmark 3

    Use the sheltered floor · Under the shed

  4. Under the shed. Column 40, row 13. This is the transfer position on this route. Locate landmark 4
This link leads to an optional part of the flight. Open the section below to continue.Continue to the linked placeThis link leads to an optional part of the flight. Open the section below to continue.Continue to the linked placeThis link leads to an optional part of the flight. Open the section below to continue.Continue to the linked placeThis link leads to an optional part of the flight. Open the section below to continue.Continue to the linked placeThis link leads to an optional part of the flight. Open the section below to continue.Continue to the linked placeThis link leads to an optional part of the flight. Open the section below to continue.Continue to the linked placeThis link leads to an optional part of the flight. Open the section below to continue.Continue to the linked placeThis link leads to an optional part of the flight. Open the section below to continue.Continue to the linked placeThis link leads to an optional part of the flight. Open the section below to continue.Continue to the linked place

High Intercept

The Tender comes back for another pass, and CoCoMan spies a high ledge that might put him on the same level as the sled. Getting there while it’s still within reach is a job in itself.

Entry

During the second sortie, reveal the footholds beneath the high ledge. Jump from the ledge while the sled is within reach. Stay clear of any tag already falling.

Return or onward flight

Drop onto the ordinary ridge to continue east. The ground route also leads past the second suit cache.

Night ridge · transfer points

Open the full-size illustration

  1. West ridge step. Column 87, row 11. This is the transfer position on this route. Locate landmark 1

    Approach the second sortie · High intercept shelf

  2. High intercept shelf. Column 93, row 7. This is the transfer position on this route. Locate landmark 2

    Drop to the ordinary ridge · Eastern ridge

  3. Eastern ridge. Column 102, row 13. This is the transfer position on this route. Locate landmark 3

