

Back to VCC Plus Games
CoCoManTo Titan and Back
Course 5-4

The Kiln with Two Doors

Hot beads swing over the ceramic pads. The kiln’s two doors give CoCoMan a choice, but sooner or later he’ll need to get across two bucket lifts going opposite ways. The Parcel Cloud Warden is waiting on the bridge to Wick’s dispatch station.

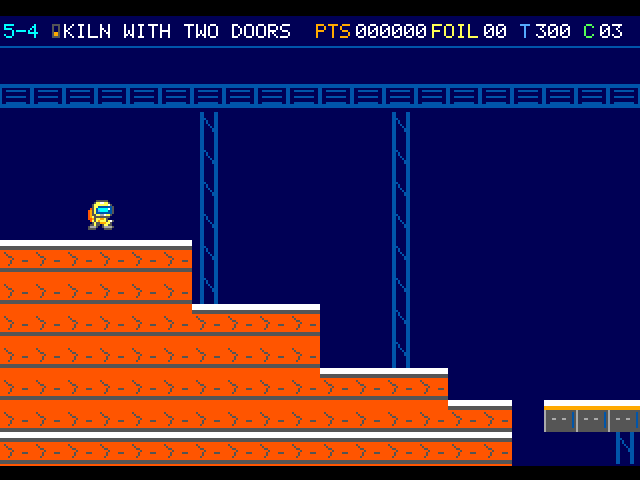
The courier starts above broad orange steps in the kiln. A blue gantry runs across the top of the room.

On the flight

Look for the open space between the hot beads and the next ceramic pad. The two doors give you a choice of sweeps before the opposed bucket lifts, and the fixed shelf between the lifts is a place to wait.

Course map

Ring Kiln and Dispatch Chamber

Open the full-size illustration

  1. Arrival. Column 2, row 6. The pilot first takes control in this part of the room. Locate landmark 1
  2. Long Thermal Rotor. Column 26, row 10. Encounter reference. A moving threat can leave this position during play. Locate landmark 2
  3. Short Thermal Rotor. Column 48, row 12. Encounter reference. A moving threat can leave this position during play. Locate landmark 3
  4. Short Thermal Rotor · 2. Column 53, row 6. Encounter reference. A moving threat can leave this position during play. Locate landmark 4
  5. Short Thermal Rotor · 3. Column 57, row 12. Encounter reference. A moving threat can leave this position during play. Locate landmark 5
  6. Bucket Lift. Column 71, row 10. Watch the moving tread before boarding. Its position changes during play. Locate landmark 6
  7. Waiting shelf. Column 74.5, row 10.5. Watch the opposed lifts from the stationary shelf. Locate landmark 7
  8. Bucket Lift · 2. Column 78, row 12. Watch the moving tread before boarding. Its position changes during play. Locate landmark 8
  9. Short Thermal Rotor · 4. Column 84, row 8. Encounter reference. A moving threat can leave this position during play. Locate landmark 9
  10. Vent Pulse. Column 89, row 14. Encounter reference. A moving threat can leave this position during play. Locate landmark 10
  11. Vent Pulse · 2. Column 98, row 14. Encounter reference. A moving threat can leave this position during play. Locate landmark 11
  12. Plasma Burst. Column 103, row 8. Encounter reference. A moving threat can leave this position during play. Locate landmark 12
  13. Parcel Cloud Warden. Column 110, row 8. Encounter reference. A moving threat can leave this position during play. Locate landmark 13
  14. Bridge Cutoff. Column 116, row 9. Approach this relay to finish the room. Locate landmark 14

    Continue to 6-1 · Arrival

Landmarks to recognize

Ceramic pad
Watch the long rotor make a turn around the central pad before reaching for the supply above it.
Shaft refuge
Stand on the fixed center shelf and let the second lift come level with you before boarding.
Give me a hint

The high door has fewer sweeps. The far lift and its landing still need your attention whichever door you take.

Routes and discoveries

This link leads to an optional part of the flight. Open the section below to continue.Continue to the linked place

Ring Kiln and Dispatch Chamber

Entry

Cross the ceramic pads and choose a door. At the shaft, ride the ascending west tread to the center shelf, then board the descending east tread. Watch both Vent Pulses after the landing.

Return or onward flight

Reach the fixed cutoff past Parcel Cloud, live or after five Arc hits reveal a Tag Tender. Wick sends you to Enceladus with any spare earned in Shepherd Moons still pending.

This link leads to an optional part of the flight. Open the section below to continue.Continue to the linked placeThis link leads to an optional part of the flight. Open the section below to continue.Continue to the linked placeThis link leads to an optional part of the flight. Open the section below to continue.Continue to the linked placeThis link leads to an optional part of the flight. Open the section below to continue.Continue to the linked placeThis link leads to an optional part of the flight. Open the section below to continue.Continue to the linked placeThis link leads to an optional part of the flight. Open the section below to continue.Continue to the linked placeThis link leads to an optional part of the flight. Open the section below to continue.Continue to the linked placeThis link leads to an optional part of the flight. Open the section below to continue.Continue to the linked placeThis link leads to an optional part of the flight. Open the section below to continue.Continue to the linked place

Lower Service Lane

The low door puts CoCoMan at floor level with two short Thermal Rotors. Getting past the first feels like progress, right up until the second sweep cuts across the lane.

Entry

Drop from the east end of the fork shelves into the low door. Let each of the two short rotors clear separately before you pass.

Return or onward flight

The lane joins the same wide floor as the upper gallery. Move from there onto the ascending west lift.

Ring Kiln and Dispatch Chamber · transfer points

Open the full-size illustration

  1. Fork shelf. Column 43, row 10. This is the transfer position on this route. Locate landmark 1

    Enter the gallery branch · Lower service lane

  2. Lower service lane. Column 52, row 13. This is the transfer position on this route. Locate landmark 2

    Rejoin west of the lift shaft · Floor before the shaft

  3. Floor before the shaft. Column 67, row 12. This is the transfer position on this route. Locate landmark 3

