

Back to VCC Plus Games
CoCoManTo Titan and Back
Course 5-3

Shepherd Moons

Out on Saturn’s fractured ice shelves, the ore shuttles have room for cargo and just enough room for a courier. CoCoMan gets one solid perch between rides. It’s a good place to watch for the next shuttle, and a better place to be when the Dart warning lamp lights up.

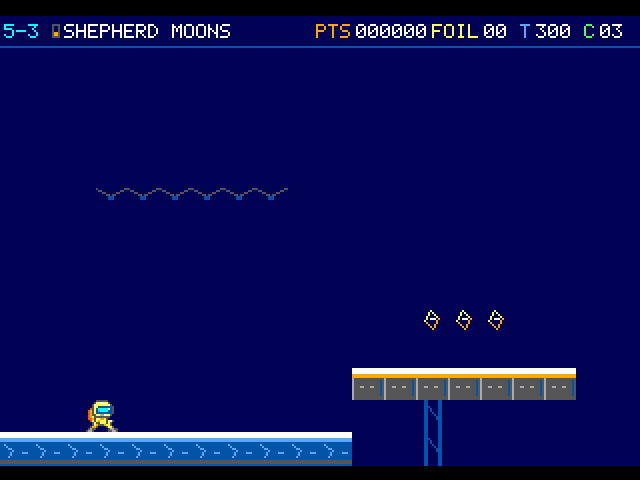
Three amber foils hang above a freestanding gray shelf. The courier stands on the starting ice ledge to its left.

On the flight

Two ore shuttles carry freight between the fractured shelves. Let each shuttle come to you and aim for its continuous amber tread. Use the fixed berth between rides to watch the lane lamp.

Course map

Shepherd ringlets

Open the full-size illustration

  1. Arrival. Column 2, row 12. The pilot first takes control in this part of the room. Locate landmark 1
  2. Parcel Roller. Column 24, row 9. Encounter reference. A moving threat can leave this position during play. Locate landmark 2
  3. Rim Surveyor. Column 32, row 8. Encounter reference. A moving threat can leave this position during play. Locate landmark 3
  4. Rim Surveyor · 2. Column 41, row 6. Encounter reference. A moving threat can leave this position during play. Locate landmark 4
  5. Lift Sail. Column 60, row 6. Encounter reference. A moving threat can leave this position during play. Locate landmark 5
  6. Dart Lane Lamp. Column 63, row 8. The lamp commits a dart to the marked height before the shot crosses. Locate landmark 6
  7. Courier Dart. Column 64, row 8. Encounter reference. A moving threat can leave this position during play. Locate landmark 7
  8. Salt-ice Shuttle. Column 69, row 10. This 32-pixel deck moves horizontally and pauses at each dock. Locate landmark 8
  9. Fixed berth. Column 74, row 10. The two shuttles approach this stationary transfer in opposite phases. Locate landmark 9
  10. Salt-ice Shuttle · 2. Column 80, row 9. This 32-pixel deck moves horizontally and pauses at each dock. Locate landmark 10
  11. Checkpoint perch. Column 86, row 9. Land on this perch to bank the quiet eastbound restart. Locate landmark 11

    Follow the optional transfer

  12. Dart Lane Lamp · 2. Column 97, row 6. The lamp commits a dart to the marked height before the shot crosses. Locate landmark 12
  13. Courier Dart · 2. Column 98, row 6. Encounter reference. A moving threat can leave this position during play. Locate landmark 13
  14. Parcel Roller · 2. Column 100, row 6. Encounter reference. A moving threat can leave this position during play. Locate landmark 14
  15. Relay Mast. Column 119, row 12. Approach this relay to finish the room. Locate landmark 15

    Continue to 5-4 · Arrival

Landmarks to recognize

Fixed berth
This narrow piece of solid ice stays put between the shuttles. You can also use it on a westbound return.
Checkpoint perch
A held jump from the second shuttle's east dock reaches this fixed perch. Land to earn the checkpoint.
Give me a hint

The lower shelves return to the same outward route. Explore while you still have the same life if you want credit for a whole sweep.

Routes and discoveries

This link leads to an optional part of the flight. Open the section below to continue.Continue to the linked place

Shepherd ringlets

Entry

Jump from the fixed approach to shuttle A, land on the middle berth and board shuttle B as it draws near. A lamp warns before a Dart crosses the rider's line.

Return or onward flight

From the east dock, jump to the checkpoint perch. Either orbit shelf leads to the relay. All 23 loose foils in one life qualify the spare on Enceladus.

This link leads to an optional part of the flight. Open the section below to continue.Continue to the linked placeThis link leads to an optional part of the flight. Open the section below to continue.Continue to the linked placeThis link leads to an optional part of the flight. Open the section below to continue.Continue to the linked placeThis link leads to an optional part of the flight. Open the section below to continue.Continue to the linked placeThis link leads to an optional part of the flight. Open the section below to continue.Continue to the linked placeThis link leads to an optional part of the flight. Open the section below to continue.Continue to the linked placeThis link leads to an optional part of the flight. Open the section below to continue.Continue to the linked placeThis link leads to an optional part of the flight. Open the section below to continue.Continue to the linked placeThis link leads to an optional part of the flight. Open the section below to continue.Continue to the linked placeThis link leads to an optional part of the flight. Open the section below to continue.Continue to the linked placeThis link leads to an optional part of the flight. Open the section below to continue.Continue to the linked placeThis link leads to an optional part of the flight. Open the section below to continue.Continue to the linked placeThis link leads to an optional part of the flight. Open the section below to continue.Continue to the linked place

Maintenance Shelf

There’s a low shelf underneath the ice crown, with a supply cache left by the maintenance crew. CoCoMan could use fresh gear before the shuttles carry him out over empty space.

Entry

Descend below the ice crown and bump the supply cache from the shelf underneath. The gap above the cache gives you a second way down.

Return or onward flight

Use the east step to rejoin the middle shelf, or climb the small west return step to try the high crossing again.

Shepherd ringlets · transfer points

Open the full-size illustration

  1. Ice crown. Column 40, row 7. This is the transfer position on this route. Locate landmark 1

    Descend from the crown · Maintenance shelf

  2. Maintenance shelf. Column 40, row 13. This is the transfer position on this route. Locate landmark 2
  3. East recovery step. Column 51, row 12. This is the transfer position on this route. Locate landmark 3

    Climb east to the shared route · Shared middle shelf

  4. Shared middle shelf. Column 55, row 10. This is the transfer position on this route. Locate landmark 4
  5. Western return step. Column 36, row 11. This is the transfer position on this route. Locate landmark 5

    Climb back to the crown · Ice crown

This link leads to an optional part of the flight. Open the section below to continue.Continue to the linked placeThis link leads to an optional part of the flight. Open the section below to continue.Continue to the linked placeThis link leads to an optional part of the flight. Open the section below to continue.Continue to the linked placeThis link leads to an optional part of the flight. Open the section below to continue.Continue to the linked placeThis link leads to an optional part of the flight. Open the section below to continue.Continue to the linked placeThis link leads to an optional part of the flight. Open the section below to continue.Continue to the linked placeThis link leads to an optional part of the flight. Open the section below to continue.Continue to the linked placeThis link leads to an optional part of the flight. Open the section below to continue.Continue to the linked placeThis link leads to an optional part of the flight. Open the section below to continue.Continue to the linked place

Lower Orbit Shelf

The last ice shelves have a lower crossing tucked beneath the high one. Foils glint down there, with enough solid ice between them for CoCoMan to pick his way to the far side.

Entry

After the checkpoint, step down beneath the upper crossing to collect the lower trio of foils. Keep the lip behind you in sight.

Return or onward flight

Continue to the shared departure shelf, or use the small west lip to climb back to the checkpoint perch.

Shepherd ringlets · transfer points

Open the full-size illustration

  1. Lower orbit shelf. Column 95, row 12. This is the transfer position on this route. Locate landmark 1

    Continue to the east departure · Departure shelf

  2. Departure shelf. Column 108, row 10. This is the transfer position on this route. Locate landmark 2
  3. West step. Column 90, row 11. This is the transfer position on this route. Locate landmark 3

    Return to the checkpoint lip · Checkpoint perch

