
Back to VCC Plus Games
CoCoManTo Titan and Back
Course 8-1

The Long Walk to Uplink

The relay looks a long way off in the low sunlight. For stretches at a time, all CoCoMan has for company is a Parcel Roller or a bouncing Spring Sail. That’s almost peaceful, until the next break in the deck reminds him he’s still got a job to do.

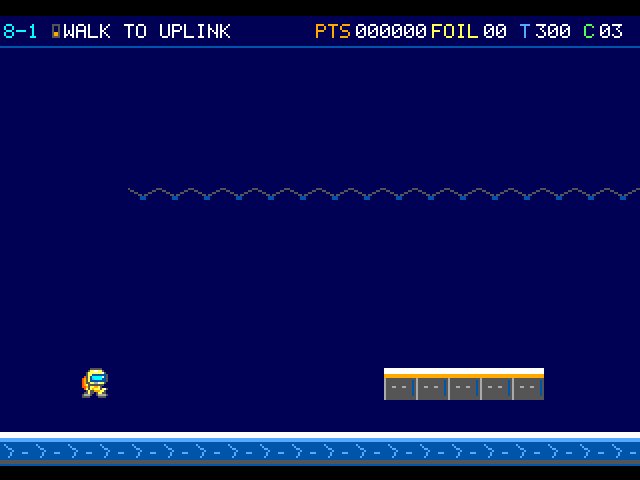
A long blue deck stretches under a high cable line. The courier is approaching a short raised gray platform.

On the flight

The long low array gives you room to run. Look for the bright fixed bridge treads before committing to a gap, and watch for the low hop of a Spring Sail where the machinery resumes.

Course map

Low sun array

Open the full-size illustration

  1. Arrival. Column 2, row 12. The pilot first takes control in this part of the room. Locate landmark 1
  2. Parcel Roller. Column 20, row 12. Encounter reference. A moving threat can leave this position during play. Locate landmark 2
  3. Spring Sail. Column 78, row 12. Encounter reference. A moving threat can leave this position during play. Locate landmark 3
  4. Array beacon. Column 99, row 12. A paid retry begins at X1552 on the western side of the beacon. Locate landmark 4
  5. Rim Surveyor. Column 172, row 12. Encounter reference. A moving threat can leave this position during play. Locate landmark 5
  6. Relay mast. Column 207, row 12. Approach this relay to finish the room. Locate landmark 6

    Continue to 8-2 · Arrival

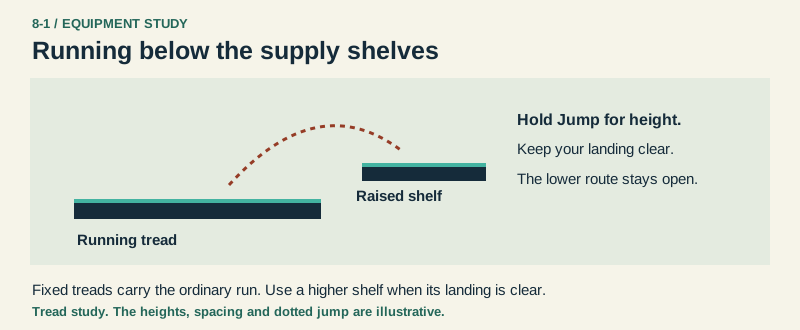
Running below the supply shelves

Running tread, Raised shelf.
A simplified side view illustrates the choice of a lower running tread or a higher optional shelf.

Open the original-size illustration

  • Running tread. Follow the lower bridge treads to keep moving on the ordinary route.
  • Raised shelf. The elevated supply shelves are optional. Check the landing before leaving the tread.

Landmarks to recognize

Array beacon
The beacon in the survey stretch marks your return point after a paid retry.
Bridge treads
Check where the next fixed tread begins before leaving the low running route for an elevated shelf.
Give me a hint

The survey pocket rewards a look overhead. You can also stay on the lower line and carry on towards the uplink.

Routes and discoveries

This link leads to an optional part of the flight. Open the section below to continue.Continue to the linked place

Low sun array

Entry

Choose the open lower route or jump to the foil and supply shelves. Near the survey pocket, bump the hidden foothold to reach the timed foil box. The Aurora cell can protect a return through the machines.

Return or onward flight

Return to the broad line after exploring and catch the mast for The Falling Spool. If you earned the spare on the Listening Span or arrived by a qualifying dispatch, collect the moving core before a lost life uses up the chance.

This link leads to an optional part of the flight. Open the section below to continue.Continue to the linked placeThis link leads to an optional part of the flight. Open the section below to continue.Continue to the linked placeThis link leads to an optional part of the flight. Open the section below to continue.Continue to the linked placeThis link leads to an optional part of the flight. Open the section below to continue.Continue to the linked placeThis link leads to an optional part of the flight. Open the section below to continue.Continue to the linked placeThis link leads to an optional part of the flight. Open the section below to continue.Continue to the linked placeThis link leads to an optional part of the flight. Open the section below to continue.Continue to the linked placeThis link leads to an optional part of the flight. Open the section below to continue.Continue to the linked placeThis link leads to an optional part of the flight. Open the section below to continue.Continue to the linked placeThis link leads to an optional part of the flight. Open the section below to continue.Continue to the linked placeThis link leads to an optional part of the flight. Open the section below to continue.Continue to the linked placeThis link leads to an optional part of the flight. Open the section below to continue.Continue to the linked place

Inspection Vault

The vault offers a little shade after all that walking in the open. CoCoMan can pocket the foils along the short passage before he’s back out under the low sun.

Entry

Stand centered on the inspection collar and hold Down. The short vault has four loose foils.

Return or onward flight

Move Right into the open side mouth to come back to the array. The beacon, spent rewards and any outdoor pickup retain their state.

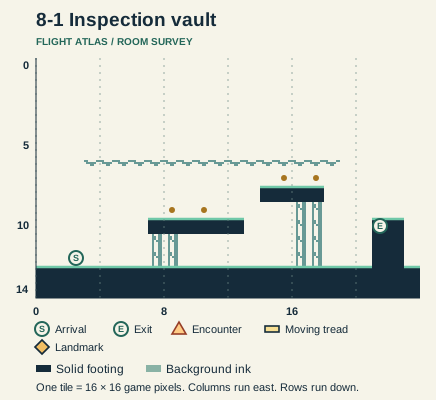
Read this room’s map

Inspection vault

Open the full-size illustration

  1. Arrival. Column 2, row 12. The inspection chamber begins on the west floor. Locate landmark 1
  2. Array return. Column 21, row 10. Swim controls are unnecessary. Walk Right into the east mouth to rejoin at X2352. Locate landmark 2

    Return to the surface · Inspection return

Low sun array · transfer points

Open the full-size illustration

  1. Inspection inlet. Column 122.5, row 10. Hold Down at the inlet seam to enter the inspection vault. Locate landmark 1

    Enter the side room · Arrival

  2. Inspection return. Column 146.5, row 10. Walk Right through the chamber side mouth to return at X2352. Locate landmark 2

    Revisit from the surface · Inspection inlet

This link leads to an optional part of the flight. Open the section below to continue.Continue to the linked placeThis link leads to an optional part of the flight. Open the section below to continue.Continue to the linked placeThis link leads to an optional part of the flight. Open the section below to continue.Continue to the linked placeThis link leads to an optional part of the flight. Open the section below to continue.Continue to the linked placeThis link leads to an optional part of the flight. Open the section below to continue.Continue to the linked placeThis link leads to an optional part of the flight. Open the section below to continue.Continue to the linked placeThis link leads to an optional part of the flight. Open the section below to continue.Continue to the linked placeThis link leads to an optional part of the flight. Open the section below to continue.Continue to the linked placeThis link leads to an optional part of the flight. Open the section below to continue.Continue to the linked placeThis link leads to an optional part of the flight. Open the section below to continue.Continue to the linked placeThis link leads to an optional part of the flight. Open the section below to continue.Continue to the linked placeThis link leads to an optional part of the flight. Open the section below to continue.Continue to the linked placeThis link leads to an optional part of the flight. Open the section below to continue.Continue to the linked placeThis link leads to an optional part of the flight. Open the section below to continue.Continue to the linked placeThis link leads to an optional part of the flight. Open the section below to continue.Continue to the linked placeThis link leads to an optional part of the flight. Open the section below to continue.Continue to the linked placeThis link leads to an optional part of the flight. Open the section below to continue.Continue to the linked place

Low sun array · detour entries and returns

Open the full-size illustration

  1. Arrival. Column 2, row 12. The pilot first takes control in this part of the room. Locate landmark 1
  2. Parcel Roller. Column 20, row 12. Encounter reference. A moving threat can leave this position during play. Locate landmark 2
  3. Spring Sail. Column 78, row 12. Encounter reference. A moving threat can leave this position during play. Locate landmark 3
  4. Array beacon. Column 99, row 12. A paid retry begins at X1552 on the western side of the beacon. Locate landmark 4
  5. Inspection inlet. Column 122.5, row 10. Hold Down at the inlet seam to enter the inspection vault. Locate landmark 5
  6. Inspection return. Column 146.5, row 10. Walk Right through the chamber side mouth to return at X2352. Locate landmark 6
  7. Rim Surveyor. Column 172, row 12. Encounter reference. A moving threat can leave this position during play. Locate landmark 7
  8. Relay mast. Column 207, row 12. Approach this relay to finish the room. Locate landmark 8
This link leads to an optional part of the flight. Open the section below to continue.Continue to the linked placeThis link leads to an optional part of the flight. Open the section below to continue.Continue to the linked placeThis link leads to an optional part of the flight. Open the section below to continue.Continue to the linked placeThis link leads to an optional part of the flight. Open the section below to continue.Continue to the linked placeThis link leads to an optional part of the flight. Open the section below to continue.Continue to the linked placeThis link leads to an optional part of the flight. Open the section below to continue.Continue to the linked placeThis link leads to an optional part of the flight. Open the section below to continue.Continue to the linked place

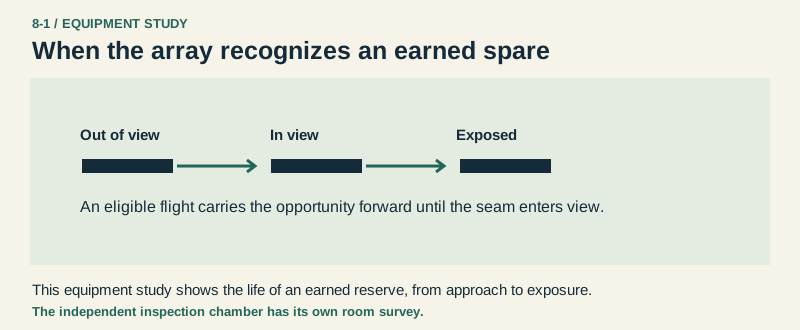
When the array recognizes an earned spare

Approach, First sight, Exposed.
Three states distinguish an unvisited seam, the first sight of it and the chance once exposed.

Open the original-size illustration

  • Approach. The carried reserve waits for its visibility boundary.
  • First sight. Seeing the seam settles its eligibility for this life.
  • Exposed. A later retry consumes an exposed opportunity.