

Back to VCC Plus Games
CoCoManTo Titan and Back
Course 7-2

Soundings at Kraken Mare

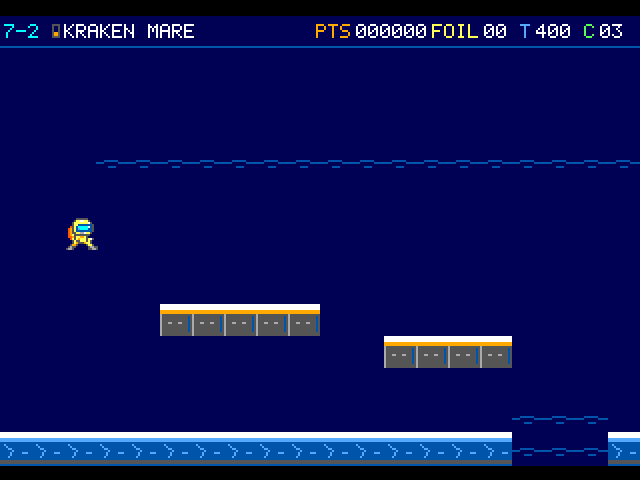
Kraken Mare tugs CoCoMan down toward the intakes as soon as he gets near them. While he’s trying to get a little room beneath his boots, Gauge Minnows cross the channel and an Optical Probe follows his every stroke.

The courier is swimming below the rippled waterline. Pale edges make two submerged shelf tops visible.

On the flight

You start this sounding underwater. Tap and release Jump for each stroke. Give yourself room above the intake mouths and change depth to let a Gauge Minnow pass. A swimmer can hurt you even if you touch it from above.

Course map

Kraken Mare channel and dry gallery

Open the full-size illustration

  1. Arrival. Column 2, row 6. The pilot first takes control in this part of the room. Locate landmark 1
  2. Current Intake. Column 17, row 12. Pull strengthens near the low lip. Keep clear of the mouth. Locate landmark 2
  3. Gauge Minnow. Column 23, row 9. Its horizontal swim can cross your stroke. Change height to pass. Locate landmark 3
  4. Optical Probe. Column 32, row 7. Encounter reference. A moving threat can leave this position during play. Locate landmark 4
  5. Current Intake · 2. Column 45, row 12. Pull strengthens near the low lip. Keep clear of the mouth. Locate landmark 5
  6. Quiet wet pocket. Column 50, row 7. A halfway retry puts the pilot here at X800, Y112. Locate landmark 6
  7. Gauge Minnow · 2. Column 54, row 11. Its horizontal swim can cross your stroke. Change height to pass. Locate landmark 7
  8. Optical Probe · 2. Column 66, row 7. Encounter reference. A moving threat can leave this position during play. Locate landmark 8
  9. Current Intake · 3. Column 71, row 12. Pull strengthens near the low lip. Keep clear of the mouth. Locate landmark 9
  10. Gauge Minnow · 3. Column 79, row 9. Its horizontal swim can cross your stroke. Change height to pass. Locate landmark 10
  11. Optical Probe · 3. Column 88, row 10. Encounter reference. A moving threat can leave this position during play. Locate landmark 11
  12. Wet-to-dry tube. Column 101.5, row 9. Enter from the left. The gallery uses the same horizontal coordinates as the channel. Locate landmark 12

    Follow the optional transfer

  13. Duct Tap. Column 111, row 11. Wait clear of the rim until the bellows retract. Locate landmark 13
  14. Relay Mast. Column 121, row 12. Approach this relay to finish the room. Locate landmark 14

    Continue to 7-3 · Arrival

Landmarks to recognize

Recessed mouths
The pull gets stronger near each lower lip. Stroke early so you have space to steer.
Quiet pocket
The middle pocket gives you a sheltered place to settle and marks the wet checkpoint.
Give me a hint

Look at the direction a tube opens. A horizontal mouth calls for steering into it from the same height.

Routes and discoveries

This link leads to an optional part of the flight. Open the section below to continue.Continue to the linked place

Kraken Mare channel

Entry

Pass the three low intakes with water beneath you. If you want all seven foil pockets, change depth between guards and leave yourself a clear stroke back out of each pocket.

Return or onward flight

Swim into the eastern gallery mouth from its open left side. A restart at the middle checkpoint puts you back in a quiet wet pocket.

This link leads to an optional part of the flight. Open the section below to continue.Continue to the linked placeThis link leads to an optional part of the flight. Open the section below to continue.Continue to the linked placeThis link leads to an optional part of the flight. Open the section below to continue.Continue to the linked placeThis link leads to an optional part of the flight. Open the section below to continue.Continue to the linked placeThis link leads to an optional part of the flight. Open the section below to continue.Continue to the linked place

Dry Gallery

Entry

Move right through the side tube until your boots are on the dry floor. Release the swim rhythm and use an ordinary jump here.

Return or onward flight

Let the Duct Tap withdraw, or hop over its raised gauge, then walk to the mast. The relay takes you to the Listening Span.

Kraken Mare channel and dry gallery · transfer points

Open the full-size illustration

  1. Dry gallery arrival. Column 105, row 12. This is the transfer position on this route. Locate landmark 1

    Continue through the guarded gallery · Relay Mast
