


Back to VCC Plus Games
CoCoManTo Titan and Back
Course 2-2

Pressure Garden

The greenhouse roof is somewhere overhead. The floor is somewhere below. For once, CoCoMan gets to choose a route anywhere in between. He takes a swim through the brine until a tug at his boots reminds him where all that water goes when somebody opens a drain.

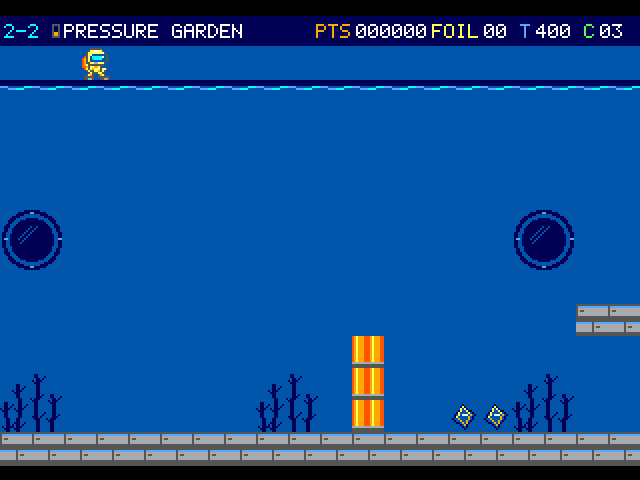
The courier is just below the rippled water surface. An amber pipe and a pair of bright foils stand out beneath the gauges.

On the flight

Give the pressure lock time to finish its dive. Once underwater, press and release Jump for individual strokes. Steer while rising or sinking, and gain height before a streak of water pulls you down.

Course map

Recycled-brine channel

You can steer during a stroke and while sinking. Watch the rising and falling gap between a fast copper swimmer and a taller blue logger. Their bodies can hurt from above as well as from the side.

Open the scenery view

Open the full-size illustration

  1. First free stroke. Column 2.5, row 4. Let the drop finish. Tap Jump, release it, then tap again to build height. A held button supplies a single stroke. Locate landmark 1
  2. Greenhouse window. Column 16, row 6. The glass lies behind the swim lane. Use it as a reference while changing depth past the masonry shelf. Locate landmark 2
  3. Intake current. Column 68, row 13. The streaks lead towards the low mouth. Build height before crossing and keep stroking until clear. You can also swim back for missed foil. Locate landmark 3
  4. Side outlet. Column 189, row 8. Reach the little ledge at the high mouth and settle at its opening. Hold Right against the open face to pass into the dry relay area. Locate landmark 4

    Follow the optional transfer

  5. Intake Vortex. Column 135, row 13. This marks an encounter position. Moving hazards can leave this point during play. Locate landmark 5
  6. Intake Vortex. Column 160, row 13. This marks an encounter position. Moving hazards can leave this point during play. Locate landmark 6
Open the scenery view

Recycled-brine channel · scenery

Water streaks mark the intakes. The rippled surface, observation windows and kelp belong to the same underwater mural.

Open the terrain view

Open the full-size illustration

  1. First free stroke. Column 2.5, row 4. Let the drop finish. Tap Jump, release it, then tap again to build height. A held button supplies a single stroke. Locate landmark 1
  2. Greenhouse window. Column 16, row 6. The glass lies behind the swim lane. Use it as a reference while changing depth past the masonry shelf. Locate landmark 2
  3. Side outlet. Column 189, row 8. Reach the little ledge at the high mouth and settle at its opening. Hold Right against the open face to pass into the dry relay area. Locate landmark 3

Garden Pressure Lock

The pressure lock carries the courier from the ordinary dry approach into brine. Let the automatic walk and descent finish. The first stroke is yours once the pilot is in the water.

Open the scenery view

Open the full-size illustration

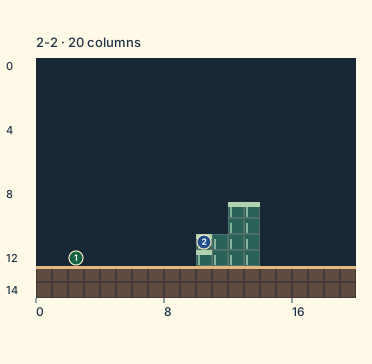
  1. Pressure-lock apron. Column 2, row 12. The courier arrives on dry footing and walks towards the lock automatically. Locate landmark 1
  2. Garden entry. Column 10, row 11. The lock takes you underwater. Once you can steer, press and release Jump to make each upward stroke. Locate landmark 2

    Follow the optional transfer

Open the scenery view

Garden Pressure Lock · scenery

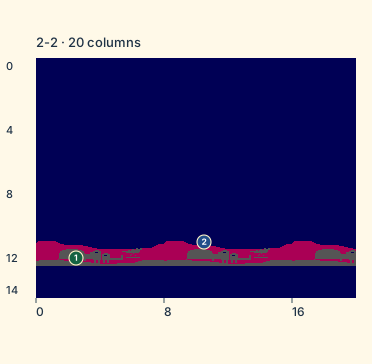
The native Martian horizon repeats along the two low rows behind the yard.

Open the terrain view

Open the full-size illustration

  1. Pressure-lock apron. Column 2, row 12. The courier arrives on dry footing and walks towards the lock automatically. Locate landmark 1
  2. Garden entry. Column 10, row 11. The lock takes you underwater. Once you can steer, press and release Jump to make each upward stroke. Locate landmark 2

Garden Outlet

The side tube returns the courier to the dry relay deck. Once the rise finishes, go back to an ordinary walking or running jump. Your remaining time and bank come through with you.

Open the scenery view

Open the full-size illustration

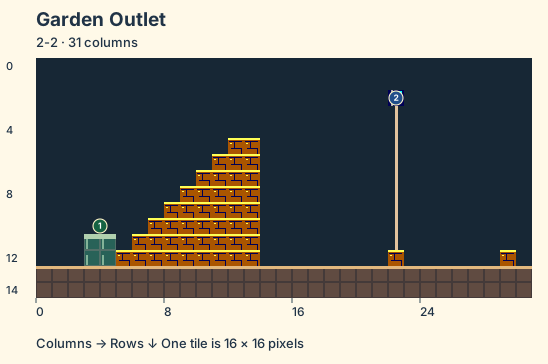
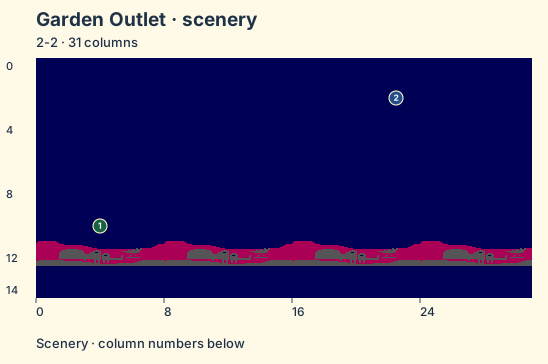
  1. Dry return. Column 3.5, row 10. The courier rises through the outlet collar. Resume walking when the transfer has finished. Locate landmark 1
  2. Aquaduct dispatch. Column 22, row 2. Grip the pennant for the handoff to Aquaduct Catwalk. The route ahead uses dry footing. Locate landmark 2

    Catch the dry relay to begin Aquaduct Catwalk. · Catwalk arrival

Open the scenery view

Garden Outlet · scenery

The native Martian horizon repeats along the two low rows behind the yard.

Open the terrain view

Open the full-size illustration

  1. Dry return. Column 3.5, row 10. The courier rises through the outlet collar. Resume walking when the transfer has finished. Locate landmark 1
  2. Aquaduct dispatch. Column 22, row 2. Grip the pennant for the handoff to Aquaduct Catwalk. The route ahead uses dry footing. Locate landmark 2

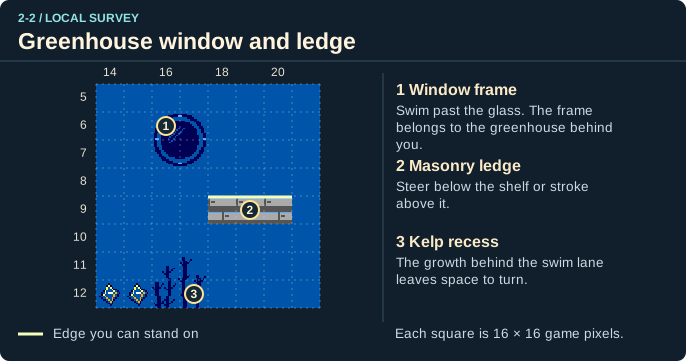
Greenhouse window and ledge

Local map · columns 14–21, rows 5–12.

Open the full-size illustration

  1. Window frame. Column 16, row 6. Swim past the glass. The frame belongs to the greenhouse behind you. Locate landmark 1
  2. Masonry ledge. Column 19, row 9. Steer below the shelf or stroke above it. Locate landmark 2
  3. Kelp recess. Column 17, row 12. The growth behind the swim lane leaves space to turn. Locate landmark 3

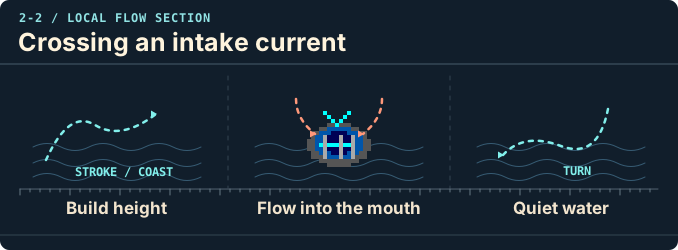
Crossing an intake current

Build height, Flow into the mouth, Quiet water.

Open the original-size illustration

  • Build height. Release Jump and press again for each upward stroke. Use the quiet approach to gain height.
  • Flow into the mouth. Flow streaks show the pull. It is strongest low over the intake. Continue stroking through.
  • Quiet water. Once clear, turn in calmer water if you need to swim back for foil.

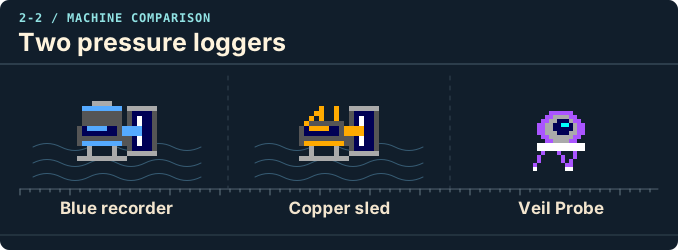
Two pressure loggers

Blue recorder, Copper sled, Veil Probe.

Open the original-size illustration

  • Blue recorder. The slow Gauge Minnow has a tall blue recorder.
  • Copper sled. The faster pressure logger has a low nose and copper ribs. Give its pass more room.
  • Veil Probe. The probe pursues the swimmer. Body contact hurts underwater, including contact from above.

Landmarks to recognize

Intake streaks
The downward pull gets stronger low in an exposed drain. Start your upward strokes before you reach it.
Gauge Minnow
The tall blue swimmer and low copper sled travel at different speeds. Give each a clear crossing.
Give me a hint

Look for water quiet enough to turn in. You can revisit a foil pocket by working back above the drains.

Routes and discoveries

This link leads to an optional part of the flight. Open the section below to continue.Continue to the linked placeThis link leads to an optional part of the flight. Open the section below to continue.Continue to the linked place

Garden Pressure Lock

CoCoMan reaches the little dry entrance to a garden that's full to the roof with water. He has carried plenty of mail through doors. This might be the first delivery of the day that calls for a swimming stroke on the other side.

Entry

The dry approach hands you to the lock for a short automatic entry. Let the descent finish before starting your swim.

Return or onward flight

Control returns underwater in the recycled-brine channel.

This link leads to an optional part of the flight. Open the section below to continue.Continue to the linked place

Recycled-brine channel

Entry

Build height over each of the three intakes. Steer and pulse Jump as you cross. All contact with swimmers can hurt, including from above. Arc sparks work underwater.

Return or onward flight

Swim into the high outlet from its open side. An earned midcourse restart puts you back in the water with your bank intact.

This link leads to an optional part of the flight. Open the section below to continue.Continue to the linked placeThis link leads to an optional part of the flight. Open the section below to continue.Continue to the linked place

Garden Outlet

Solid ground again. CoCoMan can shake the brine out of his boots and make a run for the mast. After a whole garden full of currents, it's good to know that the next jump will come down exactly where gravity says it should.

Entry

Once your boots settle in the dry outlet, use an ordinary walking or running jump again.

Return or onward flight

Reach the mast for the handoff to Aquaduct Catwalk.